Growing a taper afro means letting the shorter tapered sides and neckline gradually catch up with the fuller top, until you have a more rounded, even afro shape. It takes roughly 3 to 6 months depending on your starting point, and the main challenge is managing that transition period when the sides look patchy or uneven while the top is already doing its thing. The good news: you do not have to keep cutting it back. With the right routine, some strategic styling, and a clear picture of what each stage actually looks like, you can grow through the awkward phases with your sanity intact.
How to Grow a Taper Afro: Timeline and Daily Steps

Marcus Vickers
7 Jun 2026
Know what you're working with: taper, afro, or the blend
Before you plan a grow-out, it helps to name what you actually have right now, because the path forward is slightly different depending on your starting cut.
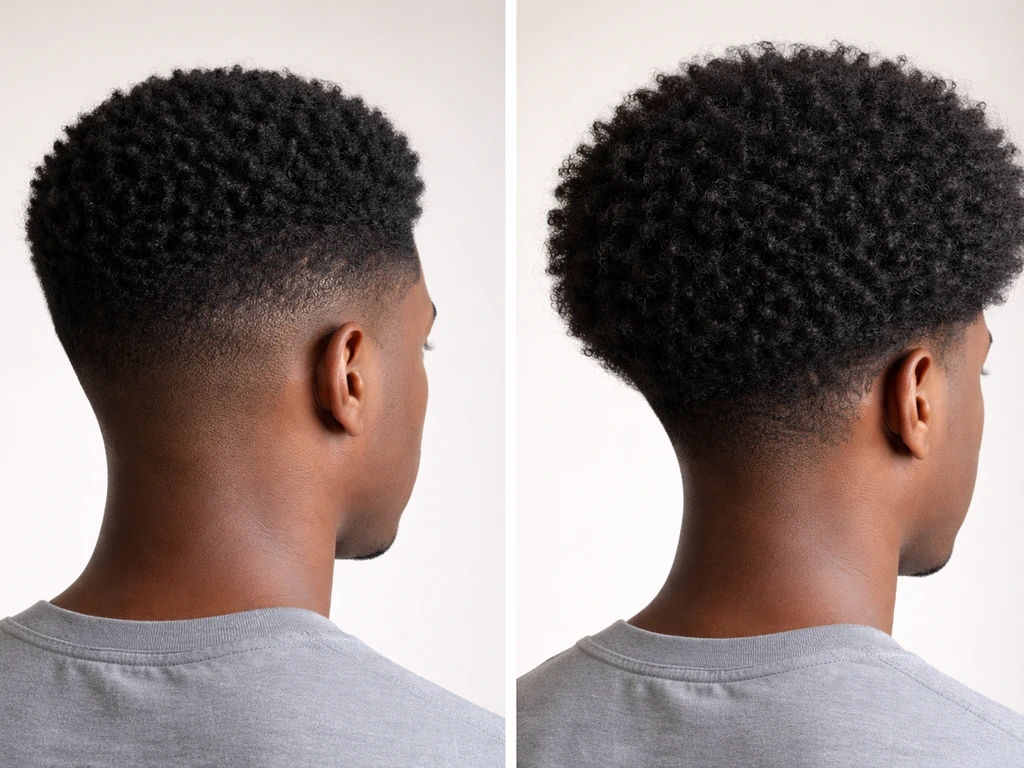
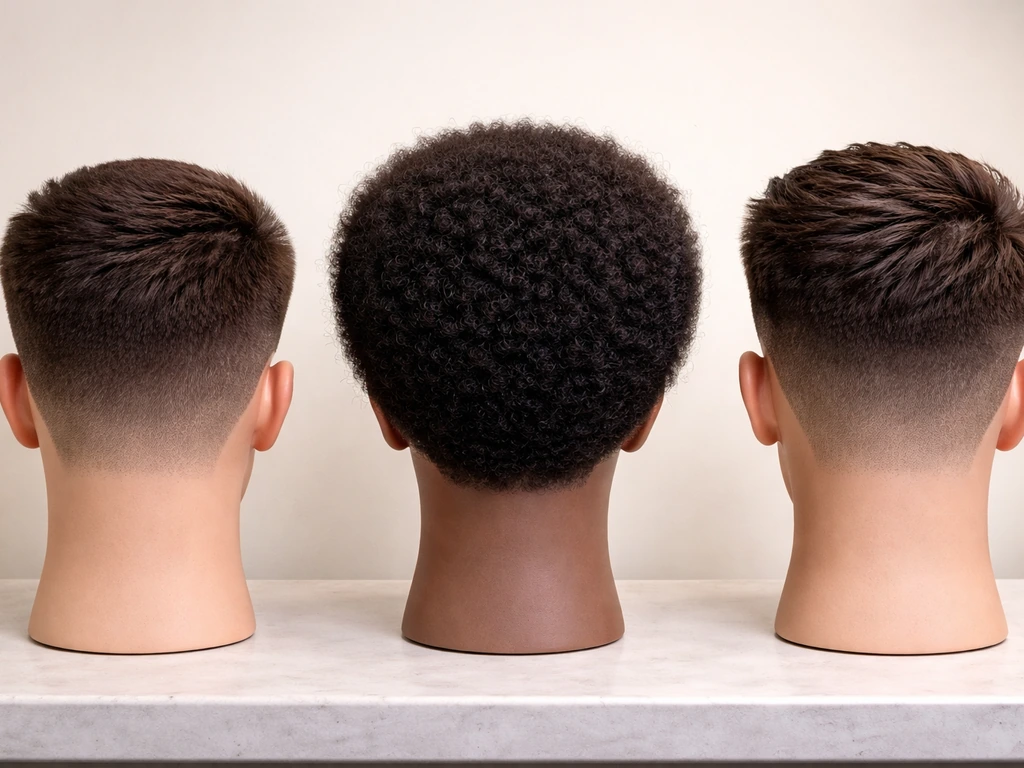
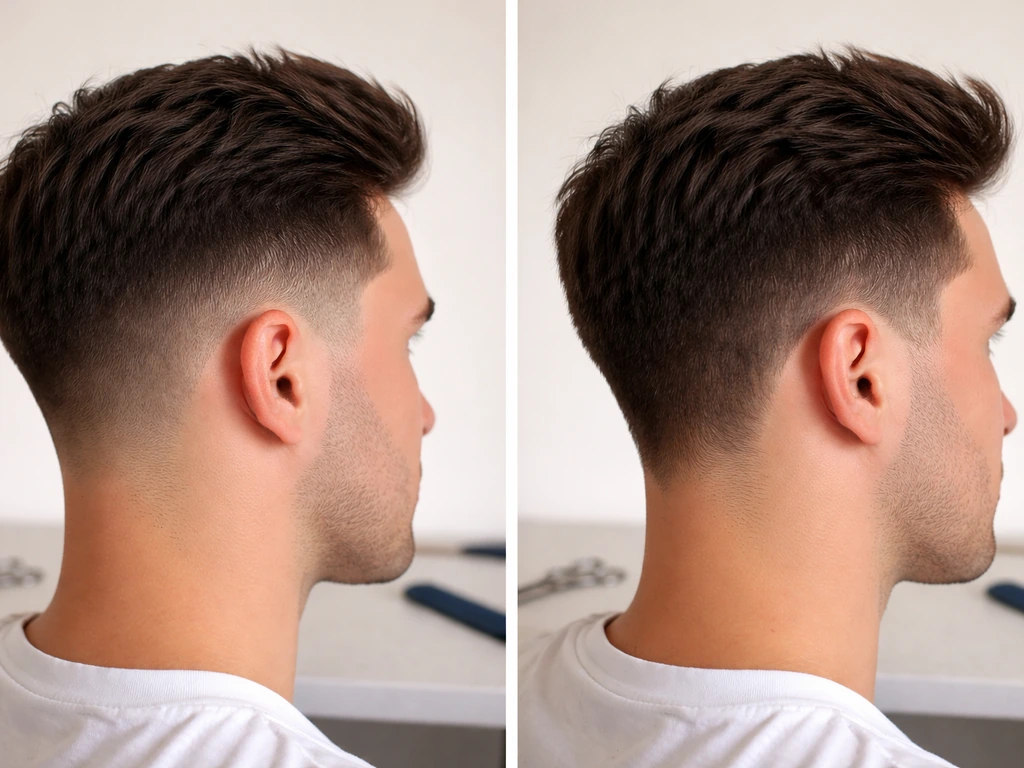
A classic taper cuts the sides and back shorter as they approach the ears and nape, leaving a visible graduation from shorter at the edges to longer at the top. A hard taper has a clear, defined line. A softer taper blends more gradually. An afro, on the other hand, is a more uniform rounded shape with consistent length or density across the whole head. The 'taper afro' that most people are trying to grow toward is a blended version: the top and crown carry the volume and fullness of an afro, but the sides still have some graduation rather than being a uniform wall of hair. Think of it as an afro with a soft, shaped fade underneath rather than a boxy silhouette.
If you currently have a fresh taper with noticeably short sides, you are at the beginning of this process. If you already have some growth on the sides but they look uneven or undefined compared to the top, you are somewhere in the middle. Both scenarios lead to the same destination, just at different distances.
Set your hair up for growth before anything else
Hair grows from the scalp, so scalp health is the foundation. A clean, balanced scalp encourages consistent growth and reduces shedding. Aim to wash once a week or every two weeks depending on how oily your scalp runs. If you struggle with flaking or dandruff, use a shampoo with ketoconazole, zinc pyrithione, or selenium sulfide, all of which the American Academy of Dermatology recommends for treating dandruff effectively. Leaving dandruff untreated can lead to itching and scratching, which causes mechanical damage to fragile new growth, especially around the hairline and nape.
After cleansing, moisture is the single biggest factor in whether your hair retains length or keeps breaking off. Kinky and coily hair is structurally fragile: the tight curl pattern creates multiple stress points along each strand, making it prone to snapping when it is dry or over-manipulated. Deep condition after every wash, and use a leave-in conditioner between wash days to keep strands pliable.
Protein matters too, but balance is everything here. Protein treatments add strength to the hair shaft, but if you overdo them your hair becomes stiff and actually snaps more easily rather than bending. Think of it as strength versus softness: you need enough protein to prevent breakage, but enough moisture to keep the hair flexible. If your strands feel brittle or straw-like after a protein treatment, that is a sign to back off and focus on moisture for a few weeks before going back to protein.
Build a weekly routine that actually retains length
The enemy of length retention during a grow-out is breakage, not slow growth. Most people's hair grows at roughly half an inch per month regardless of what they do. The difference between people who seem to 'grow fast' and those who feel stuck is how much of that growth they keep. Here is a routine built around minimizing breakage.
Wash day (weekly or every two weeks)
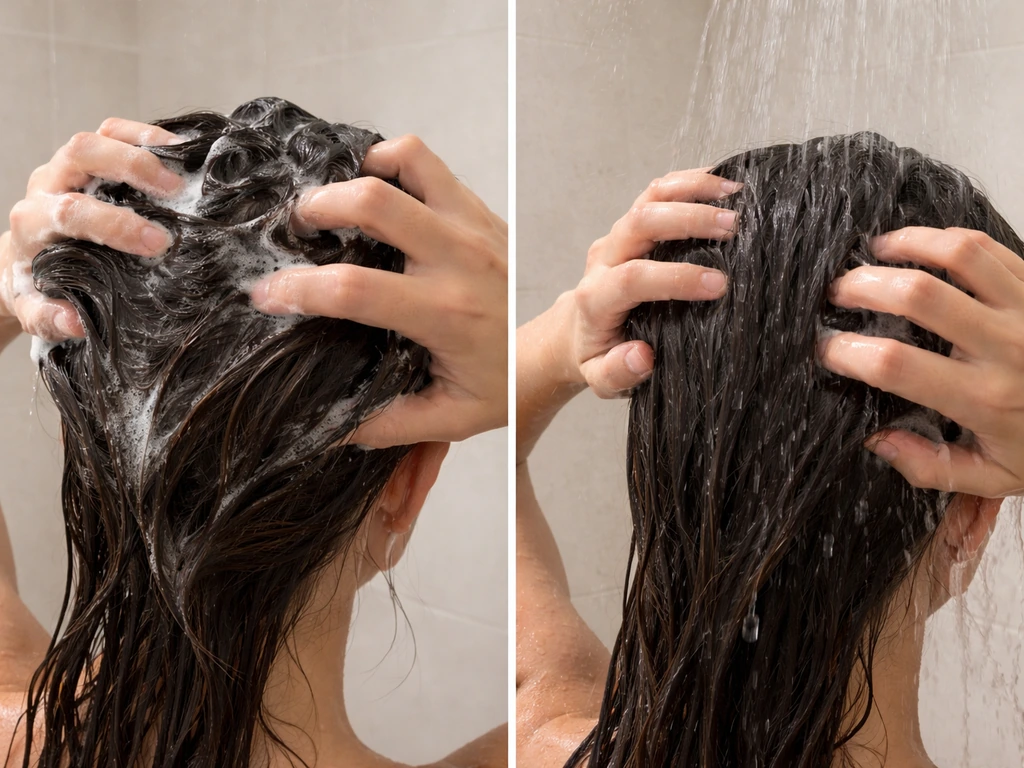
- Dampen hair with water before applying shampoo to reduce friction.
- Shampoo the scalp gently with fingertips, not fingernails. Rinse thoroughly.
- Apply a moisturizing conditioner or deep conditioner, focusing on the ends and the sides where the hair is shortest and most fragile.
- Detangle only on damp or saturated hair, never dry. Use your fingers first to work through major knots, then follow with a wide-tooth comb. Start from the ends and work toward the roots, holding the hair firmly at the root to reduce tension on the scalp.
- Section the hair into four to six parts before detangling so you are not fighting through the whole head at once. This dramatically cuts down on breakage.
- Rinse and apply a leave-in conditioner while hair is still wet.
Between wash days
- Refresh moisture daily or every other day with a water-based spritz or a light leave-in. The sides and neckline area especially need this because they are the shortest and dry out fastest.
- Seal in moisture with a light oil or butter after applying your leave-in.
- Sleep on a satin or silk pillowcase, or wear a satin-lined bonnet or du-rag. Cotton pillowcases create friction that breaks hair off overnight.
- Avoid re-styling or picking out the hair aggressively every day. Low manipulation is the goal during a grow-out.
Co-washing as a middle option
If your scalp is not particularly oily and you want to refresh the hair mid-week without a full wash, co-washing (using conditioner to cleanse instead of shampoo) is a gentler option that does not strip moisture as aggressively. That said, there is limited research on how frequently co-washing should replace shampoo, and it may not be sufficient if you use heavy products or have a scalp that tends toward buildup. Use your judgment: if your scalp feels itchy or your hair looks limp after a few weeks of co-washing only, go back to shampooing more regularly.
What the grow-out actually looks like, month by month
This is the part most guides skip, and it is the most important thing to understand. The stages are not glamorous, but knowing what to expect at each point stops you from panicking and reaching for the clippers.
| Stage | Approximate Time | What You'll See | Main Challenge |
|---|---|---|---|
| Fresh taper | Week 1–2 | Clean defined line, sides very short, top has clear length difference | Maintaining moisture on exposed scalp and short sides |
| Softening line | Weeks 3–5 | Taper line starts to blur, stubble on sides becomes visible, nape fills in slightly | Patchiness around the ears and nape; urge to get a cleanup cut |
| Uneven bulk | Weeks 6–10 | Sides noticeably growing but still shorter than top; silhouette looks asymmetric or wider at crown only | Finding styles that work with the length disparity |
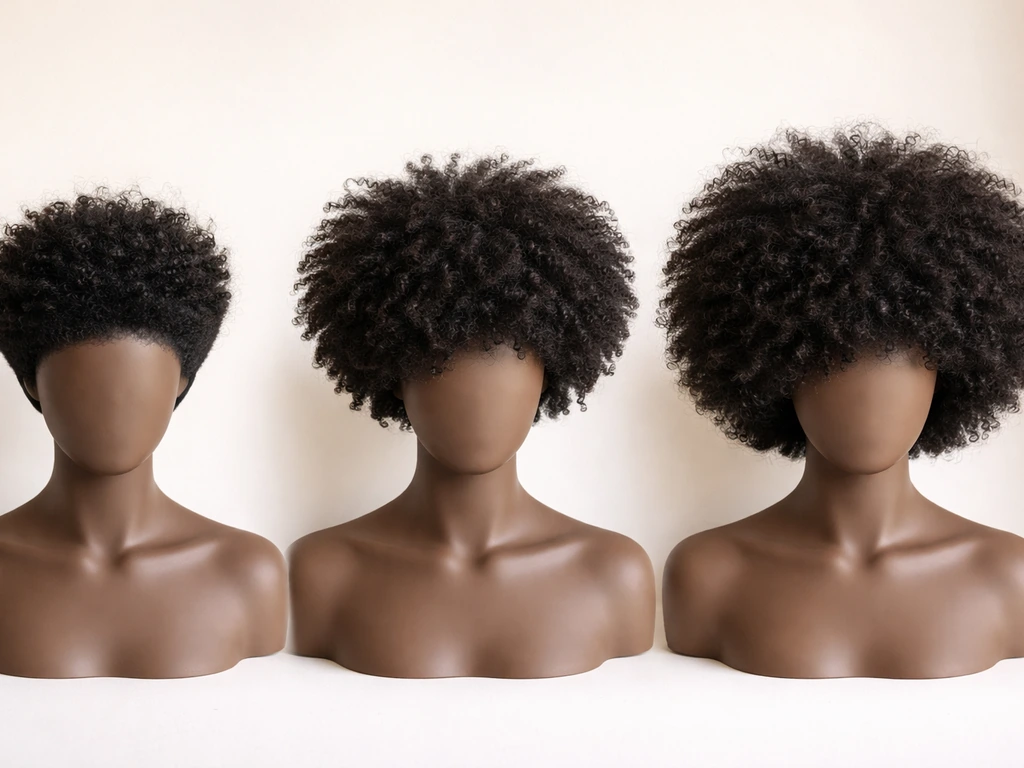
| Closing the gap | Months 3–4 | Sides reaching 1–2 inches, starting to join the overall shape; taper line nearly gone if not maintained | Keeping sides moisturized and detangled as curl pattern becomes more defined |
| Rounded afro shape | Months 4–6 | Sides and top more uniform; a fuller, more even silhouette is visible | Shaping and managing volume; deciding on final look |
These timelines assume roughly half an inch of growth per month and that you are not trimming the sides during this period. If your hair grows faster or you started with a very short taper, adjust accordingly. The nape and temples tend to be the last areas to visually catch up because they were cut shortest and have finer, more fragile hair. Be patient with those spots.
Styles for every awkward phase
The key principle during a grow-out is low manipulation and protective styling. The manual also advises using a blank" rel="noopener noreferrer">wide-tooth comb with the hair held firmly at the root and starting in a controlled way to reduce snagging and breakage. The more you pick, comb, and re-style daily, the more breakage you create. The styles below are organized by growth stage and keep manipulation to a minimum.
Early stage (weeks 1–5): work with the definition you have
- Wash-and-go: apply a defining gel or cream to damp hair and let it dry. The top will show curl definition while the sides are short enough that they do not need much managing.
- Headbands and du-rags: a simple headband or du-rag can neatly frame the hairline and draw attention away from the uneven taper line.
- Low twist-out: two-strand twists on the top section kept in for a day or two, then released for a stretched-out look. Leave the sides as they are since they are too short to twist.
Mid stage (weeks 6–10): the hardest phase, but manageable
- Twist-out or braid-out all over: as the sides gain length, you can start including them in the twist or braid pattern. This unifies the texture across the head and disguises the length difference.
- Banding: loosely banding sections of hair with soft hair ties overnight stretches the curl and reduces shrinkage, making the sides look longer and more even with the top.
- Headwraps: one of the most underrated grow-out tools. A well-tied headwrap completely removes the visual problem of uneven lengths and also protects the hair from manipulation.
- Afro pick with light shaping: pick out the top and crown for volume, and leave the sides without heavy picking so they do not look artificially dense relative to their length.
Later stage (months 3–6): getting close to the goal
- Full twist-out or braid-out: now the whole head can be styled consistently. This is the best style for this phase because it adds volume and uniformity simultaneously.
- Defined wash-and-go: as the sides grow out, using a strong hold gel on damp hair can give a more consistent, defined look across all sections.
- Shaped afro: at this point you can start picking and shaping the whole head for a rounded silhouette. Shape from underneath rather than picking straight up from the roots to avoid disrupting curl clumping.
If you are also growing out a fade on the sides (which is very similar to this process), the same mid-stage styling strategies apply. The texture difference between a very short fade and a longer top creates identical styling challenges, and low-manipulation styles solve both.
The taper line decision: keep it shaped or let it go
This is the biggest decision point of the whole process, and there is no single right answer. You have two real options. If you are wondering how to grow out top of hair while keeping the sides from derailing your timeline, focus on this taper line choice first and match your routine to the stage you are in.
Option 1: maintain a soft taper line throughout the grow-out
You keep visiting a barber every 3 to 4 weeks, but instead of a full cut, you ask only for the taper line to be softened and blended, not pushed higher or made harder. The goal is to keep the sides looking intentional without cutting them back significantly. The barber blends the fade line by working with a guard two sizes shorter than the main side length, then erasing the line rather than reinforcing it. Over time, the line gradually disappears as the sides grow up into the afro. This option works best if you want to look groomed throughout the process and are comfortable with regular barber visits.
Option 2: let the taper fully grow out with no barber visits
You let everything grow with no cuts to the sides at all. The taper line will blur on its own within four to six weeks as the hair grows past the length gradient. The sides will look patchy and undefined for a while, which is why the styling strategies above matter so much. This option is faster overall and avoids any risk of a barber accidentally cutting too much. It works best if you are comfortable with headwraps, twist-outs, or other styles that can carry you through the awkward weeks.
A quick comparison
| Approach | Pros | Cons | Best For |
|---|---|---|---|
| Maintain soft taper line | Looks groomed; sides stay shaped; easier to style during grow-out | Costs money and time; risk of barber cutting too much; slightly slower growth on sides | People who want to look polished throughout the process |
| Let taper fully grow out | Fastest path to even length; no barber risk; saves money | Awkward patch phase is more visible; requires more creative styling | People comfortable with protective styles and headwraps |
When to trim, when to leave it alone, and when to get help
The hardest part of growing out a taper afro is resisting the urge to cut when things look messy. But trimming the sides during a grow-out almost always sets you back. Here is how to think about it.
Trim only if there is a real reason
A reason to trim: visible split ends or single-strand knots that are causing tangles and breakage. A reason to trim: a section of hair that has broken off unevenly and is creating a noticeable snag or bump in the silhouette. Not a reason to trim: the sides look shorter than the top. That is the whole point of the grow-out. Trimming the top to match the sides is the opposite of what you are trying to do, and trimming the sides 'for shape' at this stage often just resets the clock.
Dealing with uneven growth and cowlicks
One side growing faster than the other is extremely common. The nape often lags behind the temples, and cowlicks or growth direction changes can create stubborn sections that stick out or lie flat when everything around them is doing something different. For cowlicks, twisting or braiding that section in the direction it naturally wants to go tends to train it over time. For uneven growth between sides, just wait. The difference almost always evens out by month four or five. If one side is significantly behind after six months, mention it to a dermatologist or trichologist, as patchy growth can occasionally signal an underlying scalp condition.
Signs it is time to see a professional
- Persistent scalp flaking, redness, or soreness that does not improve with a dandruff shampoo after four to six weeks
- Visible thinning or bald patches that are not related to the original taper cut
- Hair that consistently breaks off at the same length regardless of how carefully you handle it, which can signal a protein/moisture imbalance that needs a professional assessment
- A section of the hairline or nape that has not grown at all after three months
- Scalp irritation or pustules, which may indicate folliculitis and require medical treatment
Your next steps starting this week
If you have just gotten a fresh taper and want to start growing it out, this week is simple: do not touch the clippers, start a moisture routine, and get a satin bonnet or pillowcase if you do not already have one. If you are aiming specifically for hippie hair, focus on protective, low-manipulation styling while the taper grows in so the fullness catches up without constant trimming. Wash your hair this week, detangle gently in sections, and apply a leave-in conditioner. That is it. The growth is already happening.
If you are already mid-grow-out and feeling frustrated with the awkward phase, pick one protective style from the mid-stage list above and commit to it for the next three weeks. Consistency in a low-manipulation style during that window will make a visible difference. Take a photo of your sides today and again in three weeks so you can actually see the progress instead of comparing daily in the mirror, which makes the growth look invisible even when it is happening.
Growing a taper afro is genuinely one of the more manageable grow-out transitions because the bulk of the hair on top is already doing the work. If you are specifically aiming for a faux hawk, the same grow-out principles apply to building height on top while letting the sides catch up grow a faux hawk. The sides catching up is just a matter of time, patience, and not getting in your own way. Once you know your starting point, the next step is learning how to grow skater hair while keeping breakage under control growing it out. Give it three months of consistent care before you make any major decisions about cutting or changing direction. If you are aiming for a pompadour look instead, you can use the same low-breakage approach while styling for the lifted front and volume how to grow a pompadour.
FAQ
Should I trim the top at all while I’m growing a taper afro out?
Usually no. During a grow-out, trimming the top to “match” the sides resets the look you are trying to create. Only trim the top if you have clear damage signals (visible split ends, frequent single-strand knots, or breakage that creates snags). Otherwise, focus on moisture, gentle detangling, and low manipulation so length stays on the head.
How do I detangle the sides (temples and nape) without slowing the grow-out?
Detangle those lagging areas in sections, starting from the ends and working upward, and only when the hair is fully conditioned or very well moisturized. Use your fingers or a wide-tooth comb, then rinse or re-apply leave-in before re-styling. This prevents the “pull and snap” that makes the shortest side look even shorter.
What if my scalp itches or flakes a lot even after I use an anti-dandruff shampoo?
Treat it like a maintenance problem, not a one-time fix. Use the medicated shampoo according to how often it controls symptoms for you (often every wash at first, then less frequently once improved). If itching, redness, or thick buildup continues beyond several weeks, pause experiments and consult a dermatologist, since some cases are dermatitis, psoriasis, or folliculitis rather than simple dandruff.
Is co-washing actually better than shampoo for a taper afro grow-out?
It can be gentler, but it is not universally better. Co-washing works best if your scalp stays comfortable and you avoid heavy product buildup. If your hair feels limp, your roots get oily quickly, or you need frequent re-styling, you will likely get better length retention by shampooing on schedule and using co-wash only as a mid-week refresh.
How often should I do protein vs moisture during the transition?
Use protein only when your hair shows a need, not on a fixed calendar. A practical approach is moisture-focused between protein treatments, then reassess after the next wash. If your hair feels stiff, crunchy, or overly rigid, you have likely overdone protein for your hair type, and you should return to deep conditioning until it regains flexibility.
Why does one side look patchier for months, even if I’m not cutting?
Patchiness is often a combination of growth direction, cowlicks, and how the hair lays against your head. Training a cowlick helps, but the safest tactic is protective styling that encourages the hair to go where it naturally wants, like consistent twisting or braiding in that direction. Also know the nape and temples are usually last visually, so “uneven” at month one is not the same as “uneven forever.”
What should I tell my barber when I go in during the grow-out?
Ask for softening and blending of the taper line, not raising the sides or making the line sharper. A clear instruction is to have the barber work with a guard that is two sizes shorter than the main side length and then remove the line rather than reinforcing it. If you want to avoid risk, bring a photo of your desired “taper afro with graduation” goal and specify you do not want the sides pushed higher.
Is it okay to let it grow with zero barber visits if the sides look terrible?
Yes, it is usually fine, but you need a plan for weeks when the silhouette is awkward. Headwraps, twist-outs, braids, and other low-manipulation styles that keep volume on top and cover gaps tend to work better than trying to “comb it into place” daily. If you notice matting or tangles when you do nothing, then you may need at least periodic detangling help or a minimal barber blend.
When is trimming actually justified during a grow-out?
Trim only for damage-related reasons: visible split ends, single-strand knots that keep tangling, or broken-off sections that create a snagging bump in the silhouette. If the only issue is that the sides are shorter than the top, that is expected and not a reason to cut. Trimming “for shape” during this stage commonly delays the timeline.
How do I stop myself from cutting when I’m frustrated?
Use a rule of “no decisions for 21 to 30 days.” Pick one protective style and commit to it, then take side photos today and again at the end of the window. Growth looks slower in the mirror because you see tiny changes daily, photos reduce emotional decision-making. If you still feel the urge after the check-in, evaluate for actual damage first (snags, splits, knots) rather than appearance alone.