Growing a middle-part flow means training your hair to split cleanly down the center and fall to both sides with enough weight and length to stay put on its own. Once you have enough length to split cleanly down the center, you can focus on how to grow a middle part step by step middle-part flow. You need roughly 3 to 4 inches of length on top to get the part to hold without clips, and 5 to 7 inches before the sides actually start to flow with any movement. The routine that gets you there fastest is simple: part on wash day while hair is damp, blow-dry downward toward each side using a concentrator nozzle, finish with a cool shot, and use a light-hold product to hold the shape without weighing it down. The awkward stage is real and it lasts a few months, but there are ways to make it look intentional the whole way through.
How to Grow a Middle Part Flow: Step-by-Step Guide

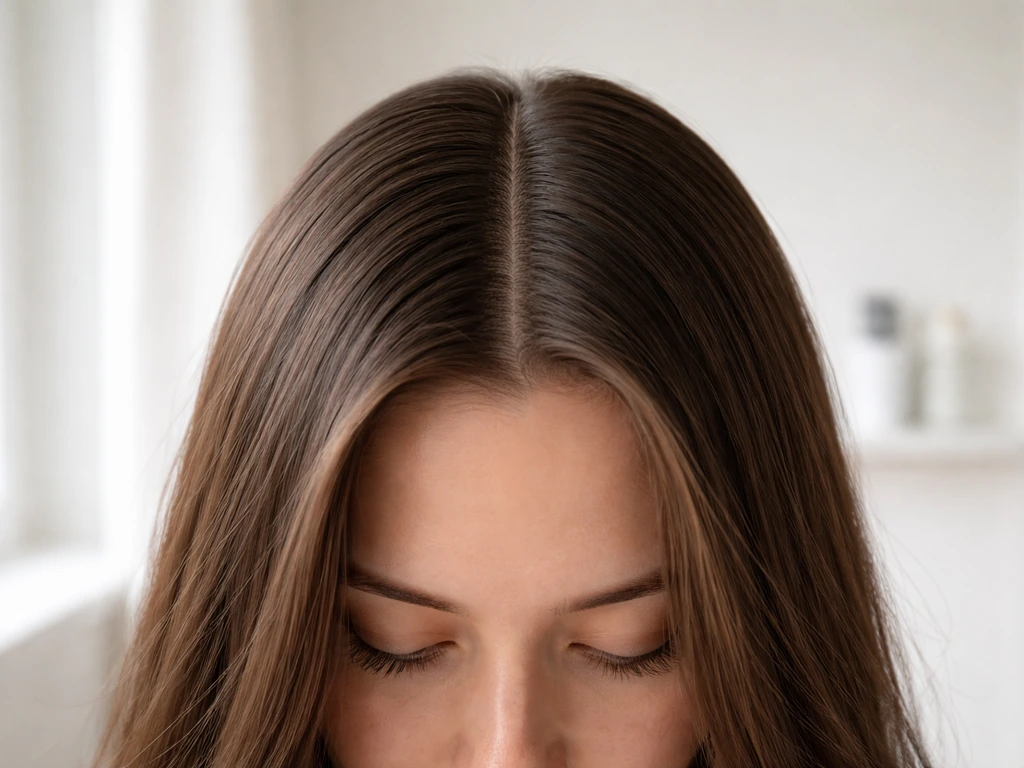
What a middle part flow actually requires
The "flow" part of this style refers to hair that sweeps to each side from a centered part, with enough length that it moves and lays naturally rather than sticking straight out or flopping over randomly. It's a look associated with curtain bangs, longer top sections, and that effortless surfer-or-skater energy, but the mechanics are the same regardless of your vibe. What makes it work is weight and direction: the hair has to be long enough to fall under its own gravity and trained to fall the right way.
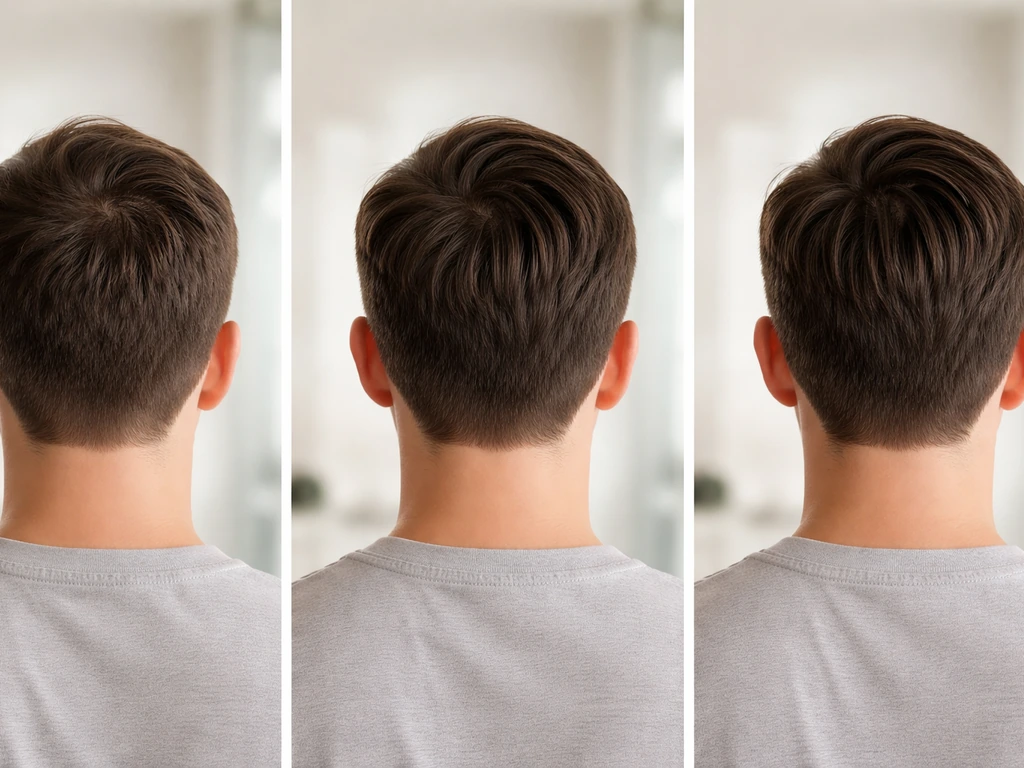
In practical terms, this means the hair on the top of your head and around the crown needs to be at least 3 inches long before a middle part will cooperate even a little. At that length, you can force it with product and heat. At 5 to 6 inches, it starts to happen more naturally. The sides and front sections need similar length to contribute to the overall shape, and if you're growing from a short cut (pixie, buzz, or a close crop), the crown and top will likely arrive at that usable length before the sides do, which creates the uneven-feeling phase that frustrates most people.
The "middle part" piece specifically means the scalp is visible in a clean line running from your forehead back toward your crown. If you have a strong side part habit, a cowlick near the front, or bangs that aren't quite long enough yet, that line is going to fight you. That's normal. The goal of the training routine below is to gradually override those habits and get the hair to accept the new direction.
A realistic growth timeline
Hair grows roughly 0.5 to 1.7 cm per month, which averages out to about half an inch. That's slower than it feels when you're impatient and faster than it feels when you're in the thick of an awkward phase. Here's what each stage actually looks like for a middle-part flow specifically. The hair growth cycle includes anagen (growth) lasting about 2 to 6 years, followed by transition and resting phases (telogen).
Months 1 to 3: the part won't sit
If you're starting from a short cut, a buzz, or a close crop, these first months are mostly about laying groundwork. The hair isn't long enough to flow anywhere yet, and a middle part will look more like a faint suggestion than a style. Focus on getting the parting habit established now so you're not fighting old muscle memory later. Use a fine-tooth comb to create the part every single wash day, even if it looks awkward. This is also the phase where you'll notice cowlicks and growth direction patterns that you'll need to work with going forward.
Months 3 to 6: the part starts to take shape
This is where it starts to feel like something is actually happening. The hair is long enough to have a little weight, the part is starting to become a real line, and the sides are beginning to fall. It's also the most frustrating-looking stage because you're past "short and intentional" but not yet at "long and styled." The half-inch-per-month math means that if you started from a 1-inch crop, you're working with 2.5 to 4 inches by now, which is enough to train but not enough to fully flow. Consistent damp-parting and blow-drying direction makes the biggest difference right here.
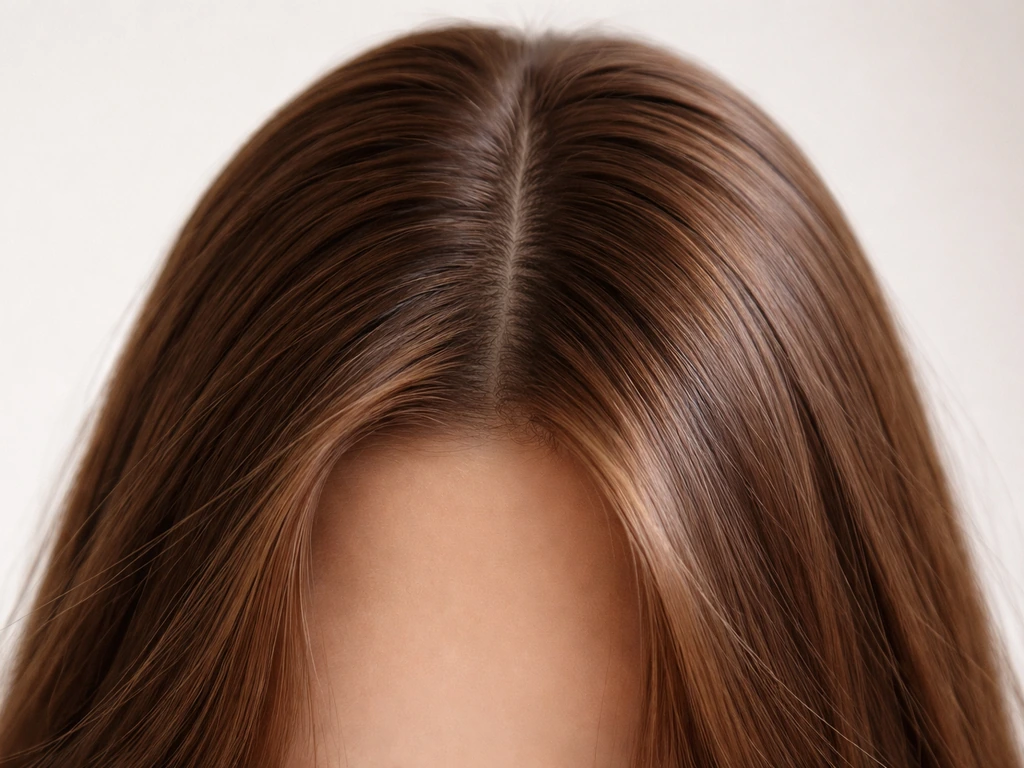
Months 6 to 12: the flow kicks in
By month 6, most people have enough top length that the middle part holds without extreme product intervention. The sides start to actually flow rather than just hang, and the look becomes recognizable. If you're growing from a bob, you may hit this stage earlier. If you're growing from bangs or a fringe, you're looking at a similar 6 to 12 month window before the front sections blend into the rest of the style (bangs take about 4 to 6 months to grow out in general, and a full fringe can take closer to 6 to 12 months depending on how short they were cut). By month 9 to 12, for most hair types, the middle-part flow is stable and self-maintaining with minimal daily effort. If you have straight hair, pairing this month-by-month plan with a targeted wash-day routine for how to grow flow with straight hair can help the sides start moving sooner.
How to train the middle part on wash day
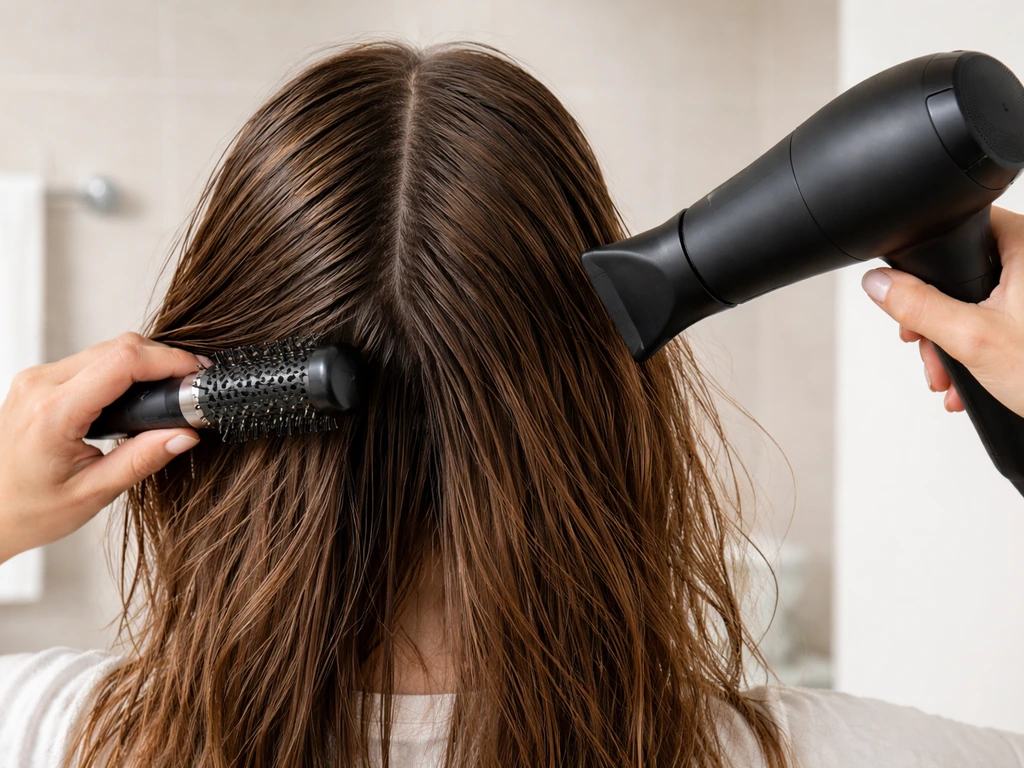
Wash day is where the real training happens. If you want the front to catch up too, make sure you pay extra attention to the way you part and blow-dry the front sections during your wash-day routine Wash day. What you do to your hair when it's wet sets the direction it wants to fall for the next 2 to 3 days. If you are also figuring out how to grow a blowout, the same rule applies: how you dry and handle your hair while it is damp shapes the final look wet sets the direction it wants to fall. This is the single most important habit to build.
- After washing, towel-dry until your hair is damp but not dripping. Soaking-wet hair is harder to direct with a dryer and harder to part cleanly.
- Apply a heat protectant to mid-lengths and ends while hair is damp. This step matters especially if your hair is colored, bleached, or already on the drier side.
- Use a fine-tooth comb or your fingers to create the center part while hair is still damp. The part line should run from your natural hairline straight back. If you're unsure where your center is, line it up with the center of your nose.
- Rough-dry your hair to about 80 to 90 percent dry before doing any directional styling. Starting to shape fully wet hair makes it harder to control and takes much longer.
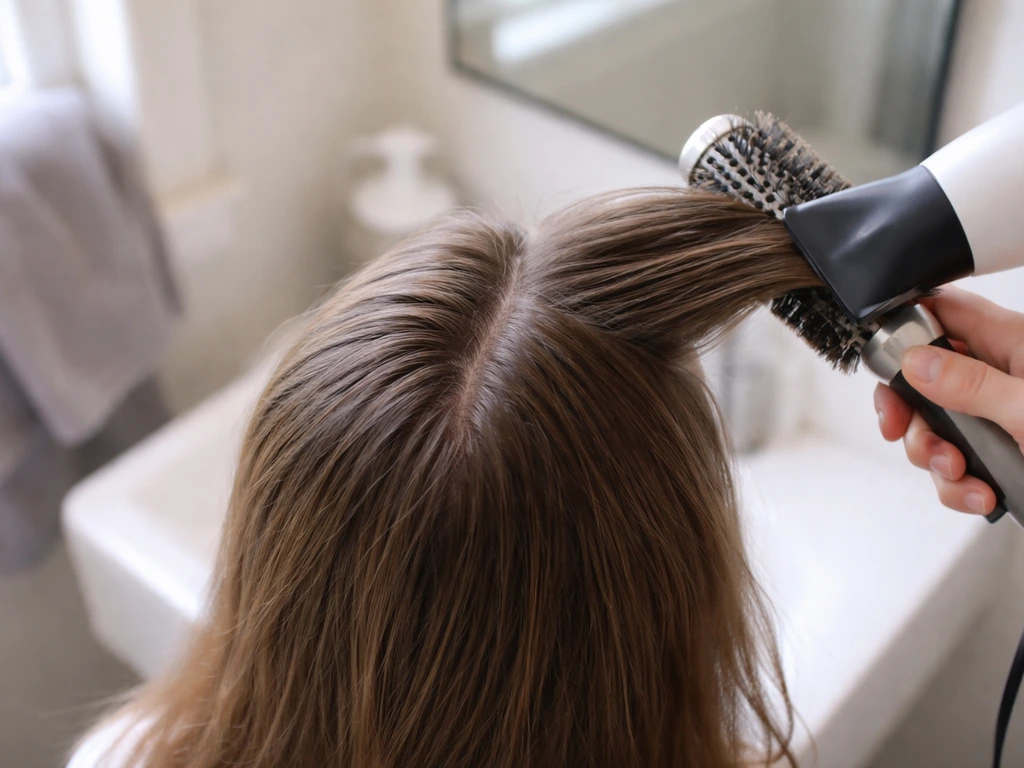
- Switch to a blow dryer with a concentrator nozzle. Direct the airflow downward (following the direction of the hair shaft, not against it) and angle the dryer toward the left side on the left, right side on the right. This encourages each section to fall away from the center part.
- If you have a cowlick near the front that keeps disrupting the part, aim the dryer in the opposite direction of the cowlick's natural growth while the hair is still slightly damp. Hold tension with a brush or your fingers for 20 to 30 seconds as it cools.
- Finish with the cool shot button. This step locks in the shape by resetting the hair's hydrogen bonds in the new position. Most people skip it and then wonder why the style doesn't hold as well.
- Once hair is completely dry, create the final part line with a comb. Do it after drying, not before, for the cleanest result.
- Apply a small amount of styling clay or light pomade (rubbed between your palms first) to smooth and define the parted sections.
Products and tools that actually help
The goal with product for a middle-part flow is light hold with smoothness, not stiffness. You want the hair to look natural and move a little, not be cemented in place. Here's what works at each step.
| Product Type | When to Apply | How Much | What It Does |
|---|---|---|---|
| Heat protectant spray | On damp hair before blow-drying | Enough to coat evenly without soaking; focus on mid-lengths to ends | Prevents heat damage, especially critical for colored or bleached hair |
| Leave-in conditioner | After washing on damp/towel-dried hair | Small amount worked through mid-lengths to ends | Adds moisture, reduces frizz, makes hair easier to direct |
| Anti-frizz serum | On damp or dry hair | 1 to 2 pumps, applied mid-lengths to ends only (not roots) | Smooths the cuticle, adds shine, prevents flyaways along the part |
| Light styling clay or pomade | On completely dry hair after parting | Pearl-sized amount rubbed between palms | Defines the part, adds subtle hold without crunch |
| Flexible-hold hairspray | As a finish on dry hair | Short bursts from 8 to 10 inches away; focus on crown and sides | Holds movement-prone areas without making hair look stiff |
| Dry shampoo | Between wash days | Sprayed at roots, worked in | Absorbs oil, adds texture, prevents the part from looking greasy or flat |
One thing to avoid: layering too many products at once. If your roots are heavy with leave-in, serum, and clay, the part will look greasy and the hair won't have enough body to flow. Pick one or two depending on what your hair needs most. Fine hair usually does best with just heat protectant and a light mist of flexible hold. Thicker or coarser hair benefits more from the leave-in and a touch of serum.
Getting through the awkward stage without looking like you're getting through it
The middle months are real. The part might be there but the sides aren't long enough to flow, or the front sections (especially growing-out bangs) are an awkward length that won't cooperate with either the parted look or any other style. Here are the strategies that make the in-between stage look intentional.
Clips and pins as a style move, not a fix
Small claw clips, bobby pins, or barrettes placed just behind the part on one or both sides can hold shorter sections in place while simultaneously looking like a deliberate style choice. A single clip on one side at the temple is especially good for growing-out bangs or front sections that won't quite fall back yet. This works better than trying to force those sections flat with product and ending up with a greasy look.
Slick styles and half-ups
On days when the flow isn't cooperating, pulling the top section into a half-up style with the middle part still visible at the front is a solid option. The part does its job visually even if the length isn't there yet to fully flow on both sides. A slicked-back version using a small amount of gel or pomade can also look very clean and intentional during the shorter stages, and is much easier to pull off than trying to make a flow work before the hair is ready.
Texture to your advantage
If the part looks patchy or the scalp is more visible than you'd like, adding texture to the rest of the hair draws the eye away from the part line. A little dry shampoo or sea salt spray gives the hair more body and makes shorter sections look like they have more volume. Avoid over-smoothing when hair is short to medium length; a more textured finish actually helps the style read as intentional rather than unfinished.
Protective styles during growth
If you're in a stage where nothing looks right and you just want to protect the hair while it grows, a loose bun, headband, or scarf style can take the pressure off while still keeping the parting habit going underneath. On wash days, you still do the full damp-part and blow-dry routine. Then you let it do its thing under a style that doesn't require the flow to be perfect yet.
Troubleshooting: when things aren't working
The part keeps flipping to one side
This usually means there's a cowlick or strong growth pattern pulling the hair in a habitual direction. The fix is consistent blow-drying in the opposite direction of that pull, every wash day, for at least 2 to 4 weeks. It takes time to override a growth pattern that's been set for years. In the meantime, a small amount of pomade along the part line on the side that wants to flip can keep it in place without making the whole style look stiff.
The sides are uneven
Uneven sides are usually a growth rate issue (hair doesn't always grow at exactly the same speed on both sides) or a leftover asymmetry from a previous cut. A small trim on the longer side to even out the shape can help without meaningfully setting back your overall length goal. If the unevenness is from an undercut or layered cut that hasn't grown out yet, that's a waiting game, but you can use texture on the shorter side to make both sides look more similar in volume.
The part won't sit or stay visible
If the hair collapses back over the part within an hour of styling, your hold product probably isn't strong enough for your hair type, or you're applying it before the hair is fully dry. Always create the final part line after drying is complete, then apply product. If the part is still collapsing, try a slightly stronger hold clay or wax (still light, but with a bit more grip), and press along the part line with a comb's spine for a few seconds after applying.
Scalp is showing too much
A very visible scalp line is most common when hair is fine or when length is still short. Dry shampoo applied right at the part line can reduce contrast between the scalp and hair. You can also try making the part slightly off-center by a few millimeters (it will still read as a middle part visually) to find a spot where the hair is slightly denser. As hair grows longer, the weight of it naturally reduces how much scalp is visible.
Breakage along the part
If you're seeing short, broken hairs sticking up along the part line, that's a sign of tension or dryness damage. This is especially common if you've been combing the part aggressively when hair is dry, or if the hair is colored or bleached and not getting enough moisture. Use a wide-tooth comb on damp hair instead of a fine-tooth comb on dry hair. Add a leave-in conditioner to your wash-day routine. If your hair is bleached, addressing moisture is essential to recovery: deep conditioning treatments once a week will make a real difference in how the hair behaves and how cleanly it parts.
Growing out colored, bleached, or natural regrowth hair
If your hair is in a color transition, whether you're growing out bleached ends, letting your natural color come back in, or managing money-piece or highlight regrowth, the middle-part grow-out has an extra layer of complexity. If you are trying to grow out money piece or highlight regrowth, focus on keeping the highlighted sections moisturized and training the parting line gently as the roots lengthen money-piece or highlight regrowth. The demarcation line between colors can sit right where the part is most visible, which draws attention to the line of regrowth in a way that a side part or bun wouldn't.
Bleached hair is particularly prone to the breakage and dryness issues mentioned above, which makes clean parting harder. The damaged sections don't lay as smoothly, they frizz more easily, and they can feel rough in a way that makes the part look messy even when it's technically in the right place. Keeping bleached or lightened sections well-moisturized (leave-in conditioner, regular deep conditioning, serum on the ends) makes a visible difference in how the part reads overall.
For natural regrowth situations where you're letting dyed hair grow out, use a clarifying shampoo about once a week to remove product buildup and keep the scalp and existing hair looking clean and vibrant. Use a color-safe clarifying formula if you want to preserve the tone of the dyed sections while you grow. A cleaner scalp and hair surface makes the part line look sharper and more intentional regardless of what's happening with the color underneath.
If you're working with natural texture or curl regrowth coming in differently than chemically treated ends, the key is managing the two different textures at the part without forcing them to look identical. Embracing the natural movement at the roots while keeping the ends moisturized and smoothed tends to look better than fighting both textures into submission with too much heat. Growing out the crown of your hair in these situations takes patience, and the middle part is easier to maintain once the textures start to blend closer to the ends.
What to adjust over the next 2 to 4 weeks and when to get a trim
Consistency is everything here. If you do the damp-part and blow-dry routine on every wash day for 2 to 4 weeks, you will notice the hair starting to default to the middle part direction even on days you don't style it. That's the habit setting in. Don't get discouraged if week one and two look rough. By week three, you should see a real difference in how willingly the hair falls.
Trimming is a judgment call during this phase. A trim does not meaningfully slow your growth in the long run, and a strategic dusting of the ends (removing just 0.25 to 0.5 inches) can remove split ends that are causing frizz and making the style look ragged, without touching the overall length in any noticeable way. If your ends are splitting or the hair looks frayed, trim. If the main issue is just length, skip the trim and wait. Growing out a side part or transitioning from a blowout style into a flow follows the same logic: protect the ends while the length builds.
The moment you know the middle-part flow has truly arrived is when you step out of the shower, part your hair with your fingers, let it air dry, and it falls the right way without you doing anything else. That's when the training has stuck and the length has caught up. For most people starting from a short cut or a strong side part habit, that moment comes somewhere between month 6 and month 12. It's worth the wait. If you want a fuller guide to the process, follow this step-by-step on how to grow the flow hairstyle.
FAQ
What if my hair is long enough to part, but the middle part line keeps disappearing by the end of the day?
First check timing, create the part after the hair is fully dry, then apply product only along the top and part line. If the part still relaxes quickly, you likely need a slightly stronger hold product for your hair type, use a small amount, and press the hair flat along the part with a comb for 10 to 20 seconds right after applying.
Can I grow a middle part flow without blow-drying every wash day?
You can reduce blow-drying for some hair types, but you still need direction while the hair is damp. If you skip blow-drying, use damp-parting plus a few minutes of manual shaping, combing each side into place and letting it dry held in that direction. Expect slower results if your hair has strong cowlicks or tends to flip.
How do I handle a middle part flow if I have a strong cowlick near the front?
Treat it like a location-specific training problem. On wash day, part as usual, then blow-dry the front in the opposite direction of the cowlick for the first pass (about 30 to 60 seconds), finish with cool air, and keep a tiny amount of pomade only on the side that wants to flip, right at the part line.
My hair looks greasy or flat when I use product. What should I change?
Use less product and pick fewer steps. If you are already using a leave-in plus serum plus a hold product, remove one and switch to a light-hold product after heat. For fine hair, avoid heavy creams and clays at the roots, and focus product on the lengths with minimal contact at the scalp.
Should I use a fine-tooth comb or a brush to maintain the middle part during the transition?
Use a wide-tooth comb on damp hair, and avoid aggressive fine-tooth combing when the hair is dry. Rough combing along the part line can cause broken hairs that make the line look fuzzy. If you need precision, create the part once after drying and touch it minimally afterward.
How often should I get trims while growing a middle part flow?
If you have visible split ends or fraying, dust the ends about every 8 to 12 weeks, trimming only 0.25 to 0.5 inches. If your only goal is length, you can skip trims for several months. The key is that trims improve appearance, they do not usually speed growth.
Will highlights or bleached ends slow down the middle part training?
They can, mainly because dryness and breakage prevent smooth laying. The fix is to increase conditioning consistency, add a leave-in after washing, and do a deep conditioner about once a week. Also be gentler with parting, use a wide-tooth comb, and consider applying a small amount of serum to the ends to reduce frizz that ruins the part line.
How can I keep my middle part flow looking good while my front sections are growing out?
Use intentional holds instead of fighting the hair with heavy styling. Place small clips or bobby pins just behind the part at the temple to keep the front sections in place temporarily. Another option is a half-up style that keeps the part visible at the front while the sides catch up.
My middle part looks too thin or shows a lot of scalp. Is changing the part location a good idea?
Yes, slightly adjusting can help. If scalp contrast is high, try moving the part a few millimeters off true center while still reading as a middle part, then blow-dry to support that exact line. As length increases, gravity usually reduces scalp visibility, so the adjustment becomes less necessary.
What is the fastest way to know my training is working?
Use a no-effort test after a shower. Part your hair with fingers, then let it air dry without styling, if it falls into the same centered, side-swept position on its own, the habit is set. If it still reverts, stay consistent with damp-parting and blow-drying direction for another 2 to 4 wash cycles.