Growing out a bowl cut takes roughly 6 to 18 months depending on how short it is and how long you want to go, but the real challenge is managing it through three distinct awkward phases: the fringe growing past your eyebrows, the sides losing their clean shape, and the back catching up with everything else. Knowing how the blunt cut grow-out stages work makes it easier to choose the right trim and styling at each point awkward phases. blank" rel="noopener noreferrer">Hair grows about 1 cm per month on average, so the math is honest and a little humbling. The good news is that with the right trims, some daily styling adjustments, and a clear plan for each stage, you can keep it looking intentional the whole way through.
How to Grow Out a Bowl Cut: Timeline, Trims, Styling

Marcus Vickers
20 Jun 2026

What makes a bowl cut hard to grow out
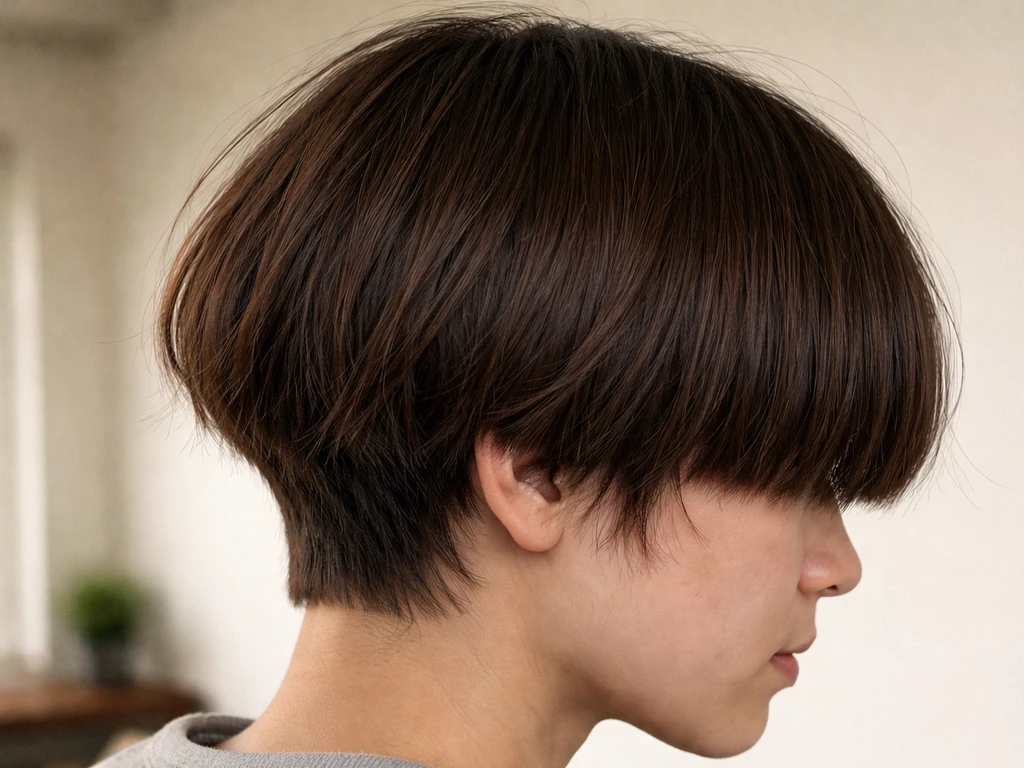
A bowl cut is one of the trickier styles to grow out because of how much structural weight it carries. If your goal is to reach a more natural, easier-to-style length, start by planning a grow-out strategy designed for how to grow an Edgar haircut without the awkward phases dragging on drop the structural weight. The signature heavy fringe, the blunt perimeter around the sides and back, and the rounded shape all fight against a graceful grow-out. When every section of the cut is the same blunt length, they all start misbehaving at the same time.
Here is what you will likely experience. The fringe hits that awkward phase first, around the 4 to 8 week mark, where it is too long to sit flat but too short to tuck behind your ears or part to the side. The sides and back will start to flip outward, usually around the 2 to 4 month mark, because the blunt ends resist the natural direction of growth. And the overall shape goes through a phase that stylists often call the mushroom: the top stays flat while the perimeter puffs out, making the whole head look wider and heavier than it did when the cut was fresh.
None of this is permanent and none of it means you are doing something wrong. It is just the geometry of growing out a shape that was built to be precise. The more clearly you can see what phase you are in, the easier it is to manage.
Stage-by-stage timeline: bangs, sides, and back
Because the bowl cut is a multi-zone style, each section of your hair goes through its own awkward phase at a slightly different time. Here is a realistic breakdown of what to expect month by month.
| Timeframe | What's happening | Key challenge |
|---|---|---|
| Weeks 1–4 | Fringe starts losing its precision; sides still fairly clean | Fringe looks overgrown rather than intentional |
| Months 1–2 | Fringe reaches brow-to-below-brow length; sides start to widen | Mushroom effect begins; fringe may flip or poke |
| Months 2–4 | Fringe hits cheekbone length; sides flipping outward; back growing past the neckline shape | Everything feels too long AND too short at once |
| Months 4–6 | Fringe long enough to tuck or part; sides reaching jaw area | Shape looks undefined without daily styling |
| Months 6–12 | Fringe blending into layers or a side part; sides and back approaching a bob or lob length | Maintaining momentum and resisting the urge to cut it all off |
| Months 12–18 | Full transition to a medium or longer style is achievable for most | Keeping ends healthy through the long stretch |
Bangs specifically can take 6 to 12 months to fully grow out from a short blunt fringe, which is longer than most people expect. The first two months are the hardest because the length is not yet useful for any real styling trick. After that, you start gaining options quickly.
Day-to-day hair care that actually supports growth

Hair grows at roughly 0.35 mm per day, or about 1 cm per month. You cannot dramatically speed that up, but you can definitely slow it down through damage, breakage, and neglect. The basics matter more than any supplement or growth serum.
- Wash with lukewarm water, not hot. Hot water opens the cuticle and makes hair more prone to breakage, especially on the ends that are already under the most stress from the grow-out shape.
- Use a wide-tooth comb before blow-drying to detangle without snapping hair. Start from the ends and work upward.
- Keep heat styling to a minimum on the fringe specifically, since this section gets the most daily manipulation and is most vulnerable to product buildup and heat damage.
- Trim your ends on a schedule (more on that below) to prevent splits from traveling up the shaft and costing you length you already grew.
- Drink enough water, eat enough protein. Hair is mostly keratin, and chronic protein or iron deficiency genuinely slows growth and affects texture.
For the fringe in particular, the temptation is to over-style it every day because it is the most visible and annoying part of the grow-out. Try to use lightweight products rather than heavy creams or sticky gels near the roots, since buildup weighs hair down and can cause the fringe to clump or sit unevenly. A light matte paste or a small amount of blow-dry spray applied from roots to ends works better than heavy pomades when you are trying to train direction.
Styling fixes for every awkward phase
This is where the grow-out either feels manageable or completely demoralizing. The right trick at the right stage can buy you weeks of confidence while you wait for more length.
Weeks 1–6: keeping the fringe from looking overgrown
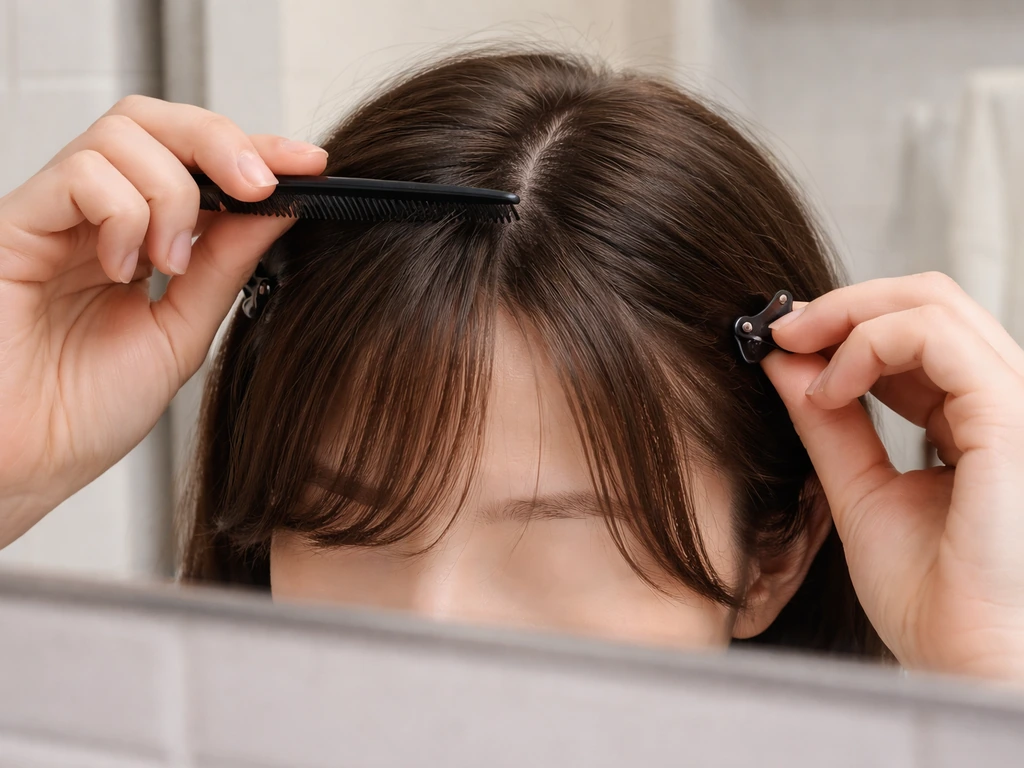
When the fringe is just past its fresh length but nowhere near your brows, your main tools are parting and product. Try shifting the part even slightly off-center. A side part alone can make fringe that is growing out look like a deliberate style choice rather than a mistake. Changing your parting is genuinely one of the fastest visual tricks available to you during grow-out, and it also starts retraining the hair to fall in a new direction. A small clip or barrette pinned to one side of the fringe while it is damp can help set that new direction over days and weeks.
Months 1–3: managing the flip and the mushroom
When the sides and back start flipping outward, it is almost always because the blunt ends are growing past the length that was keeping them in place. Round brushing while blow-drying is your best friend here. Roll the ends under rather than letting them air dry into a flip. Apply a heat-activated blow-dry spray to towel-dried hair, section the sides, and use a medium round brush to direct ends downward and slightly inward as you dry. For a medium-control, anti-frizz root lift, Redken recommends applying the Root Lifter Volumizing Spray Foam to towel-dried hair at the roots and then blow-drying with a round brush Apply a heat-activated blow-dry spray to towel-dried hair. Let each section cool before releasing it so the shape holds. This also helps fight the mushroom effect by adding some movement at the perimeter rather than letting it puff straight out.
Headbands and soft elastic bands are underrated during this phase. A thin headband pushed back slightly keeps the fringe off your face without drawing attention to its awkward length, and it looks intentional. Hats work well too, especially during the weeks when you just do not want to deal with it.
Months 3–6: when you finally start gaining styling options
By month three or four, the fringe should be long enough to either tuck behind the ears, sweep to one side, or be pinned back with a clip. At this point a slicked-back look with a light gel or a natural oil can actually look quite polished. The sides are probably approaching jaw length, which opens up the possibility of tucking them behind your ears. This is also when a half-up style becomes useful: gather the top section (including the fringe) into a small clip or tie at the crown, and the rest hangs. If you are specifically aiming for a 2-block haircut, you can use the same grow-out phases but tailor the trim and styling to keep the lengths blending half-up style becomes useful. It looks like a purposeful style rather than a phase.
Trim strategy: how often and what to ask for
The biggest fear when growing out a bowl cut is that a trim will put you back at square one. It will not, as long as you are trimming strategically rather than just maintaining the original shape. Here is the approach that works.
- Do not skip trims entirely. Waiting too long leads to split ends, which cause breakage and uneven lengths. You lose more length to neglect than to smart trimming.
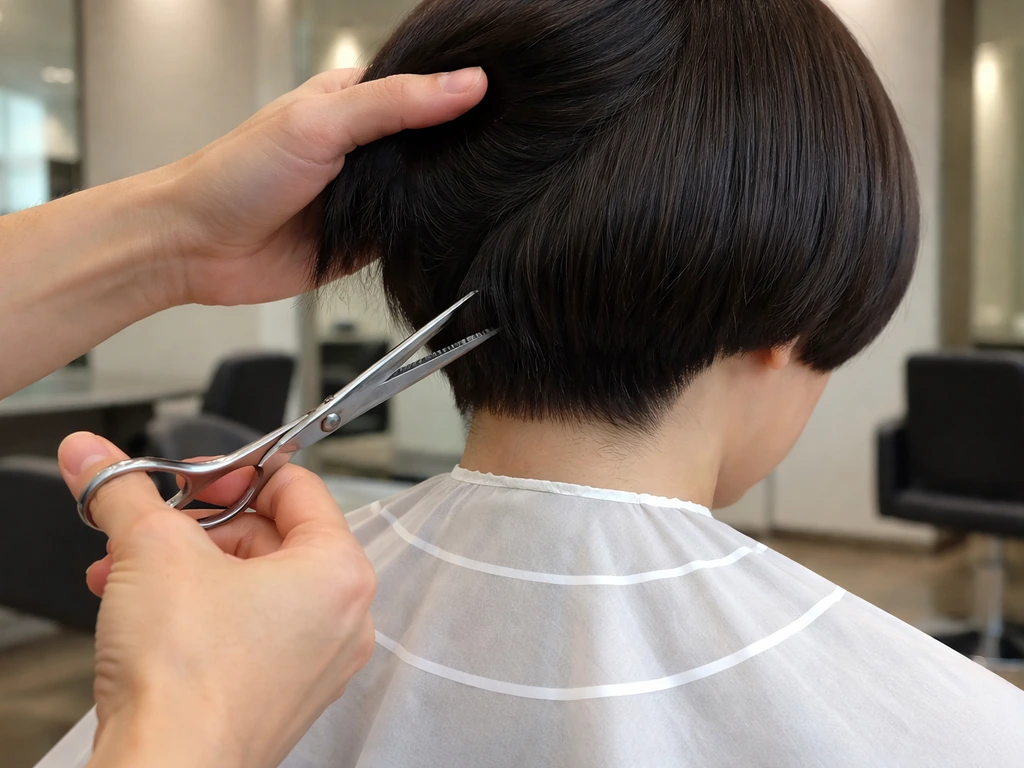
- In the first three months, aim for a light dusting every 8 to 10 weeks. Ask for no more than 0.5 cm off the ends, focusing on the back and sides rather than the fringe.
- Leave the fringe alone at the salon unless it is visibly uneven. Trimming the fringe even a centimeter resets your clock on that section.
- From month four onward, you can stretch trims to every 10 to 12 weeks if your ends look healthy. Use this window to reshape rather than simply maintain.
- Between salon visits, resist cutting your own fringe. It almost always results in a blunter, heavier line that just re-creates the original problem.
What to actually say at the salon
This is the part people struggle with the most, because salon communication is its own skill. If you walk in and say 'I am growing out my bowl cut,' a stylist may not know what that means for you specifically in terms of length goals, timeline, or shape preference. Be specific.
At month one to three, say: 'I want to keep as much length as possible. I need the back and sides cleaned up slightly, and I want the perimeter softened so it does not flip. No more than half a centimeter off. Please do not touch the fringe unless it is visibly uneven.' That last sentence is important. Stylists are trained to make things look neat, and a growing-out fringe does not look neat. Give explicit instructions to leave it.
At month three to six, ask for a reshape rather than a trim. Specifically, you want the stylist to: soften the blunt perimeter with some point cutting or gentle slide cutting to remove bulk without removing length, add some internal texture or light layers so the sides do not sit as a heavy slab, and if the fringe is long enough, ask about converting it to a soft curtain bang shape. Curtain bangs are longer at the sides and already layered, so they blend into face-framing layers as they continue to grow out. This is one of the smoothest transitions available from a bowl cut fringe.
At month six and beyond, you have real options. Discuss a gradual shift toward a lob, a layered mid-length, or whatever your goal is. Bring a reference photo. Stylists work much better with a visual target than with abstract descriptions like 'something natural' or 'not too short.'
Troubleshooting uneven growth, cowlicks, and bulk
Uneven growth
It is completely normal for different sections to grow at slightly different rates because of how hair follicles cycle through growth and rest phases. The back of the head often grows slightly faster than the sides. If you notice one side lagging, do not try to even it up by trimming the longer side. Instead, ask your stylist to point-cut the longer side during your next visit to reduce visual disparity without sacrificing length. Parting adjustments can also camouflage unevenness better than a trim can.
Cowlicks in the fringe and crown
Cowlicks are driven by the natural angle and pattern of hair growth, and you cannot train them away permanently. What you can do is work with the direction they want to go rather than fighting them. If you have a fringe cowlick that keeps pushing hair forward or to one side, try parting in the direction the cowlick naturally falls. This is counterintuitive but it usually produces a cleaner result than forcing hair the other way.
For styling, blow-dry the cowlick section first while hair is still damp, using a round brush to direct it in the direction you want. Apply a root-lifting foam or volumizing spray at the roots before drying to give yourself more grip and control. Blow-dry that section in the opposite direction first to break up the growth pattern, then redirect to where you actually want it and let it cool in that position. Using a small clip to hold the section in place while the rest of your hair dries can help set the direction over time.
Bulk and the mushroom shape
If the sides and back are giving you a puffed-out mushroom shape, the core problem is weight distribution. The hair has enough length to fall outward but not enough to fall downward. The fastest fix without a cut is blow-drying the sides downward with a round brush as described above. The longer-term fix is asking your stylist for internal texturizing: light vertical cuts into the interior of the sides remove bulk without changing the perimeter length. This is different from thinning, which removes too much weight and can cause flyaways. Ask specifically for 'internal texture removal on the sides to reduce bulk, not thinning shears.'
Transition styles to look good right now
You do not have to look like you are growing out a haircut while you are growing out a haircut. There are real styles that work at each stage and help you look intentional rather than in-between. These transition styles can make it much easier to grow a two block haircut through awkward phases.
- Soft side part with a tuck: once sides reach chin length, a deep side part with the shorter side tucked behind the ear reads as a relaxed, face-framing style.
- Curtain bang transition: asking your stylist to reshape a blunt bowl fringe into curtain bangs at around month three gives you a softer, more wearable look that continues to grow out gracefully.
- Slicked-back fringe: when the fringe is between cheekbone and chin length, slicking it back with a light gel or pomade gives a clean, put-together look that does not fight the length at all.
- Half-up with a clip: works from month three onward; gather the top section and fringe back, leave the sides and back down. Looks deliberate and keeps the fringe out of your face.
- Textured parted style: once sides are past the jaw, adding a small amount of matte paste or texture spray and working it through with your fingers gives a modern, undone look that is flattering at almost any in-between length.
- Hats and headbands: genuinely useful during months one and two when there are fewer real styling options. A fitted cap or a thin elastic headband is not giving up, it is just practical.
Other bowl-adjacent cuts like the wolf cut or the mod cut have their own grow-out paths, but the bowl cut is particularly challenging because the structured perimeter means there is no built-in forgiveness in the shape. Styles with more internal layers or graduation tend to grow out more naturally. If you are deciding between reshaping your bowl into something else before continuing to grow, something with graduation at the nape or internal layers will give you an easier middle stage.
Your next steps, stage by stage
Here is what to actually do starting today, depending on where you are in the grow-out. A mod haircut can grow out in a similar staged way, but you can keep it looking intentional by managing fringe, sides, and the perimeter as the length changes.
- If you are in week one to four: start shifting your part. Experiment with a side part or off-center part while hair is damp. Buy a set of small clips or a thin headband for the fringe. Do not go to the salon yet.
- If you are in month one to three: book a reshape appointment, not a trim. Brief your stylist clearly: soften the perimeter, no length removed from the fringe, light internal texture on the sides. Start the round-brush blow-dry routine for the sides and back.
- If you are in month three to six: ask your stylist about converting the fringe to curtain bangs. This is the single highest-value salon move during this stage. Begin thinking about your length goal and find a reference photo.
- If you are in month six to twelve: you are in the easier half now. Focus on end health, keep trims every 10 to 12 weeks, and start building toward your target style with a stylist you trust.
- If you are approaching month twelve and beyond: schedule a consultation, not just a trim. Talk about where you want to land, what shape that involves, and map out the last few steps together.
Growing out a bowl cut is a long game, but it is completely manageable if you stop thinking of it as 'not having a real haircut yet' and start treating each stage as its own style with its own logic. The awkward phases are real, but they are also short relative to the whole timeline. The readers who get through it most successfully are the ones who plan their trims, stay consistent with daily styling, and give themselves permission to look different for a while without deciding it is a disaster.
FAQ
How often should I get trims while growing out a bowl cut?
For a grow-out, the key number is how much you cut off in total, not how often. A safe default is to limit early cleanup trims to about 0.25 to 0.5 cm per visit, then reassess after 4 to 6 weeks. If you find yourself trimming to “fix” the same awkward issue repeatedly, that usually means you are cutting the wrong zone, for example trimming the perimeter when the real problem is bulk in the interior.
What should I do if my fringe is growing unevenly on one side?
If you can see unevenness, first compare it to the stage you are in. Uneven fringe is usually a placement and product issue during the early fringe phase, so try parting changes, lightweight styling, and a clip while damp. Only after the fringe is long enough to behave (around when it can be swept or tucked) does it make sense to request point-cutting or reshaping at the salon, otherwise you risk making the fringe shorter and extending the awkward period.
My sides keep flipping outward, what product mistakes should I avoid?
Don’t try to “hide” outward sides with heavy oils or thick creams, that tends to weigh hair down and exaggerate the flip. Use blow-drying with a medium round brush, roll the ends under, and let each side cool before releasing. If you still get a puff, ask for internal texture removal on the sides (bulk reduction), not thinning, because thinning can create flyaways that look worse than the flip.
Can I keep growing without cutting the perimeter every time?
If your goal is to reach a natural length, you can keep the grow-out moving without constantly trimming the perimeter. Ask the stylist for internal softening, gentle slide or point cutting to remove bulk, and minimal perimeter change early on. Save bigger shape changes, like converting to curtain-like fringe or transitioning to a lob, for when the fringe is long enough to blend into new face framing.
What should I bring to my stylist so I do not end up with a worse grow-out?
A good reference photo should show the specific end goal hairstyle and, ideally, a similar length on the sides and fringe. Bring one photo of the “target” plus one photo showing how you want the fringe to lay, for example swept, curtain, or tuckable. Also tell your stylist your timeline priority, keep length vs. reduce bulk, so they do not default to making the shape neat rather than growable.
What styling routine works best for early, mid, and late fringe phases?
Use a lightweight styling plan that matches the day’s issue. For early fringe days, use a small amount of matte paste or a light blow-dry spray from roots to ends, then train direction with parting and a clip while damp. For later tuck or sweep days, you can switch to a light gel or natural oil for polish, but apply it to the surface, not the roots, to avoid buildup that makes the fringe clump.
When is it okay to use a half-up style during the grow-out?
Yes, but timing matters. When the fringe is too short to tuck or sweep, a clean half-up can look odd because the perimeter still puffs. Wait until the fringe reaches a workable length (when it can be pinned back or swept) and then gather the top including the fringe into a small crown clip, letting the rest hang. This creates a deliberate silhouette while the sides catch up.
How do I deal with a cowlick at the fringe line?
If your cowlick pushes hair forward, parting is usually more effective than trying to override it with product. Part in the direction the cowlick naturally falls, then blow-dry that section first while damp, directing it where you want it and letting it cool in place. If the problem is stubborn, repeat the blow-dry routine for a few days rather than adding more product.
My left side is behind the right side, should I even it by trimming?
If one side is lagging, do not trim just to “even it up,” because that shortens your overall timeline. Instead, ask for a point-cut on the longer side at your next visit to reduce visual disparity while preserving length, and use parting adjustments to camouflage difference day to day. You can also clip the longer side temporarily while damp to balance the look.
What if it feels like my hair is not growing as fast as expected?
If your hair feels slower to grow, it is often damage-related breakage rather than true growth rate issues. Check for frequent dryness, heat damage, or rough detangling around the fringe and ends, then reduce friction, use gentler brushing, and focus on minimizing breakage before chasing faster growth with serums. Supplements rarely fix the problem if the main issue is hair snapping.
What happens if I accidentally trim too much during the first phase?
If you over-trim early, the most common risk is extending the awkward fringe phase because you keep shortening the part that has to pass the eyebrow length threshold. To recover, stop trimming that zone for a few weeks, focus on training direction with parting and clips, and schedule the next salon visit once the fringe is long enough to convert into a softer shape like curtain-like fringe or blended face framing.