You can grow relaxer out of your hair without cutting it. It takes patience, a protective routine, and some honest assessment of where your hair is right now, but thousands of people do it every year and come out the other side with healthy natural hair still attached to their heads. The key is managing the line of demarcation, keeping moisture and protein in balance, and styling in ways that reduce daily stress on the weakest point of your hair.
How to Grow Relaxer Out of Hair Without Cutting

Marcus Vickers
19 Jun 2026
What's actually happening during the relaxer-to-regrowth transition
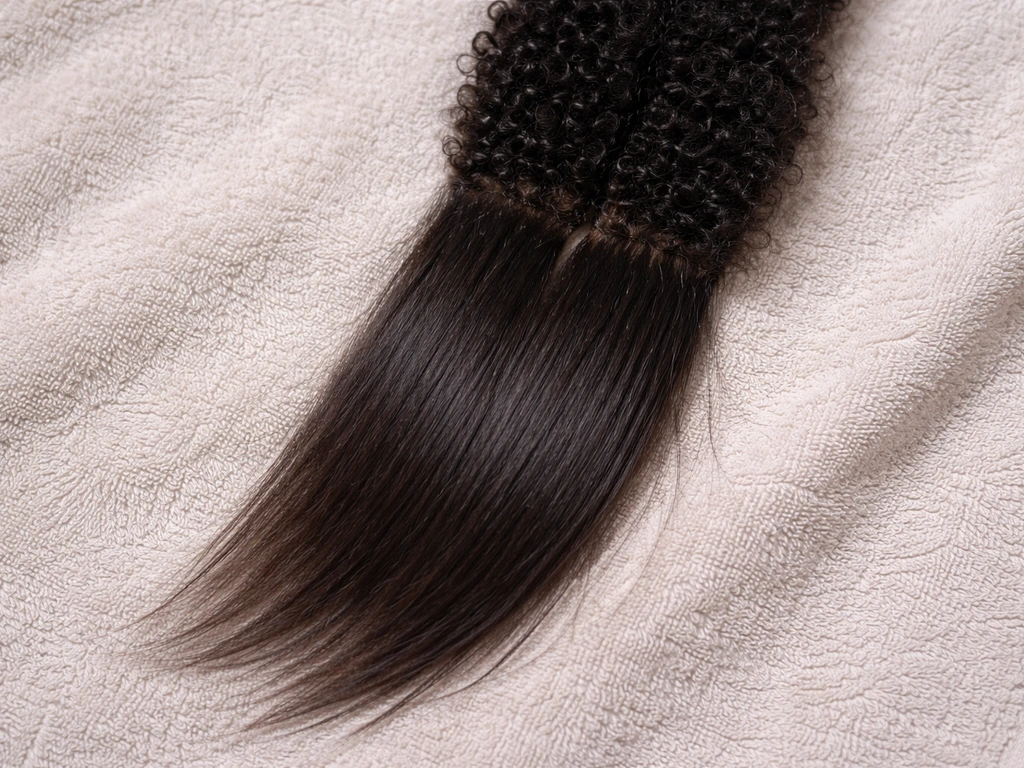
When a relaxer is applied, it permanently breaks and reforms the disulfide bonds in your hair strands, changing the protein structure and straightening the curl pattern. That change is irreversible. New growth coming in from your scalp has the original, untreated curl pattern with its natural strength and elasticity intact. The point where those two textures meet is called the line of demarcation, and it is genuinely the most fragile part of your entire hair strand.
The relaxed portion and the new growth behave differently when wet, when dried, when combed, and when stretched. The relaxed section is typically lower in elasticity because the chemical process permanently alters the hair shaft, which means it snaps more readily under tension instead of stretching and returning. The natural regrowth above it is springier and coarser, so when a comb hits that border, the two textures create friction and resistance right at the junction. That is where breakage clusters, and that is what you are managing for the entire duration of your transition.
This transition is the same fundamental challenge you face when growing out a perm, a texturizer, or any other chemical service, just with different textures meeting at the demarcation line. The longer you have been relaxing, the more length of relaxed hair you have to grow out, and the longer the transition window.
Assess your hair honestly before you start
Before you commit to a no-cut approach, spend ten minutes doing a real assessment. This is not about scaring yourself into a big chop. It is about knowing what you are working with so you can make a plan that actually works.
Check for damage at the demarcation line
Take a few strands and gently stretch them. Hair with healthy elasticity should stretch a little and then return to its original length without breaking. If a strand snaps immediately with very little pull, you have elasticity damage in the relaxed section. Also look at whether the hair is visibly thinner at the point where new growth meets old, or whether you can see little white dots along the strand (not at the root). Those are breakage points mid-shaft, not shedding. Shedding hairs have a white bulb at the root end; breakage snaps mid-shaft with no bulb present.
Identify your level of chemical processing
Ask yourself how long you have been relaxing, how frequently you were touching up, and whether you have had any overlapping applications or color on top of the relaxer. Overprocessed hair is noticeably dry and brittle, loses its shape quickly, and sheds in chunks rather than single strands. If your ends are at that stage, growing out without any trimming is harder but still possible with the right handling. If the damage is severe enough that large sections of the relaxed ends are already splitting or snapping, a single small trim can stop the damage from traveling up the shaft, but that decision is yours to make and it is not a requirement.
Do a quick porosity check
Drop a clean strand into a glass of room-temperature water. If it sinks quickly, your hair is likely high porosity, meaning it absorbs moisture fast but loses it fast too. If it floats for a while, it is likely lower porosity. Keep in mind this test is not perfectly reliable, but it gives a rough starting point. High-porosity relaxed hair (very common after repeated chemical processing) needs more sealing with oils and butters after moisturizing to hold that moisture in.
Building a protective care routine that supports growth without trimming
The single most important thing you can do right now is reduce how often your hands and tools touch that demarcation line. Mechanical stress, meaning pulling, combing, and friction, is the number one driver of breakage at the junction between your relaxed and natural hair. A protective routine is not complicated, but it does require consistency.
Wash day frequency
Washing less frequently is better for transitioning hair. Once per week or once every ten days is a good target for most people. Every wash day is a manipulation event where your hair gets wet, swells, is detangled, and dried, and each one carries breakage risk at the demarcation line. Use a sulfate-free or gentle shampoo on the scalp and let it rinse through the length rather than scrubbing the ends.
Deep conditioning is non-negotiable
Every single wash day should include a deep conditioning treatment. Not a rinse-out conditioner, a genuine deep conditioner left on for at least 20 to 30 minutes, ideally with heat. This is what rebuilds some of the flexibility in the relaxed ends and softens the new growth so the two textures behave a bit more like each other during detangling.
Stop all heat styling, at least for now

Heat is already one of the top causes of hair breakage and adds insult to injury on top of relaxer damage. Flat irons, curling wands, and even blow dryers on high heat make the relaxed ends more brittle and accelerate the snapping you are trying to prevent. If you are going to grow this out without cutting, air drying and heat-free styles are your default. If you need to use a dryer, use a diffuser or the cool setting only.
Night protection every single night
Cotton pillowcases create friction against your hair all night and wick moisture away from the relaxed ends. A satin or silk bonnet or pillowcase is a small investment that makes a measurable difference. Put your hair in a loose protective style before bed, either a loose bun, pineapple, or twists, and then cover it. This one habit alone can meaningfully reduce the breakage you find on your pillow in the morning.
Balancing moisture and protein to stop shedding and breakage
This is where a lot of people get it wrong. Relaxed hair and new growth have different protein and moisture needs, and you are managing both at once. Getting this balance right is what separates people who successfully grow out a relaxer from people who find themselves with thinning, snapping hair by month four.
What your relaxed ends need
Relaxed ends have permanently altered protein bonds, so they tend to benefit more from moisture-focused care: creamy deep conditioners, leave-in conditioners, and sealing oils like jojoba, castor oil, or shea butter. They can also benefit from occasional protein treatments to temporarily reinforce the weakened shaft, but too much protein is its own problem. Protein overload makes hair feel stiff and rigid, reduces flexibility, and can actually increase breakage.
Protein overload can make hair dry and brittle, and a sign to watch for is hair that feels stiff or rigid rather than elastic or flexible Protein overload can make hair feel stiff and rigid. If your hair starts feeling like straw after a protein treatment, dial it back and return to moisture-focused products.
What your new growth needs
Your natural regrowth is likely coarser and may be drier than the relaxed section, especially if your natural texture is type 4. It needs moisture and slip to stay manageable and to prevent it from locking up at the demarcation line. Moisturizing the regrowth while keeping the relaxed ends sealed is a daily practice, not a once-a-week thing.
A simple weekly balancing routine
- Wash with a gentle, sulfate-free shampoo, focusing on the scalp
- Follow immediately with a moisture-rich deep conditioner for 20 to 30 minutes
- Use a protein treatment once every 3 to 4 weeks, not every week
- Apply a leave-in conditioner to damp hair before any styling
- Seal with a lightweight oil or butter, paying extra attention to the relaxed ends
- Moisturize mid-week with a water-based spray and seal again if hair feels dry
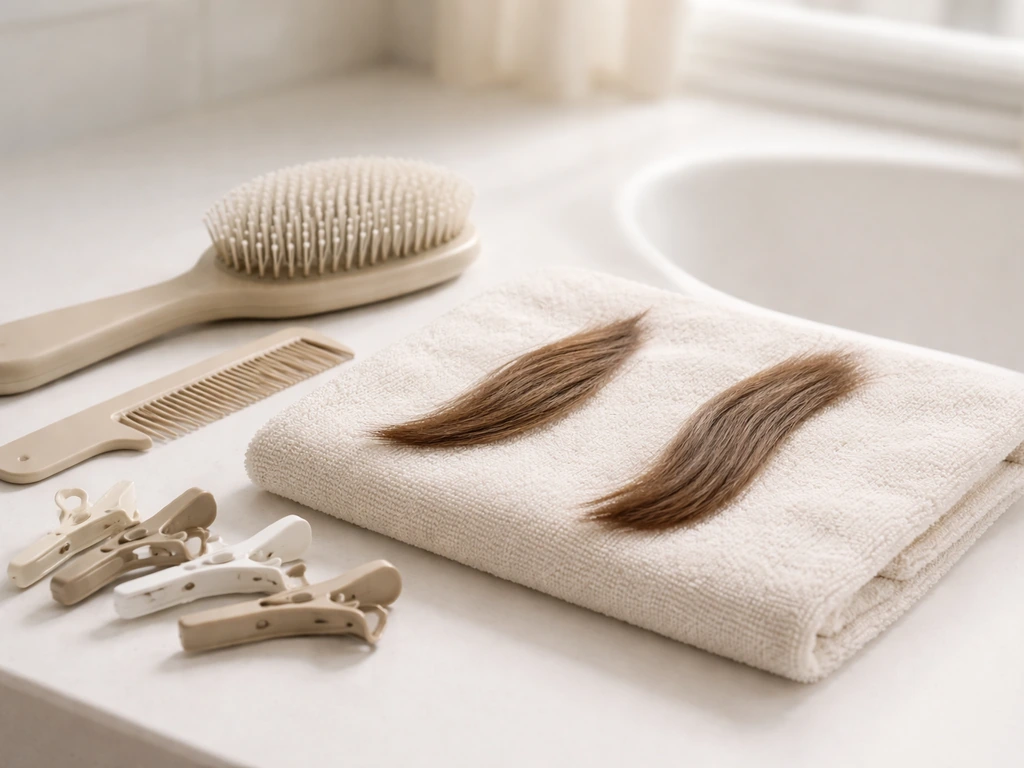
Detangling the demarcation line without snapping it
Detangling is the highest-risk moment for transitioning hair. The comb catches right at the line of demarcation almost every time because the natural curl pattern grips the tool while the relaxed section below wants to slide through. Here is how to get through it without creating breakage.
- Start with wet or damp hair, never dry. Dry detangling on transitioning hair causes significantly more breakage at the junction.
- Apply a generous amount of conditioner or a dedicated detangling product before you pick up any tool. You want serious slip.
- Divide your hair into four to six sections and clip or twist each one separately. Work one section at a time.
- Start with your fingers first. Finger-detangle gently from the ends upward before a comb ever touches the hair. This removes the larger tangles without the tearing a comb would cause.
- Then use a wide-tooth comb only, starting at the ends and working upward in small increments toward the root. Never start at the root and drag down through the demarcation line.
- When the comb reaches the demarcation line, slow down. Hold the hair below that point with your other hand to reduce tension on the junction as the comb passes through.
- Twist or braid each section as you finish it so it does not re-tangle while you work on the rest.
Avoid fine-tooth combs, paddle brushes, and boar-bristle brushes during this phase entirely. They create too much friction at the junction. A wide-tooth comb or a flexible detangling brush with widely spaced bristles is the right tool for this job.
Styles that let you grow out your relaxer without picking up scissors
The goal with styling during a no-cut transition is to keep the demarcation line protected, reduce daily manipulation, and create styles that look intentional even while two very different textures are doing their own thing. If you are wondering how to grow out relaxer successfully without rushing to cut, focus on protecting the line of demarcation and keeping daily manipulation to a minimum grow out a relaxer. There are more options than most people think.
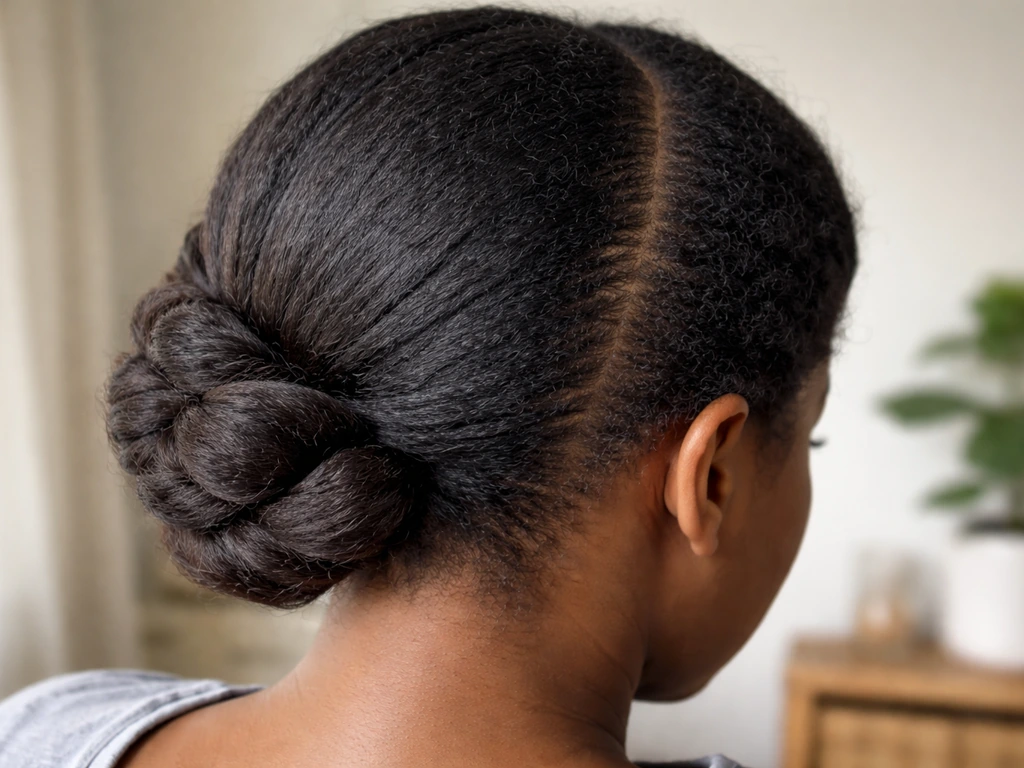
Buns and puffs
A low or mid bun is one of the best transitioning styles because it tucks the relaxed ends away and keeps them from rubbing against your clothing all day. Use a satin-covered scrunchie or a soft hair tie, never a tight elastic band. Keep the bun loose enough that you are not creating tension at the hairline or nape, and do not put the bun in the exact same spot every day or you will create a breakage ring.
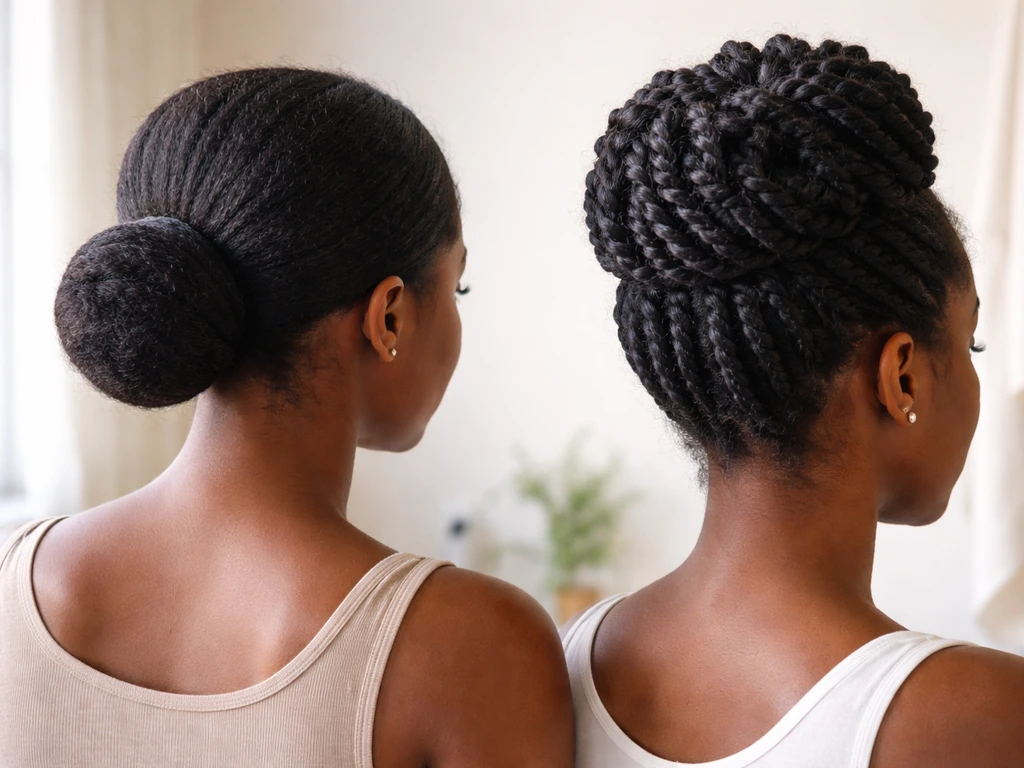
Twists and twist-outs
Two-strand twists work beautifully for transitioning hair because they keep both textures coiled together, which reduces friction at the demarcation line throughout the day. You can wear them as twists for several days, then unravel for a twist-out that blends the two textures visually. A small amount of curl cream or moisturizing gel applied during the twist helps both sections behave like a single texture when unraveled.
Braids and cornrows
Installed styles like box braids, cornrows, or flat twists are excellent for longer transitions because they protect the demarcation line for weeks at a time with minimal daily handling. Just make sure the tension at the install is not tight, especially at the hairline and edges, and that you are still moisturizing your scalp and the hair inside the style regularly.
Wash-and-go or braid-out blending
If your natural texture is loose enough, a wash-and-go with a defining cream can blend the two sections reasonably well in the early months. A braid-out is often a better option if your new growth is tightly coiled because it stretches the natural texture just enough to sit closer to the relaxed length. This is a common styling challenge, similar to what people encounter when growing out a perm, where two curl patterns need to coexist without looking like a mistake.
Protecting your edges
Edges are always the most vulnerable area during any chemical transition. Avoid styles that pull the hairline tight. Use a soft-bristle edge brush and a water-based edge control product rather than heavy waxes that require scrubbing to remove. At night, tie your edges down gently with a silk scarf before putting on your bonnet.
What to expect, month by month
Hair grows about half an inch per month on average. That is the number to keep in your head. The total time you need to transition without cutting is directly tied to how much relaxed length you currently have. Following these steps is a practical way to grow out relaxed hair to natural while minimizing breakage. Someone with two inches of relaxed hair is looking at four to six months of careful management. Someone with eight inches of relaxed hair may need a year and a half or more. Here is a realistic breakdown of the phases.
| Stage | Approximate Timeframe | What's Happening | Main Challenges |
|---|---|---|---|
| Early growth | Months 1 to 3 | 0.5 to 1.5 inches of new growth; demarcation line becomes visible | Detangling resistance at junction; adjusting to two textures |
| Mid transition | Months 3 to 8 | 1.5 to 4 inches of regrowth; natural texture becomes more dominant | Managing two very different textures; increased dryness at relaxed ends; styling blending |
| Late transition | Months 8 to 18+ | 4 to 8+ inches of regrowth; relaxed ends may be at mid-length or longer | Relaxed ends become more fragile and dry; breakage at demarcation line increases without consistent care |
| Final stretch | 18 months to 3+ years (without any cutting) | Majority of length is new growth; relaxed ends may be at tips only | Maintaining ends; temptation to trim increases; relaxed ends may be significantly more damaged than root section |
By months three to four, most people hit what feels like a wall. The two textures are dramatically different in behavior, the bun does not look as neat, and detangling takes twice as long. This is normal. It is not a sign you need to cut. It is the natural result of half your hair being one thing and half being another. This is also the phase where consistent protective styling pays off the most.
By months six to eight, your new growth has enough length that you have real styling options. Twists, braid-outs, and stretched styles become more versatile. The relaxed ends are still there but they are now a smaller proportion of your total hair length, and if you have been taking care of them, they are manageable.
The honest conversation about trimming
Skipping the scissors entirely is possible and many people do it successfully. But there is blank" rel="noopener noreferrer">a version of 'no cutting' that quietly becomes 'the relaxed ends are snapping off anyway, just not on purpose.' If you are finding significant breakage, visible thinning at the demarcation line, or your relaxed ends are splitting and fraying in ways that are traveling up the shaft, a single small micro-trim of just a quarter to half an inch can stop that damage from progressing and actually preserve more length than avoiding trimming altogether. If you are trying to keep shedding and breakage under control without trimming, also review the routine details in how to grow out a texturizer.
A micro-trim every three to four months is not a big chop. It is not starting over. It removes the most compromised portion of the relaxed end and prevents split ends from wicking damage up toward your stronger new growth. If your goal is to retain as much length as possible, one small strategic trim every few months is often more length-preserving than no trim at all, because breakage at the demarcation line is unpredictable and can remove far more than a trim would.
That said, the choice is yours. If you want to go fully scissors-free and are willing to manage the breakage through protective styling and consistent care, that is a completely valid approach. Just go in with realistic expectations: some length will be lost to natural shedding and some to breakage, and the goal is to keep the breakage low enough that your actual growth outpaces your losses.
Your starting point checklist
If you want to start today, here is what to do right now before anything else.
- Do not apply any more relaxer. The transition starts the moment you stop touching up.
- Do a stretch test and a visual check on your demarcation line so you know how fragile your hair is right now.
- Switch to a satin or silk pillowcase or get a bonnet tonight.
- Schedule wash days on a calendar, once every seven to ten days, and commit to deep conditioning every single time.
- Buy a wide-tooth comb if you do not already have one, and put away any fine-tooth combs.
- Stop all heat styling immediately.
- Choose one protective style that works for your current length and wear it consistently this first month.
- Track your growth with a photo every four weeks so you can see progress that might be invisible day to day.
FAQ
Can I really grow relaxer out without cutting at all?
Yes, but “no cut” works only if your relaxed ends are not already splitting and traveling upward. If you see rapid fraying at the demarcation line or noticeable thinning there, a tiny micro-trim can prevent the damage from outpacing your new growth. Many people choose scissors-free, then switch to a micro-trim once breakage becomes clearly progressive.
When is a micro-trim necessary, even if I don’t want to cut?
Consider it when you notice split ends on the relaxed portion that keep appearing close to the junction, or when elasticity tests fail on the relaxed strands consistently. Another trigger is “velocity,” if the same length loss shows up month after month despite gentle handling. A quarter to half inch trim is usually enough to remove the most compromised portion without resetting your progress.
How often should I trim if I’m trying to keep as much length as possible?
A practical schedule is every 3 to 4 months, only when you see active splitting or fraying. If your ends look stable and don’t feel rough or snaggy, you can stretch longer. The goal is to remove the weakest area, not to chase perfect ends every month.
What’s the fastest way to reduce breakage at the line of demarcation?
Stop making that junction the focal point during detangling. Detangle only when hair is thoroughly conditioned and very slippery, use a wide-tooth comb or flexible brush, and work in small sections rather than combing from ends to roots repeatedly. Also keep daily styles that hide the junction, like a loose bun or twists.
Is it better to detangle in the shower or before washing?
In most cases, detangling during or right after deep conditioning is safer because slip is higher and friction is lower. Detangle in small sections, start a few inches below the breakage-prone zone, and only move toward the demarcation line when the comb glides. If you feel resistance, stop and reapply conditioner or leave-in rather than forcing the pass.
How can I tell the difference between shedding and breakage more reliably?
Do a root-end check and a length check. Shed hair typically has a bulb at the root end, breakage usually snaps mid-shaft and looks shorter without a bulb. If you consistently find short pieces without bulbs near the junction, treat it as breakage and adjust handling and moisture-sealing, not just “growth routines.”
Should I use protein or is moisture enough during the transition?
Moisture is usually the foundation, but you may need occasional protein if elasticity is poor in the relaxed portion. Use protein in small, spaced doses, then switch back to moisture if hair starts feeling stiff, rough, or “too strong to bend.” If you overdo protein, the relaxed ends can become brittle and snap faster at the junction.
What can I do if my relaxed ends are high porosity and get dry quickly?
After moisturizing, seal the relaxed portion with a heavier layer like oils and butters to slow water loss, especially after washing. You may also benefit from a more structured wash cadence, with consistent deep conditioning and lighter daily misting or leave-in reapplication only where needed. Avoid soaking the demarcation line repeatedly if it triggers swelling and friction.
Are satin bonnets and pillowcases enough, or do I also need a protective hairstyle?
They help, but a protective style often does more. Bonnet or silk pillowcase reduces friction overnight, while a loose bun, pineapple, or twists reduce the number of times the relaxed ends rub and get manipulated. If you wake up to tangled hair at the junction, tighten the daytime protection, not just bedtime coverings.
How do I avoid “breakage ring” under my bun?
Don’t place the bun in the exact same spot every day, and keep tension low enough that your hairline and nape are not pulled. Use a satin-covered scrunchie or soft tie, and vary the direction of the bun (slightly higher or more off-center) to spread stress. If you notice thinning in one band, switch to twists or a different protective style.
Can I swim or tolerate water exposure while transitioning?
Yes, but plan for it because water plus friction can worsen breakage. Rinse promptly, apply leave-in and a light seal to the relaxed portion, and reduce detangling after the swim by keeping styles protected. If you use chlorine or saltwater often, consider a cap and a post-swim conditioning session to replenish moisture.
What if my natural regrowth is shrinking or looking uneven compared to the relaxed length?
That’s common, especially early when the natural texture coils more tightly. Instead of chasing equal length by frequent combing, use stretch-friendly but low-friction styles (braid-out, twists, or stretched wash-and-go options) and accept that visual mismatch often improves after several inches of regrowth. Track by growth at the scalp line, not only by how the ends “match” day to day.