Growing a quiff means getting the top of your hair to around 3–5 inches long, then styling it upward at the front and swept slightly back, while keeping the sides shorter. If you're starting from something like a pixie, buzz cut, or short crop, you're looking at roughly 6–12 months to reach a solid quiff. The awkward stages in the middle are real, but every single one of them is styleable if you know what you're working with.
How to Grow a Quiff: Timeline, Styling Tips, Products

Marcus Vickers
10 Jun 2026

What a quiff actually is and what hair can pull it off
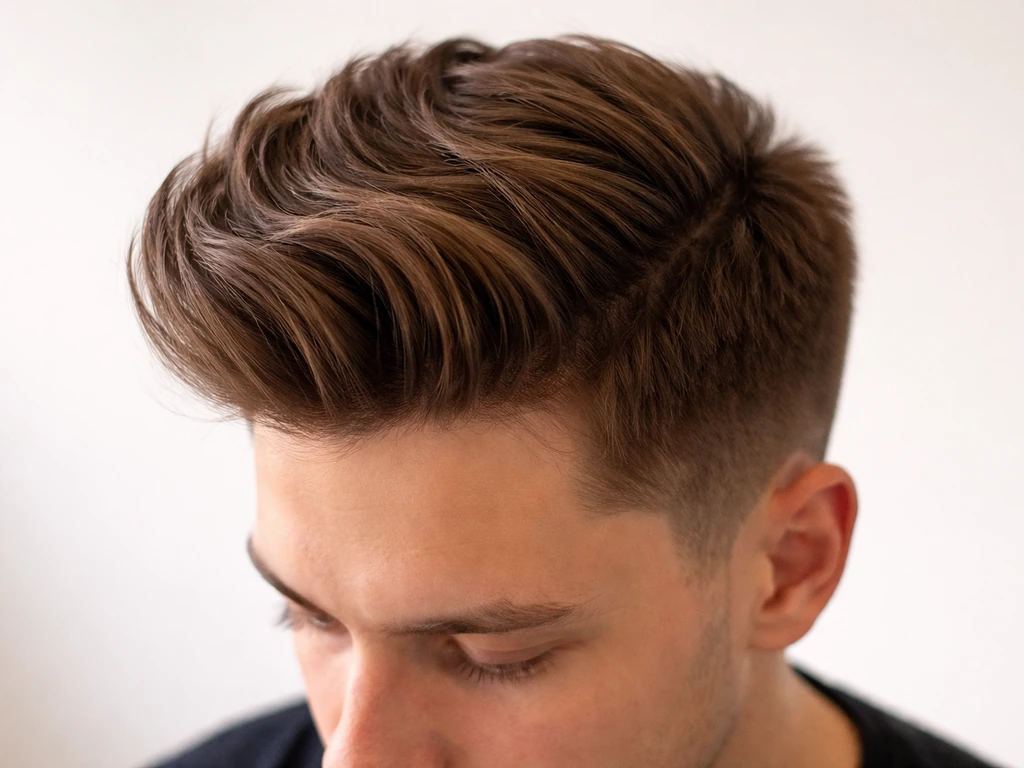
A quiff is longer hair at the front that lifts upward first, then sweeps back, fading or tapering into shorter hair at the sides and back. The volume is distributed across the top rather than concentrated right at the hairline like a pompadour. That distinction matters: a pompadour is a more swept-back, rolled wave from the hairline, while a quiff has a softer, more forward-leaning lift. Both styles share DNA, but the quiff is generally more wearable for everyday use and less demanding to maintain.
Almost any hair type can work for a quiff, but the approach differs depending on what you've got. Thick and straight hair holds shape easily but can go flat at the roots. Fine hair needs volume-building products and technique to fake the lift. Wavy or slightly coarse hair actually has a natural texture advantage because it grips product better. Curly hair can do a beautiful textured quiff but needs more length at the top to account for shrinkage. The target length on top is 3–5 inches for a classic quiff shape, though you can get a convincing mini version around 2.5 inches if your hair has natural volume.
Step-by-step: growing your hair out to quiff length
Hair grows at roughly half an inch per month on average, so your timeline is almost entirely determined by where you're starting from. Here's how to think about it based on your current length.
| Starting point | Approx. current top length | Time to quiff-ready length |
|---|---|---|
| Buzz cut / very short crop | Under 0.5 inch | 10–14 months |
| Short pixie or textured crop | 1–1.5 inches | 7–10 months |
| Longer pixie or short undercut | 2–2.5 inches | 4–6 months |
| Bob, lob, or medium length | 3+ inches | Already there or 1–3 months away |
The key rule during grow-out is to resist cutting the top. The sides and back can and should be trimmed to stay neat, but your top length is precious and every half inch matters. Growth is rarely perfectly even either: the front often grows faster than the crown, or one side outpaces the other. That's completely normal. Resist the urge to even everything out by cutting the front shorter. Instead, use product and direction to disguise any unevenness while the rest catches up.
If you're growing out an undercut or a fade, the sides will go through a noticeably patchy phase around months 2–4 where the disconnection is obvious. If you want the grow-out to end with a full afro instead of fading back in, focus on keeping more length on the sides while training the shape with your routine under cut or a fade. Regular taper trims (not taking length off the top, just blending the sides) every 6–8 weeks will keep that transition looking intentional rather than neglected. This applies equally whether you're growing out a faded undercut, a cropped pixie, or anything with a short side situation.
Styling at each awkward stage
This is where most people give up and cut their hair short again. Don't. Every stage has a working style if you approach it right.
Stage 1: Under 1.5 inches on top (months 1–3 from buzz/pixie)
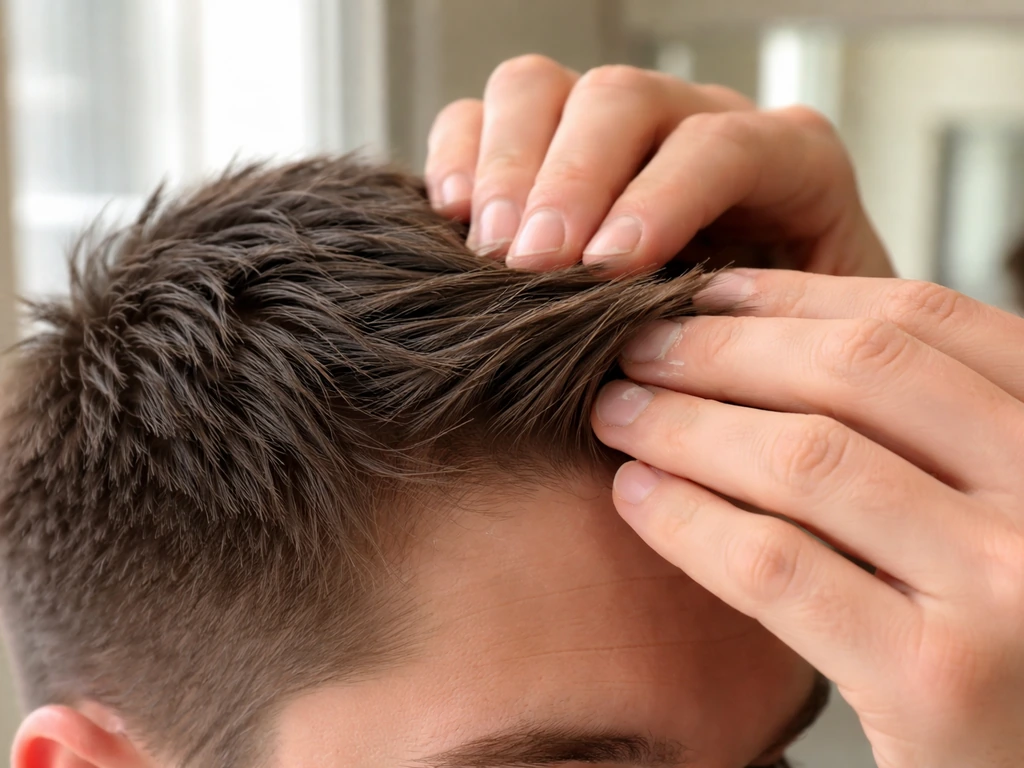
At this length you can't really do a quiff yet, but you can start training the hair to go in the right direction. Use a small amount of lightweight clay or wax to push the front section upward and very slightly back every day after showering. The muscle memory of the hair growing in that direction genuinely helps later. Keep the sides tightly faded or tapered so the top looks intentionally longer by contrast.
Stage 2: 1.5–2.5 inches on top (months 3–6)
This is the most frustrating stage because you have enough hair to want a quiff but not quite enough to make it behave. The front won't fully stand up yet and the sides look scruffy if you ignore them. Your best move here is a textured, slightly disheveled quiff: use a round brush or your fingers during blow-drying to push the front section up and back, then set it with a medium-hold matte clay. It won't look polished, but it will look intentional. If you're growing out a fringe at the same time, this is the stage where the bangs length starts to cooperate with the quiff shape, so lean into it. If you’re growing a fringe male, the same rules apply: train the front to lift and direct the style with product as your length comes in growing out a fringe. If you're wondering how to grow a fringe out into your quiff shape, the same patience and styling direction apply.
Stage 3: 2.5–4 inches on top (months 6–10)
This is where the quiff starts to actually look like a quiff. You have enough length to create real lift and the front can start to sweep back properly. Blow-drying with a round brush becomes essential at this stage. You can now also add layers if the top is feeling heavy and flopping forward rather than lifting, but ask your stylist specifically for a layered quiff shape rather than just a trim. Keep refining the taper or fade on the sides every 6–8 weeks.
Stage 4: 4–5+ inches on top (months 10–14)
Full quiff territory. At this length you can style a classic lifted quiff, a textured modern version, or even a slicked variation depending on the product you choose. The challenge now is weight: longer hair on top can fall flat without the right product and blow-dry routine. This is where technique and product choice become the main variables.
The right products and tools for volume and hold
A quiff lives or dies on its root lift and hold. Here's how to build both.
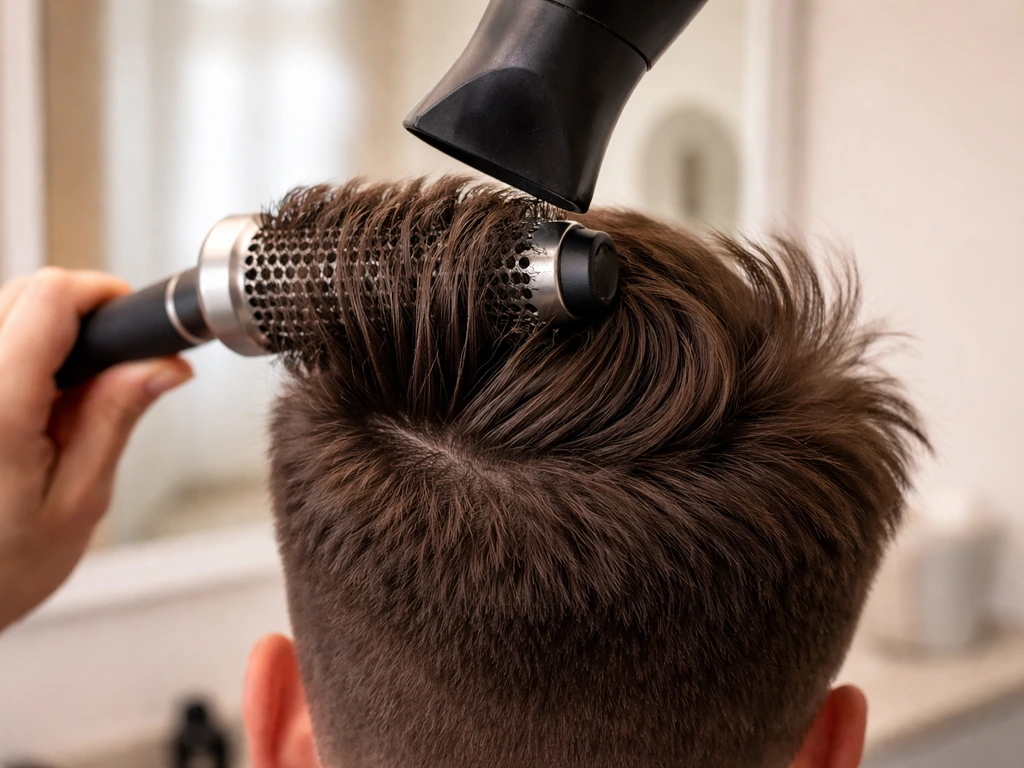
The blow-dry routine that actually creates lasting volume
Start with hair that's about 80% dry from towel drying. Apply a lightweight mousse or volumizing spray to the roots while the hair is still damp. Then section the top from the sides and work section by section: place your round brush at the root of each section, roll it slightly upward to create tension at the root, and direct the airflow down the hair shaft as you lift. When each section is dry, hit it with the cool shot on your dryer to lock the shape in place. This step is easy to skip but makes a real difference in how long the lift lasts through the day.
For the front section specifically, use your non-dominant hand to push the hair upward at the root while the brush and airflow work together to set it in that lifted position. Finish the front section last, blast it with cool air, and let it cool completely before touching it. Touching warm hair collapses the volume you just built.
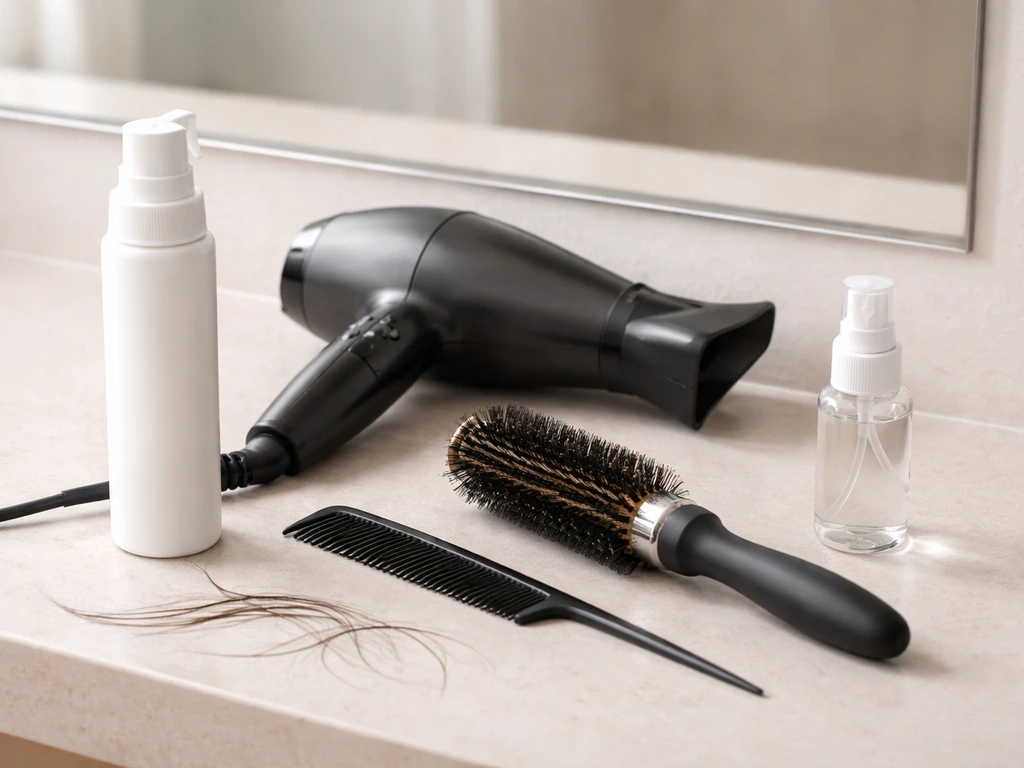
Choosing between wax, clay, and cream
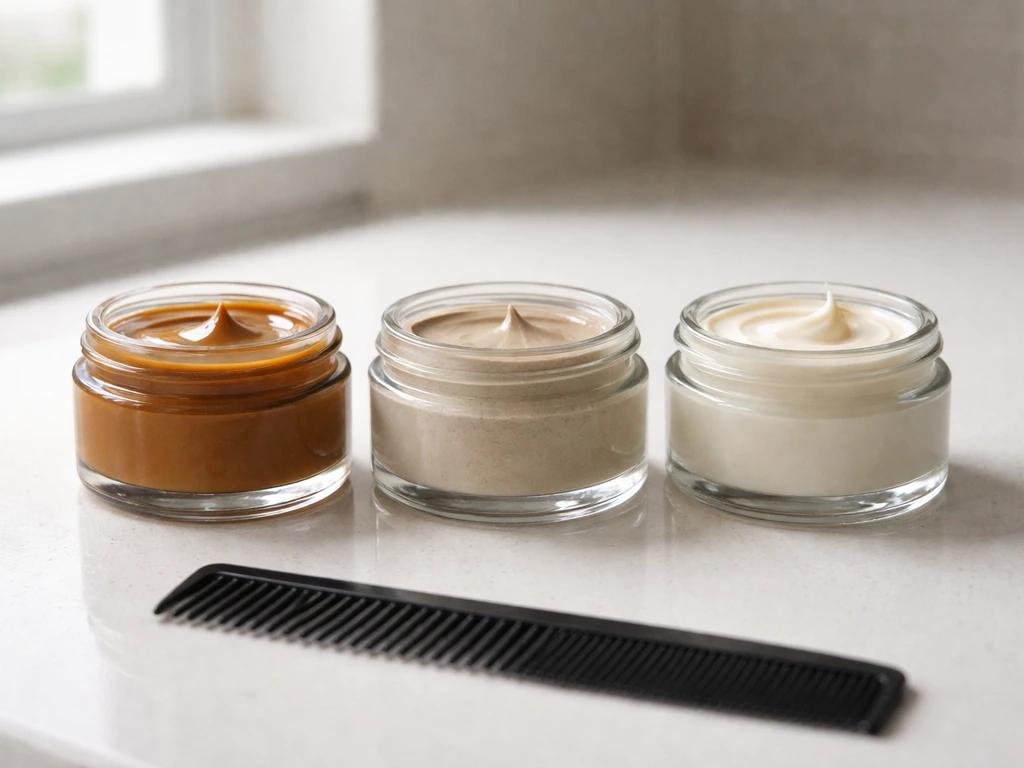
The finish and hold level you want determines which product to reach for. Here's a straightforward comparison:
| Product type | Hold level | Finish | Best for |
|---|---|---|---|
| Matte clay (e.g. Reuzel Clay) | Medium | Matte | Textured, natural-looking quiff; fine to medium hair |
| Pomade (water-based) | Medium–strong | Shine to semi-shine | Sleek or classic quiff; thicker hair |
| Wax | Light–medium | Semi-matte | Short to medium quiff stages; add texture without stiffness |
| Styling cream | Light | Natural | Wavy or curly quiff; frizz control and definition |
| Mousse | Light–medium | Natural to light shine | Volume building on fine hair; use before blow-drying |
A matte clay is the most versatile everyday option for a modern quiff. It gives you enough hold to maintain lift without making the hair look overdone. Use a pea-sized amount, warm it between your fingers, and work it through the hair after blow-drying rather than before. Adding product to dry styled hair preserves volume better than applying to wet or damp hair.
Always use a heat protectant spray before blow-drying, especially if you're using a round brush with high heat regularly. It's a 5-second step that stops cumulative damage that would eventually make your hair harder to style.
Smart trims that help the quiff without losing length
The biggest mistake during a quiff grow-out is avoiding the salon entirely to preserve every millimeter of length. That strategy backfires because split ends, uneven growth, and weight accumulation at the ends all make the hair harder to style and slower to appear longer. Strategic trims actually help.
Aim for a trim every 6–8 weeks. Hair.com by L’Oréal notes that shorter or styled hair often needs trims about every 6 weeks to maintain its shape, while longer, thicker, or curly hair can usually go 3 to 6 months between trims. Tell your stylist you're growing a quiff and that you want to keep length on top. Be specific: no more than half an inch off the top, if anything at all. What you do want them to work on: the taper or fade on the sides and back, a light layer through the mid-section of the top to remove weight without reducing length, and a neckline cleanup to keep the back looking intentional. If you're in the stage where the top is flopping forward rather than lifting, ask for a disconnection layer that removes some interior weight while keeping the surface length intact.
For people growing out a comb over or a flat top into a quiff shape, the principles are similar: protect top length, blend the sides regularly. The main difference is that a flat top grow-out often has more evenly distributed length already, while a comb over grow-out may need more directional training toward the quiff's front-lifting shape. If you want a different direction than the classic quiff, see how to grow a flat top for a more evenly shaped top with a similar grow-out patience.
Common problems and what to actually do about them
Cowlicks fighting your quiff direction
A cowlick at the front hairline is the most common quiff enemy. The hair grows in a direction that opposes the lifted, swept-back shape you're trying to create. The fix is consistency and heat. Apply a root spray or volumizing spray directly to the cowlick area while the hair is damp, then use your blow-dryer and round brush to physically push the hair against its natural direction while drying it under tension. Use the cool shot to lock it in place. Done consistently every day for a few weeks, you can train a cowlick to behave significantly better. It won't fully disappear, but it will stop being the dominant force.
Thin or fine hair that won't hold volume
Fine hair needs volume to be built in layers, not added as an afterthought. Start with a volumizing mousse on damp hair at the roots, blow-dry with the root-lifting technique described above, use the cool shot obsessively, and finish with a lightweight matte clay rather than a heavy pomade. Heavy products collapse fine hair immediately. Also consider a volumizing dry shampoo at the roots after styling: it adds texture and grip that help fine hair stay lifted for much longer.
Frizz and flyaways breaking up the quiff shape
Frizz during grow-out is usually a combination of damage, dryness, and friction. A satin pillowcase makes a surprisingly real difference here: the smoother surface reduces the overnight friction that roughens the hair cuticle and causes frizz by morning. Beyond that, always dry hair with a microfiber towel or an old cotton t-shirt rather than a regular towel, and make sure your blow-dry is finishing sections fully dry rather than leaving them slightly damp. A small amount of styling cream or a tiny drop of hair oil smoothed over the surface of a finished quiff will tame flyaways without flattening the shape.
Flat roots despite all your effort
If your roots are consistently flat by mid-afternoon, the issue is usually one of three things: applying product too close to the root before drying (which weighs the root down before it can set), not using the cool shot to lock the shape, or hair that's too long at the top without layers to remove some of the weight pulling it down. Address the technique first, then consider a layering appointment if the technique is already solid.
Realistic timeline: when your quiff will actually look right
Here's an honest month-by-month picture based on a starting point of a short crop or pixie (roughly 1 inch on top) and average growth of half an inch per month.
- Month 1–2: Top is 1.5–2 inches. No real quiff yet. Focus on daily directional styling and keeping sides tidy. This is the stage that feels the most discouraging.
- Month 3–4: Top is 2–3 inches. A mini textured quiff starts to be possible with a blow-dryer and clay. The front section can lift slightly. Sides need a taper trim to stay intentional-looking.
- Month 5–6: Top is 2.5–4 inches. A clear quiff shape is achievable. Volume is real but may still flop by end of day. This is where product choice and blow-dry technique start to matter a lot.
- Month 7–9: Top is 4–5 inches. Classic quiff territory. You can now create strong lift, shape, and hold. This is usually the sweet spot for most quiff styles.
- Month 10–14 (from buzz/very short): Full quiff with length to spare. You can now choose a longer, more dramatic version or trim to maintain a precise quiff shape.
Maintenance once you've reached your quiff length is straightforward: a trim every 6–8 weeks to maintain the taper on the sides and remove any dead weight from the top, plus your daily blow-dry and clay routine. If you're managing colored hair or a chemical service during this grow-out, keep up with toning or gloss treatments to prevent the grow-out line from making the hair look neglected, since a patchy color contrast at the root will undermine even a perfectly styled quiff.
The most important thing to hold onto when you're in month 3 staring at hair that doesn't look like anything yet: the awkward stage is not a sign you're doing it wrong. It's a sign you're doing it right and just haven't reached the finish line yet. Keep the sides clean, style every day to train the direction, and give the top the length it needs. If you want to know how to grow a jewfro, the same patience and daily conditioning habits apply while you build length and shape train the direction. The quiff will get there.
FAQ
Can I grow a quiff if my hair is very short, like under a half-inch on top?
You can start the training, but you cannot build a true quiff until the top is long enough to be lifted and brushed. At that very short stage, focus on keeping the sides tighter with periodic taper trims and use only a light, directional product after showering so you do not weigh the roots down while you wait for workable length.
Should I stop styling on days I do not blow-dry?
Not necessarily, but you should switch goals. On non-blow-dry days, use a tiny amount of lightweight matte product to re-direct the front section, then air dry while keeping hands off until it sets. If you skip totally, the lift you created will usually collapse faster, especially with fine or wavy hair.
How do I prevent split ends and breakage from slowing down my quiff growth?
Use strategic trims on a 6–8 week schedule, and treat the top with more care than the sides. Avoid piling heavy product on the ends, and keep heat protectant consistent, then prioritize fully drying each section so you do not leave hair damp at the cuticles, which can increase frizz and tangling.
What if my top grows long but it still won’t lift, it just falls forward?
First check technique, especially whether you are lifting at the root and using cool air to lock it. If technique is solid, the next variable is weight, ask for a light interior disconnection or targeted layering that removes bulk while keeping the surface length so the front can stand up.
How much mousse or clay should I use so the quiff stays light and not greasy?
For most people, start with a pea-sized amount of matte clay and only add more if the hair is very thick or very unruly. For mousse, use enough to coat the roots without soaking the mid-lengths, because extra product through the hair shaft is a common reason for flat roots and stiff, chalky texture.
Is a blow-dryer always required for a quiff?
For most hair types, yes if you want consistent lift, but you can reduce frequency. If your hair naturally has volume, you can refresh with directional training and a small amount of product on off-days. For fine hair or cowlick-prone front hairlines, skipping heat entirely usually means the quiff shape will not hold.
How do I deal with an obvious cowlick on one side of the front?
Treat it like a root-lift problem rather than a styling problem. Apply volumizing spray to the cowlick zone while damp, then dry under tension with a round brush, pushing the hair toward the lifted direction. Focus on locking with cool air on that side last, so the cowlick has less chance to revert.
My sides look patchy during an undercut or fade grow-out, what should I do instead of cutting the top?
Keep the top untouched and book taper trims every 6–8 weeks to blend the sides, but do not try to “correct” unevenness by shortening the front. If you want the grow-out to end as a fuller look, keep more side length and train the shape with your routine rather than removing the top to compensate.
Can I grow a quiff while I am also growing out bangs or a fringe?
Yes, and the awkward middle is where it helps most. Train the bangs to lift and sweep back using the same root-direction styling, then progressively let the bangs meet the lifted top as length comes in. Expect the fringe to feel messy first, that is normal, keep the sides tapered so contrast helps the quiff read.
What’s the best product order: mousse first, then clay, or the other way around?
Mousse or volumizing spray goes on damp hair at the roots before you blow-dry, then clay is for after drying to control texture and hold. Putting clay on damp hair or applying product too close to the root before drying is a common mistake that collapses the lift before it sets.
How do I keep my quiff looking good if my hair gets oily quickly?
If roots get flat by afternoon, reduce how much product you apply near the scalp and make sure you lock with cool air. You can also use a volumizing dry shampoo at the roots after styling to add grip and absorb oil without redoing the full blow-dry.