Trimming your hair while growing it out does not make it grow faster, hair grows from the follicle at roughly 0.6 to 1.5 cm per month no matter what you do to the ends. What trimming does is remove split ends before they travel up the shaft and break off, so more of the length you already grew actually stays on your head. That's the whole idea: protect your progress instead of losing it to breakage. Done right, a home trim every 8 to 12 weeks, removing as little as a quarter-inch, keeps your ends healthy without sacrificing the length you've been working for.
How to Trim Hair to Grow It Out: DIY Steps

Marcus Vickers
29 Apr 2026
Why trimming helps you keep length (even though it can't create it)
Split ends are a structural problem. Once a hair strand splits, it can't seal itself back together, the only fix is cutting above the damage. If you leave splits alone, they travel up the shaft over time, and the hair eventually snaps off much higher than it would have if you'd just caught it early. That's the source of the feeling that your hair "isn't growing", it is growing, but it's breaking off at the ends almost as fast. Regular tiny trims stop that cycle. A dermatologist cited by The Washington Post puts it plainly: trims help preserve length and reduce breakage even though they don't directly speed up the biological growth process.
Heat damage and chemical treatments, color, bleach, relaxers, accelerate split-end formation because they weaken the hair's structure. If you're growing out color-treated or heat-damaged hair, your ends are more fragile than average and will need attention sooner. That's not a failure, it's just physics.
How often to trim based on where you are in the grow-out
There's no single right answer, but there are solid starting points. If you want a quick starting point for timing and technique, also see the guide on how to cut hair to grow it out. The phase you're in and how fast your ends deteriorate matter more than following a strict calendar.
| Growth Phase | Hair Length | Recommended Trim Interval | How Much to Remove |
|---|---|---|---|
| Early grow-out (pixie, buzz, undercut) | Under 2 inches | Every 8–10 weeks for shape; skip if no splits | 1–2 mm dust, or just shape the outline |
| Mid grow-out (chin to shoulder) | 2–6 inches | Every 8–12 weeks | Quarter-inch to half-inch |
| Later grow-out (shoulder+) | 6+ inches | Every 10–16 weeks | Quarter-inch to half-inch |
| Color-treated or heat-damaged ends | Any length | Every 6–8 weeks | Dust only: 1–4 mm above visible damage |
| Maintaining a shape (bob, lob) | Any length | Every 6–8 weeks | Quarter to half-inch to hold the line |
If your ends look frayed, feel rough when you run fingers up the strand, or snag when you detangle, that's your signal to trim, don't wait for the calendar. If your ends look smooth and clean and there's no breakage, you can push the interval longer. Growing out choppy layers or a mullet transition often means you'll want slightly more frequent clean-ups to keep the shape looking intentional rather than accidental.
How to trim your own hair at home without cutting too much
What you actually need
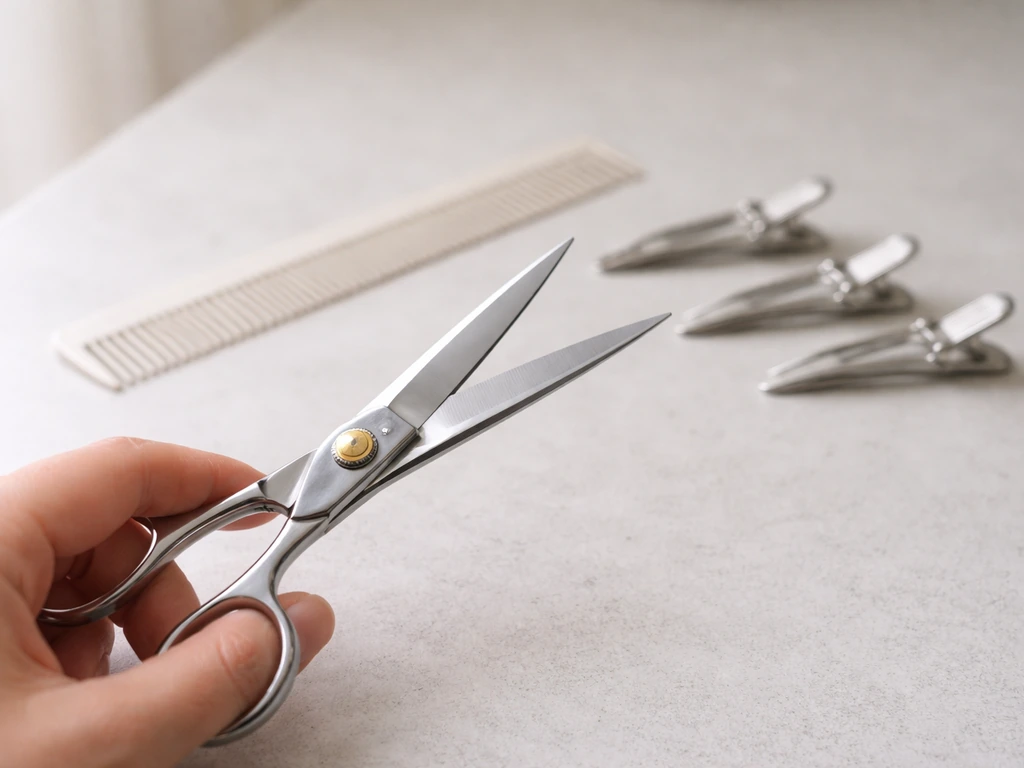
- Sharp hair-cutting shears—not kitchen scissors, not craft scissors. Dull blades crush the hair shaft and create new split ends the moment you cut.
- A fine-tooth comb and sectioning clips
- Good lighting—natural daylight or a bright overhead light aimed at your work
- A 3-way or handheld mirror for checking the back
- A spray bottle if you're working on straight or wavy hair
Wet vs. dry: which is better for DIY trims?
For straight hair, trimming on towel-dried (not soaking wet) hair works well, the hair lies flat and you can see the line clearly. Fully saturated hair is more fragile and can stretch, making your cut appear shorter once it dries than you intended. For wavy and curly hair, the shrinkage factor is a real issue: cutting while wet or fully stretched can lead to a much shorter result once the curl springs back. The safest approach for curly and coily hair is to trim when dry, working with the natural curl pattern so you can see exactly where the damage is and how much you're actually removing. If you're a Black man wondering which haircut works best while you’re growing out length, choose a style that reduces breakage and keeps your ends looking clean as it transitions best haircut to grow out hair black male.
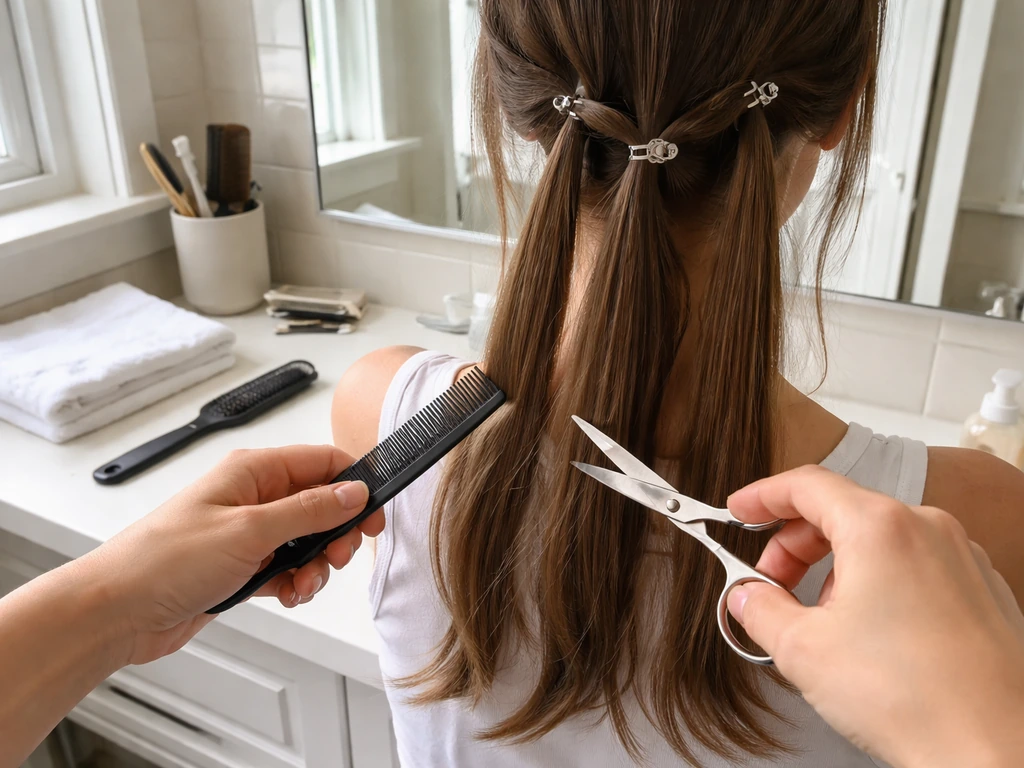
Step-by-step home trim
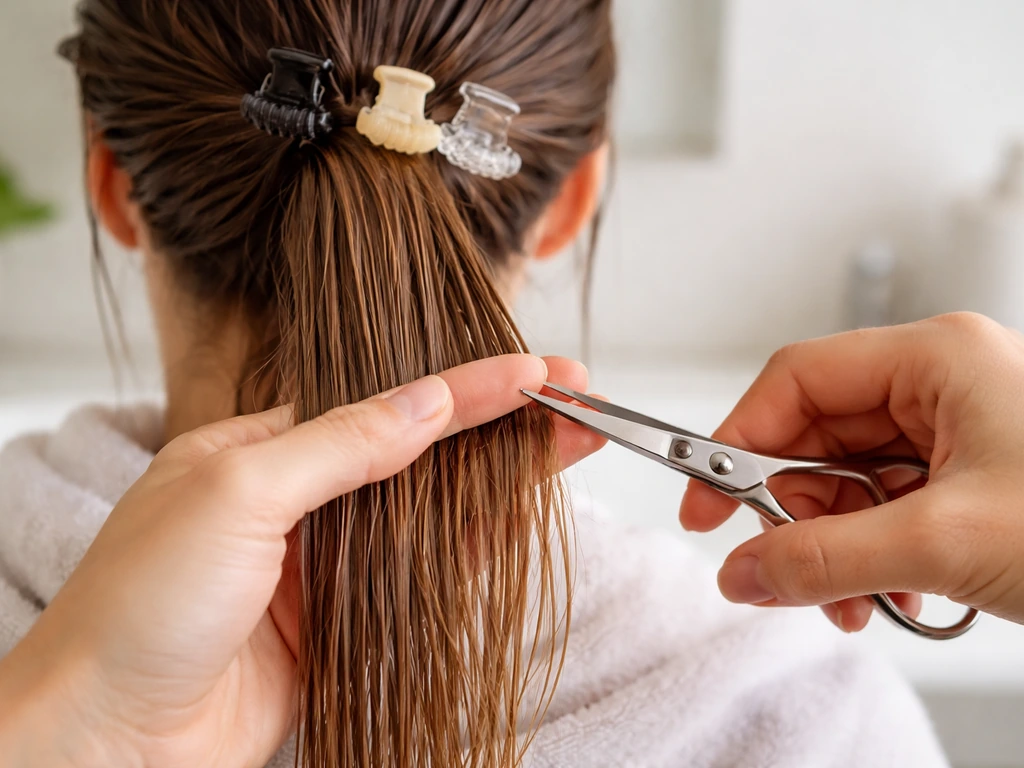
- Wash your hair and let it dry to the state you'll be cutting it in—towel-dry for straight/wavy, fully dry for curly/coily.
- Detangle gently before you start. Knots pulled taut across the blade change where the cut actually lands.
- Section your hair into four parts: left front, right front, left back, right back. Clip three sections out of the way and work one at a time.
- For each section, comb the hair smooth, hold it between two fingers, and slide your fingers down to just above where you want to cut. Use the previously cut section as your guide so length stays consistent.
- Cut straight across or at a very slight angle—parallel to your fingers. Small, deliberate snips are safer than one big slice. Remember: you can always take more, you can't put it back.
- Release the next section and compare it to the first before cutting. This is your check against uneven ends.
- For the back, use your 3-way mirror setup. Bring the back sections forward over each shoulder to trim if you can't see well enough in mirrors—it's not perfect, but it's better than guessing blind.
- Once all sections are done, dry and style as normal, then look at the overall line in good light. Make any tiny corrections now while the context is fresh.
What to actually cut: split-end dusting vs. a real trim
There's a meaningful difference between dusting and trimming, and it matters when you're trying to preserve every millimeter. Dusting is a targeted snip, often a quarter-inch or less, aimed only at the visibly damaged tips. You're snipping just above the split, not reshaping the whole hem. A trim removes more (typically half an inch to two inches) and resets the overall line. When you're in the middle of a grow-out, dusting is usually what you want most of the time, with a real trim only when the ends have genuinely deteriorated across the board.
Straight hair
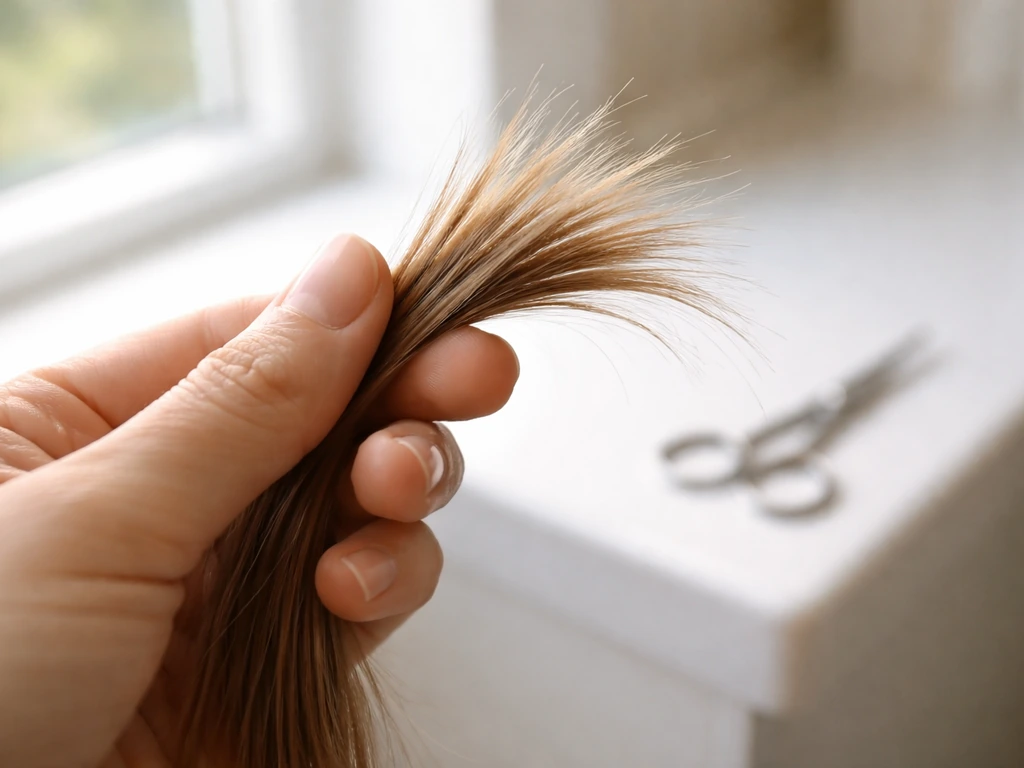
Straight hair shows split ends and uneven ends most clearly, which is actually helpful for DIY work. Hold sections up to the light and look for white specks, fraying, or strands that are thinner at the tip than mid-shaft. Snip just above where the strand looks different. Because straight hair has no shrinkage, what you see wet is close to what you'll see dry, just avoid soaking wet to prevent stretching.
Wavy hair
Wavy hair splits similarly to straight hair but has some shrinkage when it dries into its wave pattern. Trimming on towel-dry hair with the wave forming is a good middle ground, you can see the real shape while still being able to see split ends clearly. Account for a small amount of shrinkage (maybe 10–15%) if your waves are pronounced.
Curly and coily hair
Curly and coily hair shrinks dramatically as it dries, the curlier your pattern, the more length disappears. Cutting while wet or stretched can give you a result that's an inch or more shorter than you planned once it dries. Work through dry, fully defined curls section by section, unraveling each curl gently to spot damage and snipping just above it. This is sometimes called micro-dusting, and it's the most length-preserving approach for tightly coiled textures. Take your time, rushing is how you accidentally remove too much.
Styling through the awkward stages while you grow

Trimming keeps your ends healthy, but it doesn't solve the awkward-phase problem on its own. Here's what actually helps at each common trouble spot.
Growing out bangs
The itchy-forehead stage (roughly 2–4 months in) is the hardest. Trim bangs straight across to keep them neat and out of your eyes if you can't stand them yet, or start pushing them to the side with a little product once they hit eyebrow length. Curtain bangs are a forgiving transition shape, they blend into the sides as they grow. Curtain bangs are a forgiving transition shape, they blend into the sides as they grow best haircuts to grow out hair. Bobby pins, clips, and headbands are your friends during this stretch.
Growing out layers
Layers grow out at the same rate as the rest of your hair, so shorter layers gradually catch up with longer ones, it just takes patience. In the meantime, blunt-style the ends to make them look intentional. A little texturizing product or mousse can blend the length differential visually. Resist the temptation to cut all the shorter layers to match the longest layer, because that just shortens everything.
Growing out an undercut
The undercut grow-out is genuinely one of the trickier transitions because the shaved or very short section underneath creates a visible gap in density as the top grows. The trick is to let the underneath grow without trimming it back, while keeping the top length as-is or very gently shaped. As the two lengths get closer to each other, you can start blending. In the meantime, styling the top section down and back helps disguise the line.
Growing out a mullet or bob
Both involve an uneven perimeter. With a mullet, the front and sides eventually catch up to the back, keep the back trimmed only for split ends, not for length, and let the front grow freely. With a bob, the weight line at the back can look blunt and heavy as the sides grow. Soft trims to blend the back corners can help this look less abrupt during the transition.
Realistic timeline: what to expect month by month
Hair grows roughly half an inch per month on average, which works out to about 5–6 inches per year. That's the baseline. Some people grow slightly faster, some slower, and factors like diet, stress, and hormones can influence it, but the range is roughly 0.6 to 1.5 cm per month for most people.
| Month | Approximate New Growth | What You'll Notice | Trim Needed? |
|---|---|---|---|
| Month 1–2 | Half to one inch | Pixie/buzz starts to look shaggy; bangs hit the brow | No, unless shape is a problem |
| Month 3–4 | 1.5–2 inches total | Awkward in-between length; layers start separating | Maybe—dust split ends only |
| Month 5–6 | 2.5–3 inches total | Chin-area length for short starts; bangs past the eyes | Yes, one light dust or trim |
| Month 8–10 | 4–5 inches total | Approaching lob/shoulder territory from a pixie | Trim every 8–12 weeks |
| Month 12+ | 5–6 inches total | Shoulder length from very short; mid-back from a bob | Maintain every 10–16 weeks |
These numbers assume you're keeping split ends in check. If you're not trimming at all and your ends are damaged, you may feel like you're stuck at the same length for months, because breakage is eating the new growth. That's the whole reason this matters.
To decide when your next trim is due: look at the ends closely in good light. For the best days to cut hair to grow, plan your trim around when your ends already show fraying or snags so you protect your length without adding unnecessary cuts. If you see fraying, white dots at the tips, or hair that snags when you run fingers through it, it's time. If the ends look smooth and clean, push the interval another two to three weeks and check again.
Mistakes that will set you back (and how to fix them)
Using dull or wrong scissors
This is the most common DIY error. Kitchen scissors and craft scissors crush hair instead of cutting it cleanly, which creates new split ends right at the cut site. Invest in a proper pair of hair-cutting shears, you can get a decent pair for under $20, and use them only on hair.
Cutting too much at once
When you're frustrated with your ends, it's tempting to take a real chunk off just to feel clean again. But even a half-inch cut that feels small in your hand represents a month of growth. Start with less than you think you need, you can always do a second pass.
Cutting curly or coily hair wet
As noted above, wet curls are stretched. Cut them wet and they'll spring up shorter than expected once dry. If you've done this and ended up with a shorter result than planned, work with the current length, try a wash-and-go that defines your natural pattern, and give it a few months for the extra length to come back.
Uneven ends
If one side came out longer than the other, fix it by working in better light with a mirror and using the shorter side as your new guide. Don't try to eyeball it freehand again, hold both sections side by side and trim the longer one to match. A 3-way mirror setup makes this much more manageable.
Color-damaged or bleached ends
Chemically processed ends are structurally weakened and split faster than virgin hair. If you're growing out color, commit to more frequent dusting, every 6 to 8 weeks, and focus on removing only the most visibly damaged tips each time. Using a bond-repair treatment (like a protein or bond-building mask) between trims helps slow down the damage, which means you can take off less each session.
Choppy-looking layers after a DIY trim
If your trim left the ends looking blunt and heavy rather than soft, the fix is usually very small point-cut snips, holding the shears vertically and snipping upward into the cut line rather than straight across. This softens the bluntness without removing more length. Go lightly; a few snips is all it takes.
Growing out your hair is a long game no matter how you approach it. The goal with trimming isn't to rush the process, it's to protect what you've already grown. Keep the intervals realistic, take off the minimum that gets rid of actual damage, and let the rest just grow. If you're navigating a specific transition like a pixie to bob or a buzz to medium length, the styling strategies for each phase are worth knowing ahead of time so you don't end up cutting back to the start out of frustration. If you're starting with a short cut, also check short haircuts that are easy to grow out for transition styling ideas so you stay on track. If you want a men's haircut while you grow it out, aim for a tidy shape that controls split-end damage without shaving off extra length pixie to bob or a buzz to medium length.
FAQ
How much should I trim when I’m growing my hair out, exactly?
Use the “minimum effective amount” rule. For most grow-out stages, start with dusting (a quarter-inch or less) to remove only visibly damaged tips. If the ends are fraying across a larger section, switch to a light trim (often half an inch) rather than cutting a full reshaping length, then reassess after a few weeks.
Should I trim right after washing, or wait until my hair is fully dry?
It depends on texture. Straight hair is often easiest towel-dry (not soaking wet). Wavy to curly hair is best trimmed in its natural, defined state (dry for many people) because wet or stretched curls can look longer and lead to an over-cut once they spring back.
What if I can’t clearly see split ends, but my hair still feels rough?
Roughness can come from dryness, tangling, or product buildup, not only splits. Try a detangling pass with fingers or a wide-tooth comb on clean, conditioned hair, if it catches at the ends or you see white specks and fraying, that’s a trimming signal. If it feels rough but doesn’t snag and tips look clean, focus on conditioning and only dust the very tips.
How can I tell whether my problem is breakage versus slow growth?
If your scalp length adds over time but your ends keep shortening, that points to breakage. A quick check is to compare the ends to mid-shaft thickness and look for thinning, fraying, or short broken hairs. If the overall shape stays the same while the tips deteriorate, trimming and end protection are usually the fix, not cutting more frequently.
Can I trim less often if I use leave-in conditioner or hair oil?
Conditioners and oils can reduce friction and improve slip, which may slow how quickly splits travel, but they do not repair a split once it starts. If you still see fraying, white dots, or snagging at the ends, skipping trims too long usually costs length through breakage.
Is it better to dust frequently or do one bigger trim later?
For most people, frequent micro-dusting is more length-preserving than waiting for a larger “catch-up” cut. Small removals keep split damage from migrating up the strand, while a bigger later cut often removes more total length than the same number of weeks of dusting would have.
What should I use if I don’t have hair-cutting shears?
Avoid kitchen or craft scissors because their edges crush and can create new damage right at the cut site. If you can’t buy proper shears yet, postpone the trim and focus on slip and protection (detangle gently, reduce heat). Once you have proper hair shears, do a very small first pass rather than trying to compensate for delay.
How do I fix a trim that looks blunt or uneven?
If it’s blunt, do small point-cut adjustments (holding the shears vertically and making upward snips into the cut line). If one side is longer, use better light and trim to match the shorter side as your guide, working gradually rather than removing a full chunk in one go.
When growing out bangs or a fringe, how do I keep them from getting worse?
Plan for the itchy-forehead stage by using a shape that grows out cleanly, like curtain bangs, or trimming bangs straight across if you cannot tolerate them in your eyes. Use clips, bobby pins, or a headband to reduce friction while you wait for the next clean-up moment.
Does trimming chemically treated or heat-damaged hair mean more frequent cuts?
Usually yes. Color-treated or heat-damaged ends often split sooner, so consider shorter intervals (commonly every 6 to 8 weeks) and remove only the most visibly compromised tips. Between trims, use bond-repair or strengthening treatments to reduce further weakening so you can take less each time.
My hair grows at different rates on different spots. Should I trim to the shortest area?
Trim to damage, not to length differences created by cowlicks, texture variation, or styling. Use the “ends-first” approach: remove the visibly altered and fraying tips, then let the rest catch up with time. If you continuously trim to the shortest spot, you can unintentionally reduce the overall length target.
What’s the safest way to trim at home if I’m growing out a pixie, bob, or undercut?
For undercuts, avoid trimming the shaved area back, focus on keeping it from looking unhealthy while the top grows, then blend once the lengths approach each other. For bobs, keep attention on the ends and corner weight rather than cutting aggressively to “even it out,” because harsh blending can shorten the back.