You can hide bangs as they grow out right now by sweeping them to one side and pinning them behind your ear, tucking them under a headband, or pulling longer layers over them to conceal the pin. These aren't just "good enough" fixes, done well, they look completely intentional.
How to Hide Bangs as They Grow Out: Step-by-Step Guide

Marcus Vickers
20 Jun 2026
The harder part is keeping things under control week after week as your bangs inch through that in-between zone where they're too long to style as bangs but too short to blend on their own. That's exactly what this guide covers: what to do today, how to adapt your approach as the length changes, and how to keep everything looking deliberate rather than accidental.
If you want extra perspectives and quick ideas, it also helps to look up how other people handle this on how to grow out bangs reddit.
Why bangs feel so awkward while growing out
Hair grows about half an inch per month, which sounds fine until you realize that getting bangs from eyebrow-length to chin-length takes roughly six months of awkward in-between. The real problem isn't the length, it's that bangs were cut to sit in a specific zone of your face, with a specific weight and shape. As they grow, that shape falls apart. Blunt-cut bangs start to look stringy and uneven. Short bangs poke forward instead of lying flat. Bangs styled for one face zone suddenly hang in front of a different one. Add cowlicks, fine hair that separates into clumpy pieces, or a strong natural growth pattern, and the whole thing can feel unmanageable fast.
The good news is that the awkward phase is mostly a styling and expectations problem, not a hair problem. Once you stop trying to maintain the original bang style and start working with where the hair actually is right now, most of the frustration goes away. The goal shifts from "hiding bad bangs" to "making this length look like a choice", and that's very doable.
Quick fixes you can do right now

These are the moves that work today, regardless of how long or short your bangs currently are. None of them require any special skill, just a minute or two in front of the mirror.
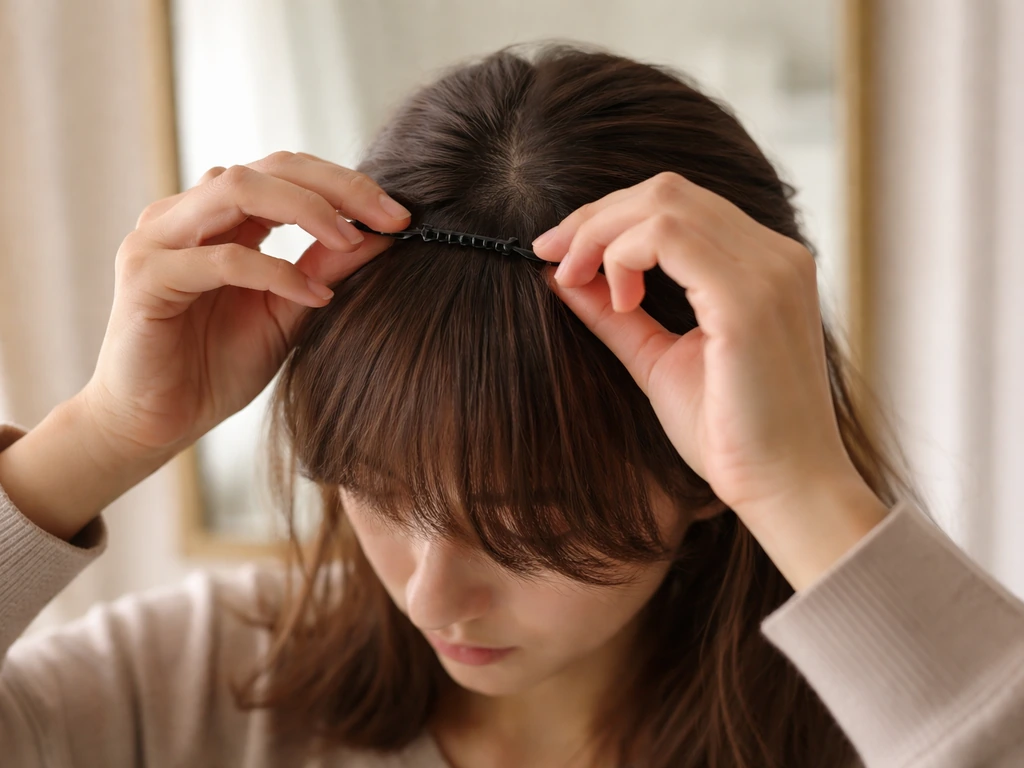
- Headband push-back: slide a headband over your head and position it just behind the bang area. The bangs get tucked back with your other hair and virtually disappear. Works best when bangs are at least nose-length.
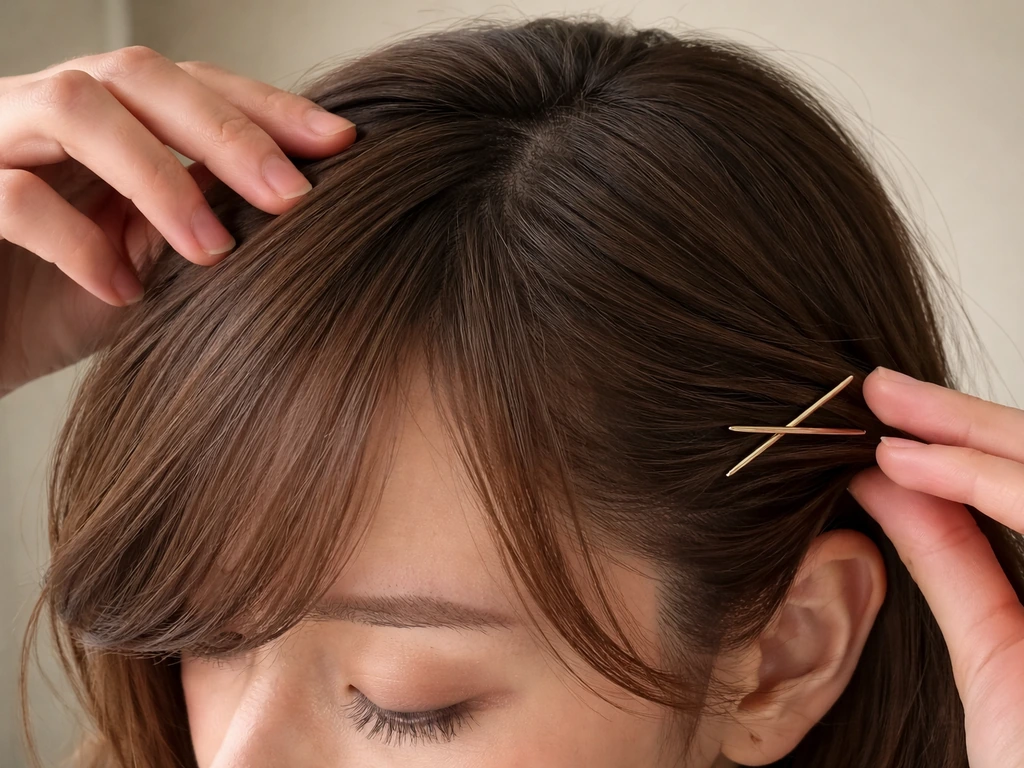
- Side-sweep and pin: comb or blow-dry your bangs to one side, twist slightly, and bobby-pin them behind your ear. Use the wavy side of the bobby pin against your scalp so the flat side faces up — that's what actually grips the hair. Pull a few small strands of the longer layers over the pin to hide it completely.
- Deep side part with layer camouflage: part your hair as far to one side as possible, pin the bangs flat against your head on the shorter side, then let your longer layers fall naturally over the top. The bangs disappear under the longer hair.
- Tuck-and-clip with a barrette or claw clip: section the bangs back toward the crown, twist them loosely, and secure with a clip. Letting a few pieces from the sides fall forward makes this look styled rather than "I gave up."
- Head scarf or bandana: wrap a scarf along your hairline and tie it at the back or top. This works at any bang length and looks deliberately retro rather than like a cover-up.
Styling methods by hair length and texture
What actually works depends on where your bangs are right now and what your hair texture does naturally. Here's how to break it down.
Short bangs (above the brow)
At this stage you have the fewest options because the hair is too short to sweep or tuck easily. A headband or thin elastic band pushed back slightly is your most reliable tool. You can also try blow-drying them straight back using a light gel or pomade to keep them flat to your head, this works best with fine to medium-texture hair. If you have thick or coarse hair, a firm-hold wax or paste applied to damp bangs and dried while holding them back can keep them in place. Avoid products that make hair look wet or stiff, since that draws more attention.
Mid-length bangs (brow to nose)
This is the most versatile zone and honestly where styling options open up the fastest. The side-sweep-and-pin technique works great here. For straight hair, blow-drying the bangs to one side while keeping light tension with a brush gives them a smooth, swept shape that stays all day. For wavy or curly hair, scrunching the bangs slightly to one side while they dry and then pinning them gives a softer, more natural side-sweep effect. If your bangs have enough length here, you can also do a small two-strand twist or a tuck into a half-up style, which works across almost all textures.
Longer bangs (nose to chin)
By the time bangs reach nose-to-chin length, you have real options. Curtain-bang styling becomes possible, part the bangs down the middle and sweep each side outward. A round brush placed behind the bangs and pulled gently forward (toward the nose, not straight down) while blow-drying gives that soft, face-framing shape. You can also incorporate them into a braid: a small French braid or a simple face-framing braid on one side pulls the bangs right into your overall style. At this length, deep side parts and tucking behind the ear look very natural and stop reading as "growing out bangs" entirely.
Texture-specific notes
Fine hair tends to go limp and separate into pieces as it grows, that stringy, clumpy look is a texture issue, not a cleanliness one. A tiny amount of light-hold cream or pomade pressed between your fingers and smoothed over the bangs helps them group together. Thick hair is more likely to flip or stick out at odd angles; a medium or firm hold product applied at the roots before blow-drying is essential. Curly or wavy hair actually has an advantage here: the texture gives shape to the bangs and makes the grow-out look more intentional. Letting them air-dry with a bit of curl cream and then pinning loosely to the side looks styled and deliberate.
Cuts and trims that actually help
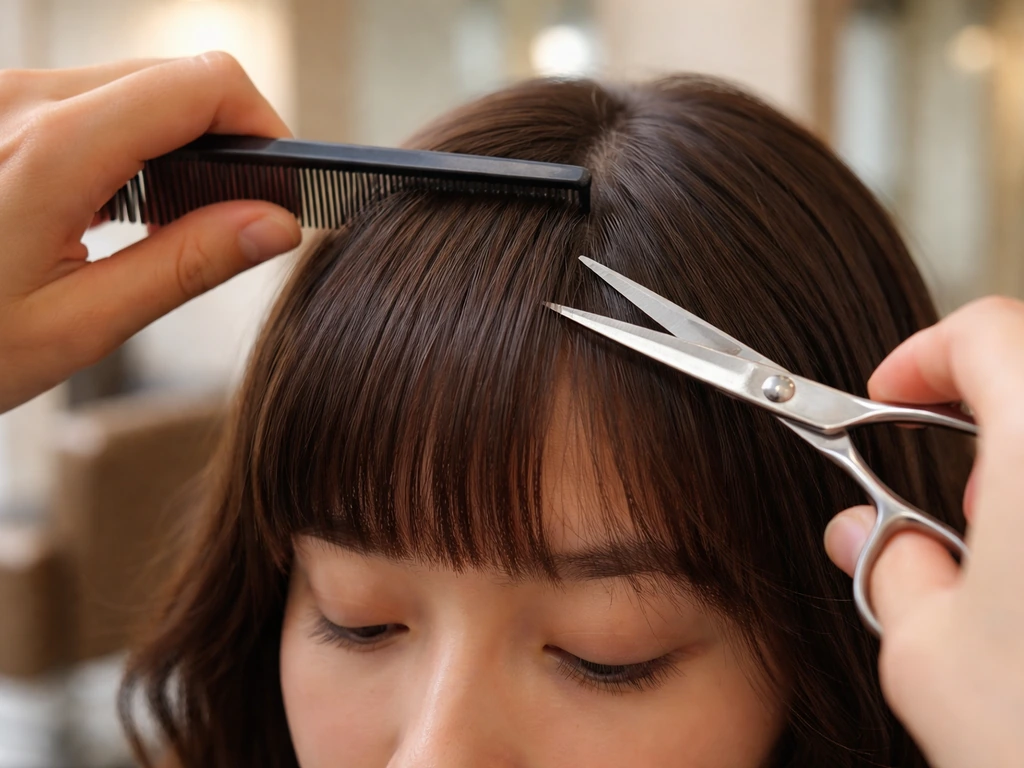
The goal during a grow-out isn't to stop trimming, it's to trim smarter. A general guideline is about a quarter to a half inch every 12 weeks, but the more useful rule is: trim when the shape stops working, not on a fixed schedule. What that looks like in practice depends on your starting bang style.
If you started with blunt bangs, the single most helpful thing a stylist can do is soften the perimeter with point-cutting (small snips into the ends at an angle) rather than cutting straight across. This removes the harsh line, makes the bangs look less grown-out, and helps them blend into your layers as they get longer. Keeping blunt bangs blunt while growing them out just extends the awkward phase.
The other strong strategy is asking your stylist to integrate your bangs into your overall haircut shape rather than treating them as a separate zone. If your bangs are being grown into layers, slight trimming of the surrounding hair to blend the lengths makes a huge difference. Some people find it helpful to transition deliberately into curtain bangs as an intermediate step, the softer, parted shape is much more forgiving during the grow-out.
If you are aiming for curtain bangs, note that their grow-out can look a little weird at first before the layers start to hang more naturally. If you're curious about how that process works specifically, the grow-out experience for curtain bangs has its own quirks worth understanding before you commit to that direction.
Managing cowlicks, flyaways, and uneven growth
Cowlicks and flyaways are the main reason growing-out bangs can look messy even when you're trying. The fix for a cowlick is counterintuitive: blow-dry it in the opposite direction from how it naturally grows, while the hair is still damp. Stylist Kristin Ess describes pulling bangs right, then left, then straight down while blow-drying, the multi-directional tension confuses the cowlick pattern and the hair ends up lying flatter. Keep the dryer moving and keep light tension on the hair throughout.
For flyaways along the bang area, a small amount of light-hold hairspray misted onto a fine-tooth comb (not directly on the hair) and lightly combed over the surface tames them without making hair look stiff. A tiny bit of smoothing serum worked through dry ends also helps. If your bangs separate into clumpy pieces because of a strong growth pattern, try pressing the sections together with your fingers while they're still warm from the blow-dryer and holding for a few seconds, the heat helps set them in a grouped shape.
Uneven growth is normal and annoying. Bangs almost never grow at exactly the same rate across the whole section, so you'll likely have some pieces that reach a workable styling length before others. When that happens, work with the longer pieces first, style them into a side-sweep or part, and the shorter pieces will usually follow along or tuck under the longer ones. Point-cutting the uneven edges (or having a stylist do it) removes the visual jaggedness without taking real length.
What to expect week by week
Here's a realistic look at the timeline, starting from short bangs at or above the eyebrow. To avoid the awkward look, use a stage-based styling plan as your bangs move through each in-between length how to grow out your bangs without looking awkward. Your actual experience will vary depending on how fast your hair grows and your starting texture, but this gives you a stage-by-stage picture of when things get easier.
| Timeframe | Approximate Bang Length | What's Happening | Best Styling Options |
|---|---|---|---|
| Weeks 1-4 | At or just past the brow | Bangs are in their most fixed position — too short to sweep easily | Headband, flat-back blow-dry, firm hold product |
| Weeks 5-8 | Reaching the nose bridge | Side-sweep becomes possible; cowlicks most noticeable here | Side-sweep and pin, deep side part, light hold product at roots |
| Weeks 9-16 | Nose to upper lip | Real styling options open up; blending into layers starts to work | Curtain-bang styling, half-up tuck, braid incorporation |
| Weeks 17-24 | Upper lip to chin | Bangs start to blend naturally with longer hair | Side part, behind-ear tuck, full braid incorporation, no-pin styles |
| Month 6 and beyond | At chin or below | Bangs are effectively just long layers or framing pieces | Full blend with haircut shape, curtain bangs fully viable |
The weeks 5-12 window tends to be the hardest for most people, long enough to feel messy but not long enough to blend. That's when consistent use of the side-sweep, headband, or tuck techniques matters most. If you're also growing out a specific style like curtain bangs, the awkward stage has its own particular shape and the timeline for when they start looking intentional again is worth knowing in advance.
For people over 50, hair texture changes can also affect how bangs grow out and which styles hold best, which is a whole separate consideration. If you're wondering how to grow out bangs over 50 specifically, focus on your texture and pick the styles that hold best as the length shifts For people over 50.
Products, tools, and daily maintenance
Getting your bangs to stay hidden or styled takes about two minutes once you have the right tools on hand. Here's what actually makes a difference.
Products worth keeping close
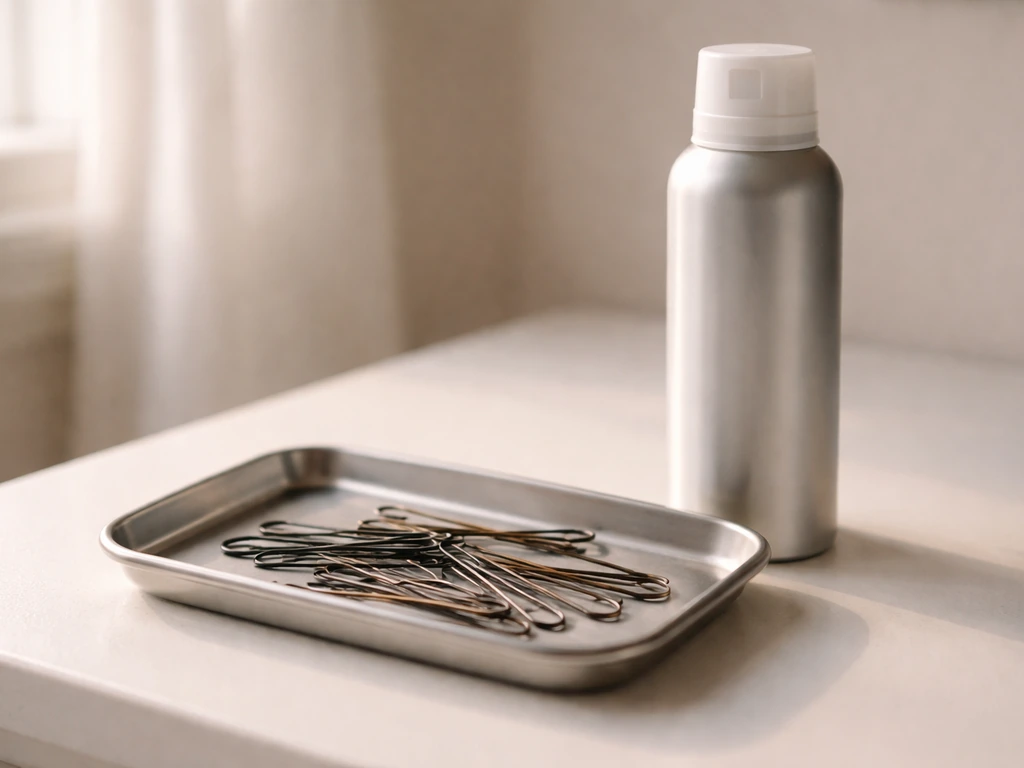
- Dry shampoo: apply it before your bangs look greasy, not after. Hold the can about 10 inches from your roots, spray, let it sit for five minutes, then massage and distribute. This adds texture and grip, which makes styling techniques hold better and extends how long a side-sweep or pin stays in place.
- Light-hold pomade or styling cream: a pea-sized amount worked through damp bangs before blow-drying gives control without stiffness. Great for fine hair that separates into pieces.
- Medium or firm hold hairspray: mist onto a comb and smooth over the surface for flyaway control, or spritz lightly over a finished style to lock it in place.
- Smoothing serum: a small amount on dry ends prevents frizz and helps bangs group together rather than splitting apart.
Tools that are actually useful
- Bobby pins: keep a mix of sizes. Remember the wavy side goes against your scalp for maximum grip. Small pins are best for fine hair; larger ones for thick or heavy bangs.
- Fine-tooth comb: essential for smoothing and directing bangs before pinning or sweeping.
- Round brush (small to medium): use it to blow-dry bangs in the direction you want them to go. A small round brush is enough for most bang sections.
- Clips and barrettes: a simple barrette or claw clip at the crown can replace bobby pins entirely for longer grow-out stages and gives a more put-together look.
- Headbands: elastic, fabric, or rigid — all work. Keep a few on hand for high-humidity days when nothing else wants to cooperate.
Daily habits that keep the grow-out on track
Consistency matters more than any single product. Blow-drying your bangs in the direction you want them to go, even just for 60 seconds on damp hair, trains them to fall that way over time. Skipping this and letting them air-dry in a random direction makes every subsequent styling session harder.
If you sleep on your bangs and wake up with them going in five directions, a quick spritz of water and a 60-second blow-dry in your target direction fixes it fast. Apply dry shampoo before you style in the morning, not after, so the texture is built in.
And check in with your stylist every 10 to 12 weeks, not necessarily to cut the bangs, but to let them soften any harsh lines and blend the growing sections into your overall cut.
FAQ
What’s the fastest way to hide bangs if they’re too short to pin behind my ear?
Use a thin elastic or headband pushed back slightly (about 1 to 2 fingers behind the hairline). If they pop forward, blow-dry them straight back for 30 to 60 seconds on damp hair with a light gel, then secure the headband. This is usually quicker than trying to sweep and pin when the ends cannot reach.
How do I keep my grow-out bangs from looking greasy when I’m using products to hold them down?
Apply product only at the bang section, then lightly blot the roots with a clean tissue before styling. If you use gel or wax, use less than you think and focus on pressing and smoothing the surface, then finish with a small amount of dry shampoo only at the roots (not on the ends) to maintain lift.
What should I do if my bangs flip up even after I pin or headband them?
Flip issues are often a cowlick direction problem. Blow-dry the bangs in the opposite direction while they are damp, keep light tension with a brush, then re-pin while the hair is still warm. Avoid pulling them straight back if they naturally part that way, choose the side-sweep direction you use most during the day.
Can I hide bangs without heat if I’m trying to reduce damage?
Yes, but you’ll need more friction and hold. Apply a small amount of curl cream or light styling cream to damp bangs, then braid or twist them to the side and let them dry fully before unpinning. For very short bangs, a headband overnight can keep them tucked while they set, then you remove it once dry.
How often should I trim during the grow-out to avoid going too long?
Instead of trimming on a fixed date, trim when the perimeter starts to look “jagged” or pokes forward. A stylist can point-cut just the ends to soften the line, usually requiring smaller maintenance snips every 8 to 12 weeks rather than full trims.
My bangs grow unevenly, one side reaches usable length sooner. Should I style them differently on each side?
Yes. Style the longer side first (side-sweep and pin or part-based curtain direction), then tuck the shorter pieces under the longer section so they look intentional. If the ends look blunt or choppy, point-cutting only the uneven edge visually evens it without removing extra length.
How do I hide bangs overnight so they look better in the morning?
Either use a headband to keep them pushed back, or loosely pin them to one side after dampening (lightly mist water if needed). Make sure they dry or set fully before bed when possible, to reduce morning re-flipping and separation.
What’s the best trick for flyaways across the top of the bangs?
Mist a tiny amount of light-hold hairspray onto a fine-tooth comb, then smooth the comb over the surface. This prevents heavy product from making bangs look wet, and it tames the hair without flattening the entire bang section.
When should I consider switching from hiding to styling them as part of my haircut?
When the ends reach a length where they can blend past your brow to your cheek area (roughly nose-to-chin range), switch to curtain or side-part placement. At that point, blending and integrating with layers reduces the need for constant concealment, and it usually looks more natural in photos.
Are there any hairstyles that work better if I have curly hair during the grow-out?
Curly textures often look best with loose side placement. Try letting bangs air-dry with curl cream for shape, then pin loosely to the side. If you want more control, do a short two-strand twist and secure for 10 to 20 minutes to set the direction before releasing.