Growing out a pixie cut takes roughly 12 to 24 months to reach shoulder length, depending on where you're starting from and how fast your hair grows. The average growth rate is about half an inch per month (around 0. DermNet NZ notes that a hair shaft growth rate is about 1 cm per month within a follicle hair shaft growth rate of about 1 cm per month.
Pixie Grow Out Timeline: Stages, Trims, and Styling Tips

Marcus Vickers
7 Apr 2026
35 mm per day), which sounds painfully slow when you're staring at the mirror in month three wondering what happened to your head. StatPearls (NCBI Bookshelf) reports hair growth at about 0. 35 mm/day, around 1 cm per month, and roughly 15 cm per year, with variation by individual and context [0. 35 mm per day](https://www.
ncbi. nlm. nih. gov/books/NBK499948/).
But here's the honest truth: the timeline is predictable, the awkward phases are survivable, and with the right approach you won't need to cut it all off again.
What to expect during the overall grow-out
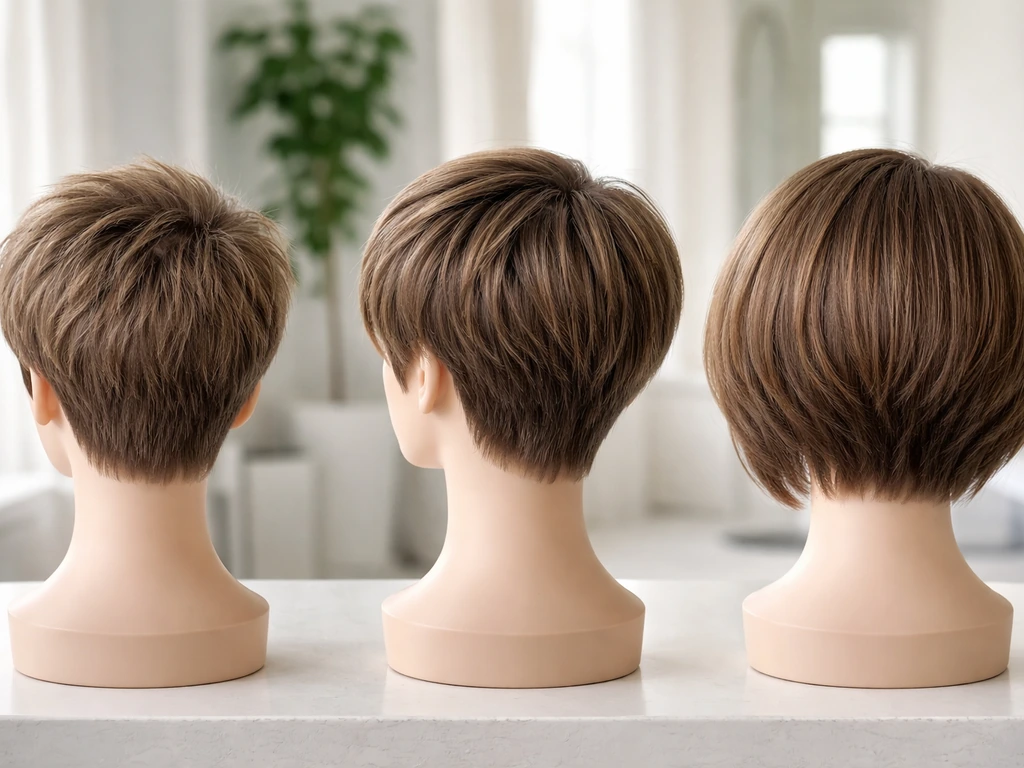
The pixie grow out timeline breaks down into three broad chapters. The first few months are actually easier than people expect because your pixie still looks like a pixie, just slightly shaggier. Then comes the middle chapter, roughly months three through seven, which is where most people lose their nerve. Hair is too long to look intentional and too short to do much with. After month eight or nine, things start resolving into a soft bob or lob shape, and from there it's a straightforward path to whatever length you're aiming for.
If you're on the fence about whether growing it out is even right for you, it helps to have a clear picture of what the process involves before committing. Deciding whether to grow out your pixie is genuinely worth thinking through before you start, because the mindset going in makes a real difference in whether you stick with it.
The key variables that affect your personal timeline are genetics, age, overall hair health, and whether your hair has been chemically treated. People with color-treated or heat-damaged hair often see slower apparent progress because breakage eats into the length gains. Keeping hair healthy from day one compresses the timeline noticeably.
Stage by stage: what your hair actually does each month
Months 1 and 2: the clean pixie phase
In the first four to eight weeks, your hair still reads as a pixie. The top layers might gain a little volume and the nape area might start to curl or flip. This is actually the easiest phase because the shape is still legible and most of your usual styling still works. Enjoy it. The main thing to watch is the nape, which grows faster than the crown in most people and can start to look shaggy before anything else does.
Months 2 to 4: the mushroom and helmet phase
Around six to eight weeks, the back of your hair starts outpacing the top, and this is where the classic mushroom or helmet effect appears. The crown puffs out, the sides start to widen, and the nape grows faster than the front. This is the phase that makes people panic-book a trim. The shape feels out of control and there's not enough length anywhere to style it into something that looks deliberate. This phase is real, it's annoying, and it's completely normal. The fix is targeted: keep the nape trimmed while letting the top keep growing.
Months 4 to 7: the in-between wilderness
This is the hardest stretch for most people. Hair is sitting somewhere between a pixie and a short bob, the layers are uneven, bangs are falling into your eyes, and nothing quite sits right. The front pieces are long enough to be annoying but too short to tuck behind your ears reliably. The crown is gaining volume but without enough weight to fall properly. This is the stage where styling tools, products, and a consistent plan make the biggest difference. It's also where many people bail and cut it short again, which just restarts the clock.
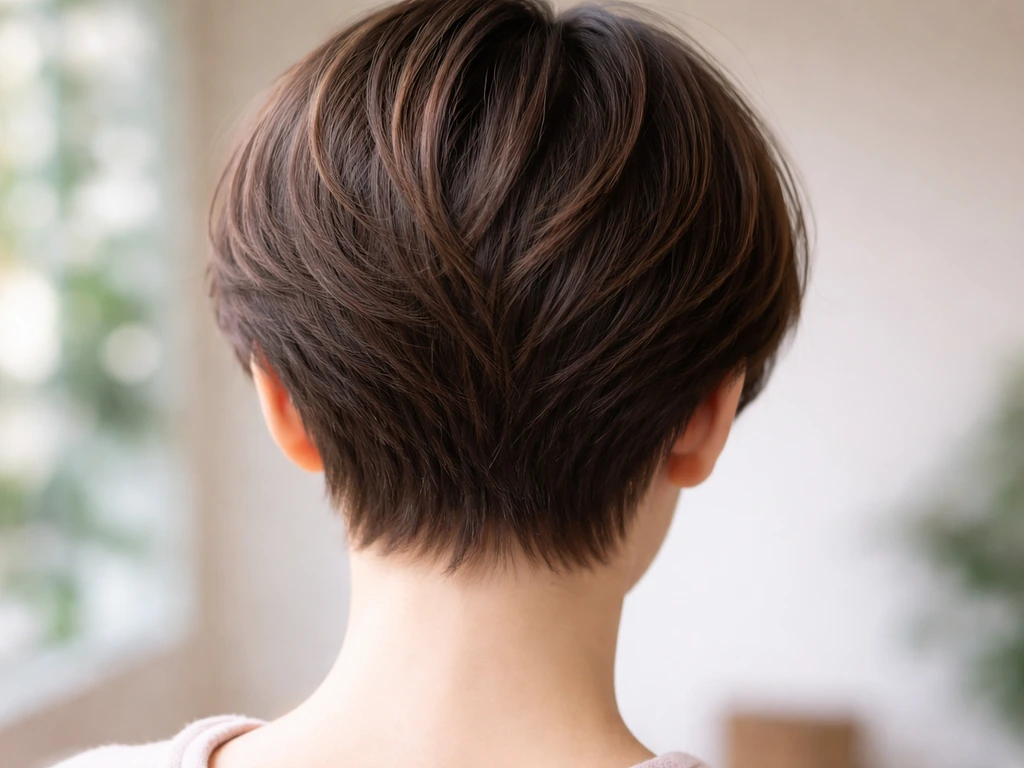
Months 7 to 12 and beyond: the bob territory
Once you're past the seven-month mark, things start to organize themselves. The layers begin to blend, the shape starts resembling a short bob, and you have enough length to actually style it. From here, the grow-out feels less like suffering and more like just waiting. If you're aiming for a long bob or shoulder length, you're looking at another six to twelve months of steady growth, but this part of the journey is genuinely manageable. If your goal is a chin-length bob, you might already be close.
Month-by-month length reference
| Month | Approximate Length Gained | What It Looks Like | Main Challenge |
|---|---|---|---|
| Month 1 | ~0.5 inch | Pixie is slightly shaggy | Nape starts to curl or flip |
| Month 2–3 | ~1–1.5 inches total | Mushroom/helmet shape begins | Back outgrows top, crown puffs |
| Month 4–5 | ~2–2.5 inches total | Short shag or uneven layers | Front falls in eyes, sides flare |
| Month 6–7 | ~3–3.5 inches total | Proto-bob or grown-out shag | Uneven layers, no clean shape |
| Month 9–12 | ~4.5–6 inches total | Soft short bob | Maintaining shape during growth |
| Month 15–18 | ~7.5–9 inches total | Chin to collarbone length | Managing layers and texture |
| Month 18–24 | ~9–12 inches total | Shoulder length or longer | Keeping ends healthy |
Styling the awkward phases without losing your mind
The crown and top
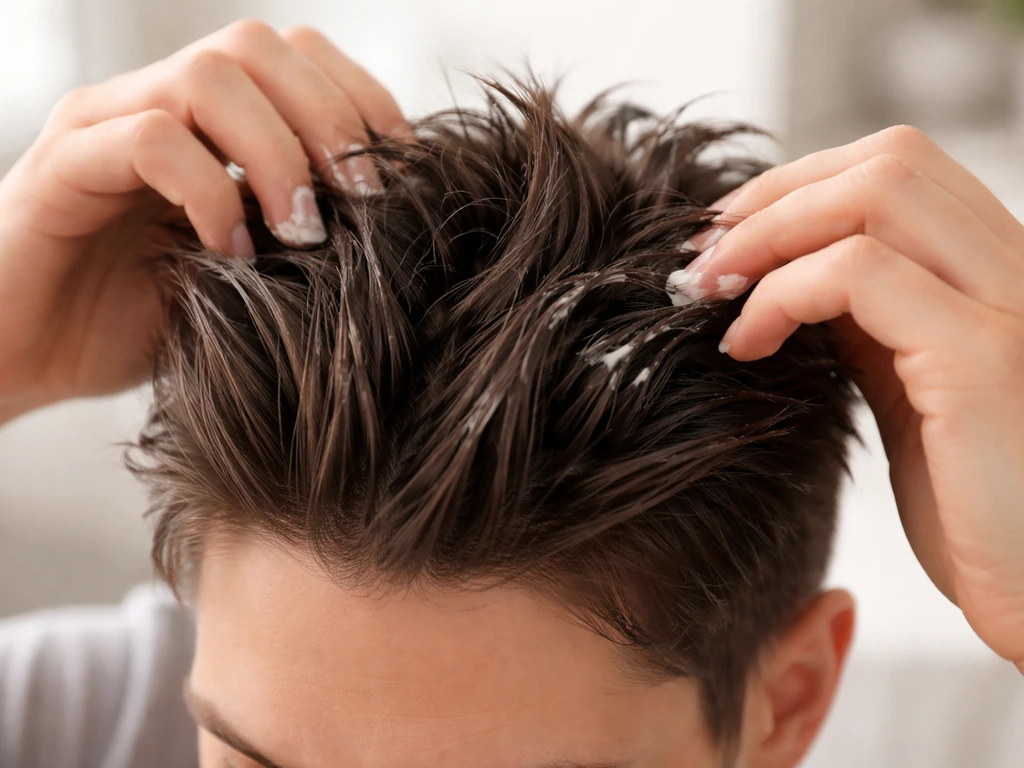
The crown area is where the helmet effect lives. When the top layers gain length before they gain weight, they puff outward instead of falling down. Light texturizing at the crown, done by your stylist during a shape-up visit, adds internal movement that prevents that rounded balloon look. At home, a small amount of lightweight styling cream or pomade worked through damp hair and then diffused or air-dried can encourage the hair to move directionally rather than expanding in all directions. Avoid heavy products on the crown during this phase; they weigh the hair down in a flat cap instead of giving you shape.
The front and face-framing pieces
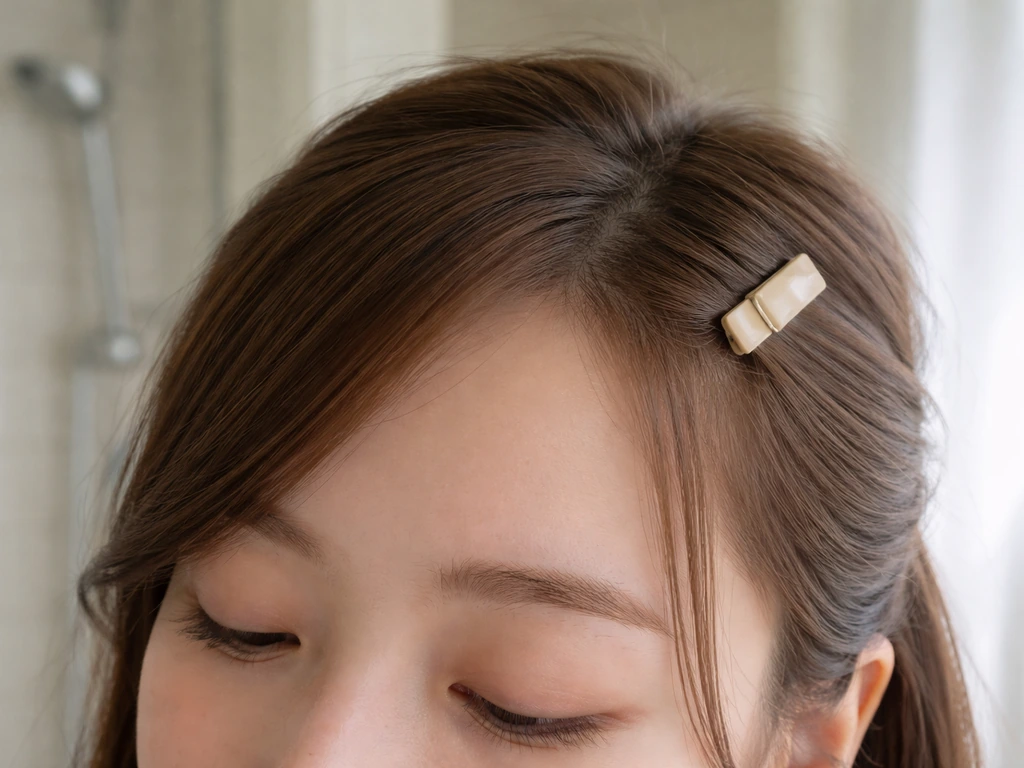
The front of the hair, including whatever's left of your bangs, is usually the trickiest area because it's the most visible and the most prone to behaving erratically. Side-sweeping is your best friend during months three through six. A small clip or bobby pin used strategically at the temple creates a face-framing look that feels intentional rather than overgrown. Switching your part can also transform the same amount of hair into something that looks deliberate; a soft middle part or a deep side part both work well once front layers hit cheekbone length.
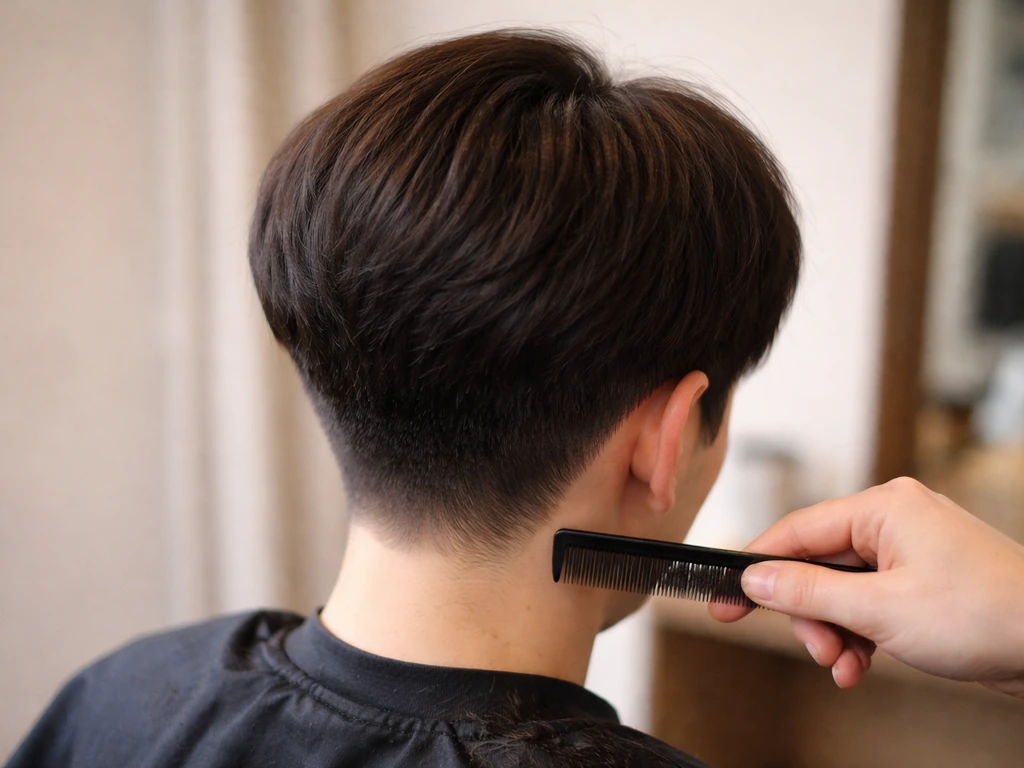
The nape and sides
The nape grows fast and is the first thing to look unkempt. Keeping this area trimmed every four to six weeks prevents the mushroom silhouette and makes everything else look more intentional. The sides are similar: if your original pixie had an undercut or close-cropped sides, those areas will grow out with a different texture than the top, creating a visible line. Your stylist can soften this during shape-up visits without cutting off any top-layer length.
Easy styling tools that actually help
- Bobby pins and small clips: use two or three at a time for a sculptural look rather than a single utilitarian pin
- Thin headbands or fabric bands: push hair back during the mid-growth phase when front layers are too short to style but too long to ignore
- Low-manipulation pinned styles: a loose twist at the nape with a few pins works once hair hits two to three inches
- Flexible hairspray: a brushable, non-stiff formula lets you hold side-swept pieces without the crunchy finish that reads as a bad hair day
- A small diffuser attachment: adds volume and shape to the crown without heat damage, especially helpful for wavy or curly textures
If you have thick hair, the mushroom and helmet phases tend to be more intense because there's more volume expanding outward. Growing out a pixie cut with thick hair has its own set of strategies, particularly around managing the crown and controlling bulk during the middle months.
Your trimming plan: what to cut and what to leave alone
The single biggest mistake people make during a pixie grow-out is either avoiding trims entirely (hoping to "save" length) or cutting too much because they panicked. Neither works. The right approach is targeted maintenance: trim the nape and around the ears every four to six weeks, keep the crown and top layers completely alone, and only dust the ends of top layers if there's visible damage or splitting.
Stylist guidance consistently points to four to six week intervals for shape maintenance, with some suggesting micro-trims focused specifically on the neckline and around the ears to keep the silhouette from getting away from you. Going eight weeks or longer between any kind of cleanup is usually when the mushroom effect peaks and the shape starts looking genuinely unkempt. That said, "trim" during grow-out means cleaning up the perimeter and maybe removing a centimeter from the back, not reshaping the whole cut.
If you're growing out from a very short starting point, the process shares some similarities with other ultra-short grow-outs. The buzz cut grow out timeline covers similar early-stage dynamics and the same nape-management logic applies, so it's worth a read if your pixie was extremely close-cropped to begin with.
For split end maintenance without losing length, ask your stylist for a "dusting," which removes just the very tips of damaged ends without taking noticeable length. TriBeCa Salon recommends trimming every six to twelve weeks during grow-out specifically to keep ends healthy and avoid the kind of breakage that makes your hair look like it's not growing at all. Healthy ends mean your length gains actually show up.
When NOT to trim
Avoid trimming the top layers and front pieces unless there is actual damage. It's tempting to "even things out" when the layers are at different lengths, but cutting the longer pieces just resets the progress. The layers will blend on their own as they grow, and your stylist can blend them without sacrificing length during a shape-up visit. Resist the urge to DIY any kind of reshaping at home during the awkward phase, especially around the face.
Dealing with bangs and texture changes as everything grows in
Bangs are their own subplot in the pixie grow-out story. If your pixie had short, blunt fringe, those bangs will be the first thing to look overgrown and the most annoying to manage. The most practical approach is to stop fighting the original bang direction and start working with the length you have. Switching to a middle part and styling your bangs as loose curtain bangs is one of the most effective reframes during grow-out. It takes the same hair that looked messy swept straight across and makes it look intentional and stylish.
Dampen the front pieces before styling them during this phase. Damp hair is more cooperative, and using your fingers to shape the hair rather than a brush gives you a softer, more natural movement. If your bangs have a strong cowlick, working with the direction of the cowlick rather than fighting it is always going to produce better results. A flexible hairspray holds the shape without stiffness.
As your bangs continue gaining length, they'll naturally evolve into face-framing layers, which is actually a really good outcome. Once they're long enough to tuck behind an ear or fall past the cheekbone, the curtain bang styling approach starts working beautifully and the "I'm growing out my bangs" look disappears entirely.
Texture changes are something a lot of people don't expect. Hair that was cut very short can behave differently as it gains length, partly because the weight of longer hair pulls out curl or wave patterns, and partly because the ends of short-grown hair are blunt and may feel coarser. If your hair seems to be changing texture during the grow-out, this is normal. Wavy or curly hair in particular often looks wavier at longer lengths than it did when it was short, because the curl pattern has enough length to form. This is worth keeping in mind when planning your styling approach for each phase.
If you started with an asymmetrical pixie, the grow-out involves an extra layer of complexity because one side is longer than the other by design. Growing out an asymmetrical pixie cut involves specific strategies for balancing the two sides without cutting the longer side back to match, so the overall length still progresses.
Color, maintenance, and protecting your hair while you wait
If your hair is colored, the grow-out timeline has an extra layer of planning. Demarcation lines, where new growth meets previously colored hair, are more visible on short hair because there's less length to blend them. The good news is that most stylists can use techniques like babylights or strategic highlights to soften the line of demarcation and make the grow-out look more intentional rather than neglected.
For color-treated hair, sulfate-free shampoo is a practical everyday choice because it's gentler on the hair shaft and helps color last longer between appointments. Bond-repair formulas are worth using if your hair has been lightened or chemically processed, since they help reinforce the hair's internal structure during a period when it's being asked to grow as long as possible without breaking. A dime-size amount of a gentle, bond-maintaining shampoo is all you need, and starting small prevents over-stripping already-processed hair.
Weekly scalp massages before shampooing are a simple habit that supports overall hair health during the grow-out. It takes about five minutes, it increases circulation to the follicles, and it costs nothing. Do it once a week before your wash and it becomes an easy ritual that feels good and does something useful.
Heat styling during grow-out is fine in moderation, but always use a heat protectant. Damaged hair breaks, and breakage during grow-out is the most demoralizing thing because you'll see length disappear from the ends faster than it's appearing at the roots. Keep heat tools on the lower temperature settings (under 380°F for most hair types) and avoid daily heat if your hair is fine or already processed.
For blonde or highlighted hair, toning shampoos can help maintain vibrancy between salon visits, but use them in moderation. Overuse on dry or porous hair can cause buildup and dryness, which is the opposite of what you need during a grow-out. Once or twice a week is usually enough for most people maintaining blonde tones.
Touch-up scheduling matters more than people realize. If you're getting highlights or glosses, building those appointments into your trimming schedule (every six to eight weeks) means you're dealing with both color and shape in a coordinated way rather than letting one get ahead of the other. A hair plan is genuinely useful here, not just for motivation but for managing cost and time.
Tips that make the whole process easier
The single most useful thing you can do right now, regardless of what month you're in, is get a clear picture of how to grow your hair out from a pixie cut as a complete process rather than just a waiting game. The decisions you make about trimming, styling, and maintenance compound over time, and making good ones early means you spend less time in the worst phases.
For anyone with natural or textured hair, the grow-out involves some additional considerations around moisture retention and shrinkage, which can make length progress harder to see. Growing out a pixie cut on Black hair covers those specific dynamics in detail, including how to manage the different growth phases while keeping hair healthy and moisturized.
Finally, it's worth knowing that the process from a pixie is genuinely different from some other short-hair grow-outs but shares some DNA with them. If you've also grown out a shaved section or undercut as part of your pixie, the shaved head grow out timeline gives useful context for what to expect from the very shortest areas as they catch up with the rest of your hair.
The bottom line is this: growing out a pixie cut is not a passive process. It rewards people who have a plan. Know your trimming intervals, protect your hair health, lean into styling tools during the awkward months, and stop trying to fight your hair into shapes it can't hold yet. Month by month, it gets easier, and the goal length you're imagining is genuinely reachable. A comprehensive look at how to grow out a pixie will give you everything you need to handle each phase with confidence rather than dread.
FAQ
How do I know if my pixie grow-out is truly going “on track” when the top and sides look uneven?
Track progress by sections, not by how the whole head looks. If the nape is controlled every 4 to 6 weeks and the crown is not being trimmed, the overall silhouette should start calming after the 7 to 9 month mark. If the sides are widening faster than the top by more than a few centimeters, ask your stylist for bulk reduction at the perimeter (a soft blend), not for removing length from the crown or bangs.
Can I grow it out without trims, if my hair grows fast?
Skipping trims usually backfires even with fast growth. Split ends and blunt, damaged tips can cause breakage, so length appears to stall. A compromise is a neckline and around-the-ear “maintenance only” appointment every 4 to 6 weeks, plus a dusting (only the very ends) when you see visible splitting.
Should I trim my bangs during the grow-out, or just style them differently?
If your bangs are only annoying and not damaged, avoid cutting them shorter. Instead, shift to a part and technique that makes them look intentional (often a middle part into curtain-style). Cut only if they are fraying, developing heavy breakage, or repeatedly falling into your eyes despite pinning, and even then ask for a tiny perimeter cleanup rather than reshaping the whole fringe.
What product should I use for the crown to prevent the “helmet” puff?
Lightweight matters more than “strong hold.” Use a small amount of lightweight cream or pomade on damp hair, then diffuse or air-dry while directing the hair downward. If your crown still balloons, switch to less product and a matte texture, because heavy, shiny products tend to flatten then puff (creating a rounded shape).
Is dry shampoo okay during a pixie grow-out?
It can be, but use it sparingly, especially on the crown. Dry shampoo buildup can make hair feel rough and cause the silhouette to look uneven, which is already happening during months three to seven. If you use it, pair with a gentle wash routine and make sure you thoroughly cleanse the scalp before adding more product.
My hair curls or waves more as it grows. Should I change my styling routine?
Yes, slightly. Longer hair can reveal or intensify wave and curl formation because it gives the pattern enough length to set. Adjust by using finger shaping on damp hair, adding conditioner for slip, and avoiding excessive brushing during the transition phase. If you heat-style, keep temperatures lower and prioritize heat protectant to reduce breakage at the ends.
How often should I see a stylist for shaping if I’m aiming for shoulder length?
Plan for perimeter management every 4 to 6 weeks (nape and around the ears), then reassess at about the 7 to 9 month mark when the shape turns into a short bob or lob. Early trims should not reshape the cut, they should maintain the outline so the top keeps growing. For shoulder-length goals, you may need an additional dusting or blend once the layers start competing.
I colored my hair before growing it out, will the demarcation line make the timeline look worse?
Demarcation can look sharper on short lengths, but you can coordinate color and shape to reduce the visual contrast. When you schedule glosses or highlights, align them with your grow-out maintenance interval (often every 6 to 8 weeks) so the line softens while the silhouette is being cleaned up. If the line is very noticeable, ask about techniques that blend at the root area rather than only refreshing color ends.
How can I protect my length if I keep panicking and touching the hair at the mirror?
Avoid “micro-cutting” at home. The biggest risk is uneven decisions that reset progress in the exact area you want to grow (top and front). Instead, set a rule: only allow nape and ear cleanup, and only book trims on schedule. For visual relief, use part switching and targeted pinning (temple area) during months three to six, since those changes are reversible and do not remove length.
What’s different about growing out a pixie if my hair is thick and bulky?
Thicker hair usually needs bulk control earlier in the middle months, otherwise the mushroom effect amplifies. Ask your stylist for internal blending or gentle thinning at the perimeter, while keeping the crown’s weight manageable so it falls down instead of outward. At home, use less product and focus on distributing it evenly, especially near the crown where buildup causes flat-to-puff behavior.
I started with an asymmetrical pixie. How do I prevent one side from looking stuck behind?
Don’t trim the longer side to match the shorter side. Instead, create balance through styling (part changes, pinning, and directing the front pieces) and request targeted blending at shape-up visits that preserves overall length. If the gap persists past the middle phase, your stylist can soften the transition by adjusting layer connectivity rather than cutting down the longer side.