Growing out shaggy layers takes roughly 6 to 18 months depending on how short and dense those layers are, but you do not have to look rough the whole time. The real strategy is simple: stabilize the bottom edge, trim only what disrupts the shape, and use your styling routine to bridge the gap between where your hair is now and where it is going. Hair grows about half an inch per month, so you can actually map out a realistic timeline from day one and stop guessing.
How to Grow Out Shaggy Layers: Step-by-Step Guide

Marcus Vickers
23 Jun 2026

Figure out exactly where your layers sit right now
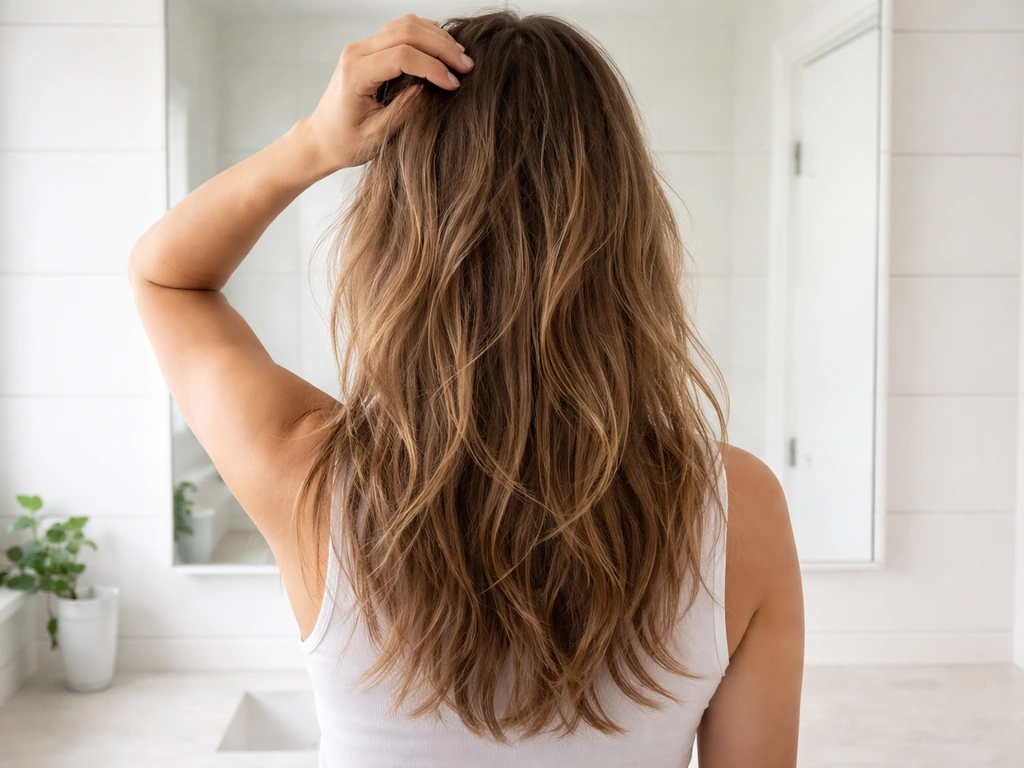
Before you do anything else, get a clear picture of your current layer pattern. Stand in front of a mirror with dry, unstyled hair and look at three zones: the crown (where the shortest layers usually live), the sides and face frame (where layers often create bulk or a triangular silhouette), and the perimeter or bottom edge (the longest length you have). Note how far apart those zones are in actual inches, because that gap is what you are closing over the next several months.
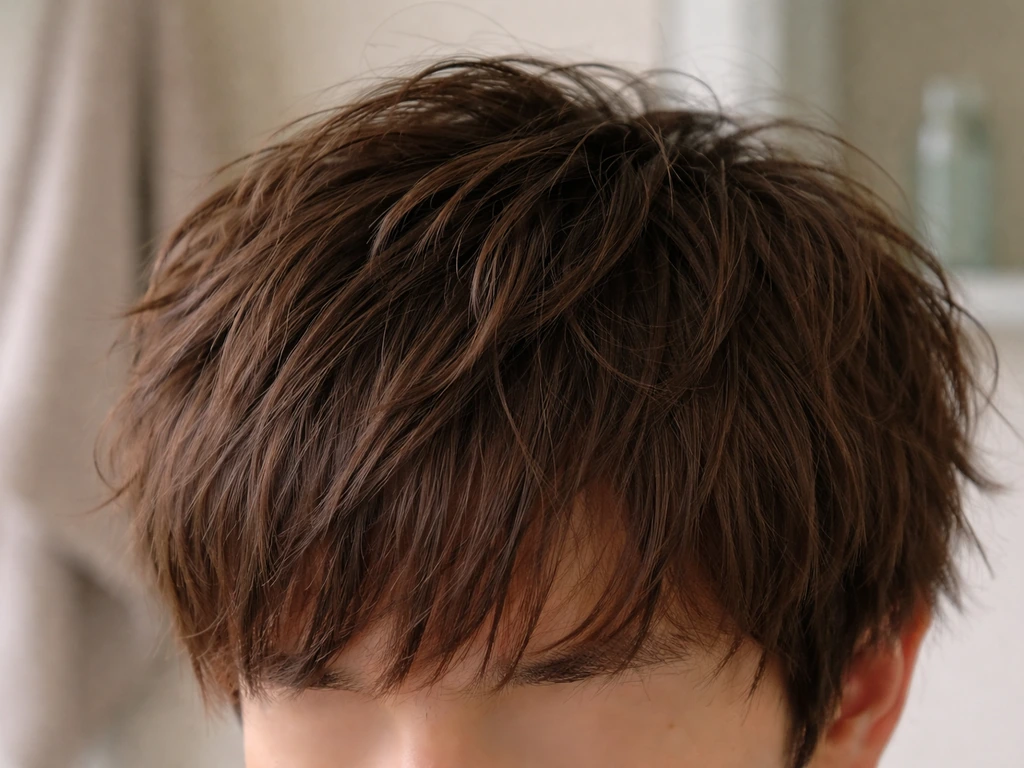
Shaggy layers typically come with a lot of interior texture, which means the crown and mid-lengths have been cut significantly shorter than the perimeter. If your crown layers are around your ears and your perimeter is at your shoulders, you are looking at several inches of disparity. That is a longer grow-out commitment than someone whose layers are only an inch or two apart. Knowing this upfront prevents the frustration of expecting to look polished at month three when your hair genuinely needs month eight.
Also identify any bonus challenges: Do you have bangs or curtain bangs sitting somewhere in that shag? Face-framing pieces that are significantly shorter than the rest? Any shaved or undercut sections underneath? Each of those adds a variable to manage. Growing out bangs alongside layers, for instance, adds roughly 10 to 16 weeks to the phase where your front sections feel especially awkward. Growing out face-framing layers has its own set of styling tricks worth knowing. Growing out face-framing layers can also affect how your sides and mid-lengths feel during the awkward months. Write down your situation plainly so you can make a plan instead of just reacting to bad hair days.
Start here: daily care that stops extra frizz and bulk
The number one thing that makes a grow-out look messy is a care routine that was designed for the shag, not for the transition. When layers are growing out, the mid-lengths become the most vulnerable part of your hair. They are dealing with multiple lengths, possibly damaged ends from previous shaping, and changing weight distribution. Your routine needs to account for that.
Switch to a microfiber towel or a soft cotton T-shirt immediately. Rubbing a regular terry-cloth towel over growing-out layers creates friction that lifts the cuticle and causes frizz before you even apply a single product. Instead, scrunch or press the microfiber towel gently against your hair to absorb water without disturbing the texture pattern.
Apply your leave-in conditioner while hair is still damp but not soaking wet. This is the step most people skip or do wrong. Leave-in needs moisture already present in the strand to absorb properly. Work it through mid-lengths to ends, which is exactly where the older, more stressed hair lives. Follow that immediately with an anti-frizz serum or smoothing cream while the leave-in is still wet on the hair, so both products activate together. Waiting until your hair is half-dry to add serum means it sits on the surface instead of working in.
- Use a microfiber towel or cotton T-shirt and scrunch, never rub
- Apply leave-in conditioner to damp (not soaking) hair, focusing on mid-lengths to ends
- Layer anti-frizz serum immediately on top of the leave-in while hair is still wet
- Do not touch or rearrange hair repeatedly while it air-dries
- Sleep on a satin or silk pillowcase to prevent overnight frizz and breakage
- Clarify once a month to prevent product buildup, which amplifies bulk in growing-out layers
A realistic stage-by-stage timeline for shaggy layer grow-out
Here is what actually happens to shaggy layers as they grow, broken into stages. These are based on the standard half-inch per month growth rate, so adjust them slightly faster or slower depending on your own hair.
Months 1 to 2: The shape starts to soften
In the first two months, not much dramatic change happens in terms of length, but the sharpness of the cut starts to blur. The clean layer lines that gave the shag its choppy, textured look begin to soften as each section grows out. This is actually a good phase visually. Most shaggy cuts look their best at the 6 to 8 week mark, right before they start to feel overgrown. Enjoy it, but also use this window to see your stylist for a light shaping so they can establish a grow-out plan with you rather than just a maintenance trim.
Months 2 to 4: The bulk and frizz peak
This is the hardest phase. Interior layers that were short and textured are now long enough to sit heavily in the mid-section of your hair but not long enough to blend into the perimeter. The sides can puff outward, creating a triangle or boxy silhouette. The crown can look fluffy and disconnected from the rest. Face-framing pieces that were at your cheekbone are now hovering somewhere around the jaw, which often looks unintentional rather than styled. A well-placed layer line can shift visibly to a new position as hair grows, so what looked intentional at week 4 may look sloppy at week 10. This is normal, not a sign the grow-out is failing.
Months 4 to 6: Length starts to feel real
By month four, most people notice that the perimeter is meaningfully longer and the shortest interior layers are catching up. The silhouette starts to feel more connected. If you started with a lot of very short crown layers, they may still be in an awkward mid-length zone, but at least the weight of the growing perimeter helps pull everything downward. This is when a light dusting of the ends (just the frayed tips, no length removed) can make a big difference in how polished the grow-out looks without sacrificing any of your progress.
Months 6 to 12 and beyond: Blending into your goal length
From month six onward, you are in a gradual blending phase. The interior layers are now long enough to get a real blend cut rather than just a maintenance trim. A stylist can use point cutting or razoring at this stage to seamlessly connect the old layer lengths without pulling the perimeter back. If your target is a longer look with soft layers, a collarbone-length style, or curtain bangs framing a longer cut, this is where those transitions become achievable. Shags with many very short, densely packed layers can take up to 18 months to fully transition, which is worth knowing upfront.
| Stage | Approximate Timeframe | What to Expect | Priority Action |
|---|---|---|---|
| Softening | Weeks 1 to 8 | Layer lines blur, cut looks effortlessly worn-in | Book a grow-out consultation, establish trim plan |
| Bulk Peak | Months 2 to 4 | Triangle silhouette, puffiness, interior layers feel heavy | Style with products daily, light blending trim if needed |
| Length Emerging | Months 4 to 6 | Perimeter noticeably longer, shape starts connecting | Dust ends every 8 weeks, begin targeting final length |
| Blending | Months 6 to 12+ | Layers integrate, final style becomes achievable | Point cut or razor blend to unify, shape into goal style |
Day-to-day styling that gets you through the awkward phase
The awkward phase is real, but it is not unmanageable. The goal with daily styling during this period is to create the illusion of intention: hair that looks like it is in a deliberate in-between style rather than just outgrown.
For straight and fine hair
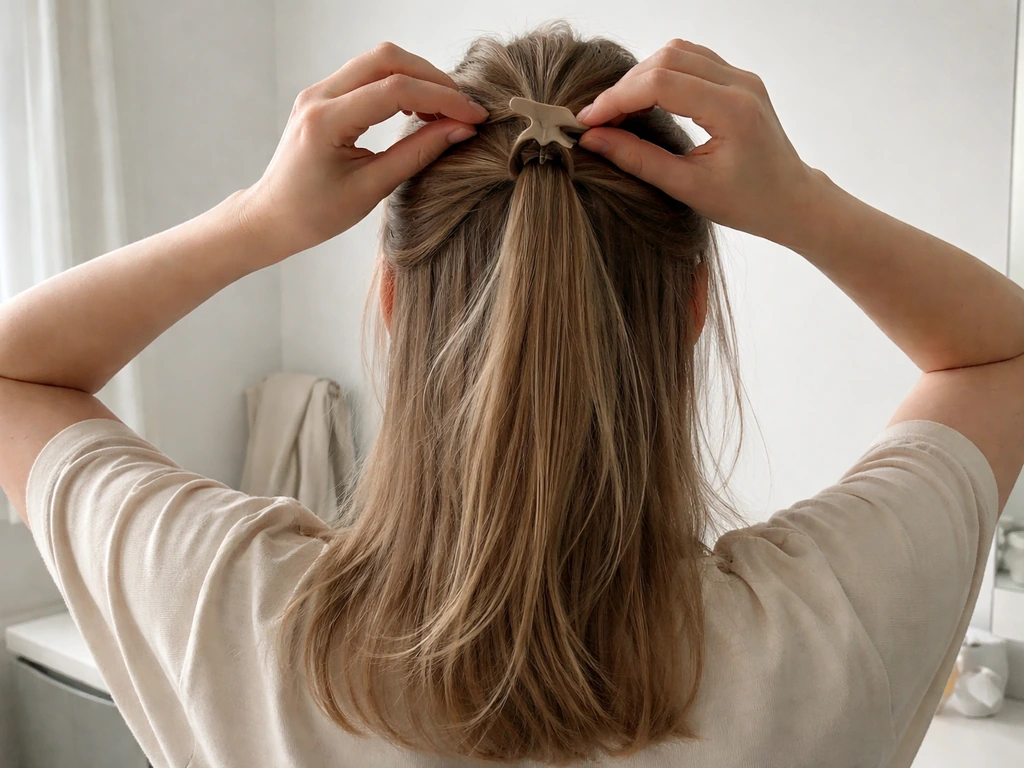
Fine, straight hair shows layer disconnection the most obviously because there is no natural texture to disguise it. A round brush blow-dry is your best friend here. Blow-dry the crown downward and away from the face, which reduces the puff and helps shorter layers lay flatter. Use a light smoothing cream before drying to add weight and control without greasiness. Half-up styles, low ponytails, and clip-back sections are all genuinely useful tools for the days when the shape just will not cooperate.
For wavy hair
Wavy hair in a grow-out situation tends to flip unpredictably, with shorter layers springing up while longer layers weigh down. Scrunching a curl cream or light mousse into damp hair and then letting it air-dry (without touching it while it dries) gives you a controlled wavy look that makes the grow-out feel styled rather than sloppy. On days when the waves are cooperating, lean into the texture with a bit of extra hold gel at the roots to define the pattern and reduce the pouf.
For curly and coily hair
Curly and coily hair has a natural advantage during grow-outs: the curl pattern disguises layer disconnection better than straight hair does. The challenge is that shorter layers can spring up significantly more than longer ones, creating an uneven silhouette. Diffusing is your most effective tool. Cup curls upward into the diffuser bowl, scrunch toward the scalp, and let each section dry fully before moving to the next.
Turn the diffuser off before removing it from each section to avoid disturbing the curl and creating frizz. Once dry, scrunch out any crunchiness from gel cast to reveal soft, defined curls. Do not touch curls while they are drying or you will break the clumping and create frizz in exactly the spots where your layers are most obvious.
Quick fixes for bad hair days
- Pin back the shortest face-framing sections with bobby pins or a claw clip for an intentional half-up look
- Use a lightweight texturizing spray on dry hair to blend puffiness into volume
- French braids or a loose braid down one side make use of mid-length layers that feel too short to style freely
- A headband or ribbon worn across the crown covers that area when shorter layers are sticking up
- Dry shampoo at the roots adds lift that draws attention upward rather than to the mid-length bulk
- A silk scarf tied loosely around the hairline is both practical and stylish during the worst bulk weeks
Trimming without resetting your progress
The single biggest mistake people make during a layer grow-out is either never trimming (which leads to split ends, breakage, and a shape that looks increasingly chaotic) or trimming too aggressively (which resets the perimeter and leaves them back where they started). If you are unsure when trimming helps versus resets your timeline, use these same “keep growing or re-cut” decision rules for your shag grow-out. The solution is strategic, minimal trimming focused on the right parts of the haircut.
Keep the bottom edge of your hair stable. This means asking your stylist specifically not to take any length off the perimeter unless you have significant splits or breakage that genuinely require it. Every quarter-inch removed from the perimeter is a month of grow-out time lost. Instead, trimming energy should go toward the interior layers: blending harsh layer lines, softening the transition between short and long sections, and removing bulk that is causing the triangle silhouette. If you are searching “how to grow out layers” on Reddit, the most repeated advice is to avoid resetting the perimeter and to trim strategically only when needed month of grow-out time lost.
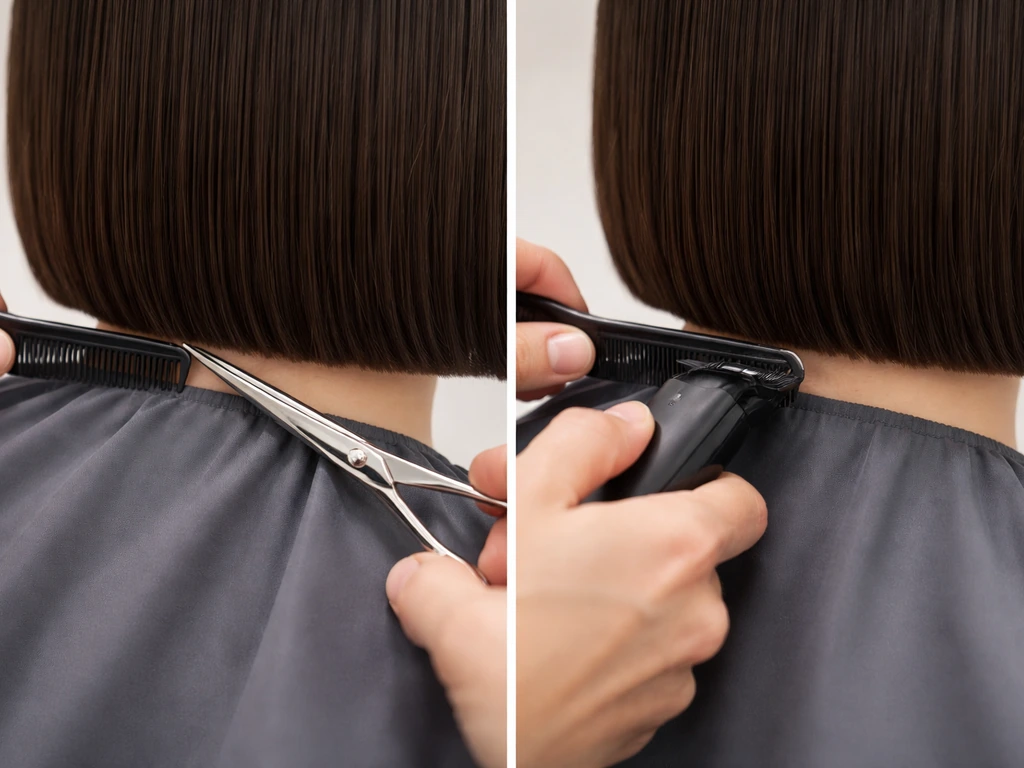
Point cutting is the most useful technique for this. It means cutting into the ends of the hair at a vertical angle rather than making a straight horizontal cut across. This softens layer endpoints so they blend rather than sit in a visible shelf. A stylist who understands grow-outs will alternate point cutting with a light razor technique to create seamless movement through the layers rather than a blunt, boxy result. Ask for this specifically.
A good trimming cadence for a shaggy layer grow-out is every 8 to 12 weeks for most hair types, with wavy and curly hair often needing a look at the 8-week mark to catch interior bulk before it becomes unmanageable. Bokaos Salon & Spa similarly recommends keeping ends sealed with minor end-trims about every 8 weeks when the cut line softens every 8 to 12 weeks. Fine, straight hair can often stretch to 10 to 12 weeks between trims if the routine is solid. At each appointment, ask for a dusting (just frayed tips) on the perimeter and a blend or point cut through the interior layers only.
Adjust your heat, products, and technique by hair type
What works in a grow-out routine depends heavily on your hair type. Here is a breakdown of what to prioritize:
| Hair Type | Best Drying Method | Key Products | What to Avoid |
|---|---|---|---|
| Straight / Fine | Round brush blow-dry downward | Light smoothing cream, heat protectant, anti-frizz serum | Heavy oils that flatten roots; excessive touching while drying |
| Straight / Thick | Blow-dry with paddle brush, section by section | Smoothing serum, medium-hold cream | Air-drying without product (creates bulk); skipping leave-in |
| Wavy | Scrunch and air-dry or diffuse low | Curl cream, light mousse, anti-frizz gel | Brush through when dry; heavy creams that weigh out the wave |
| Curly (2C to 3B) | Diffuse on low heat, cupping curls upward | Leave-in, curl cream, hold gel (SOTC after) | Touching curls while wet; terry towel rubbing |
| Coily (3C to 4C) | Diffuse or stretch with tension while diffusing | Rich leave-in, curl custard or butter, sealant oil | Skipping protein treatments; heat without protectant |
Regardless of hair type, the product layering order matters more during a grow-out than at any other time. Go in this order: leave-in conditioner on damp hair first, then your styling product (cream, gel, or mousse) on top of the leave-in while it is still wet, then a serum or oil last to seal everything. Applying serum before your styling product blocks it from absorbing, which wastes the product and leaves you with greasy-feeling hair that still frizzes.
Heat tools are fine to use during a grow-out but always use a protectant and keep temperatures reasonable. Repeated high heat on hair that is already transitioning through a grow-out adds brittleness and breakage, which extends your timeline. If you love blow-drying, try alternating with air-dry days to reduce cumulative heat damage.
When to re-cut and when to commit: honest decision rules
Sometimes the right move is to keep growing. Sometimes it is to take a step back, get a strategic shorter cut that works better for your current length, and grow from a cleaner baseline. Here is how to decide which situation you are actually in.
Keep growing if:
- Your perimeter is already past chin or jaw length and your interior layers are starting to catch up
- The bulkiest phase (months 2 to 4) is behind you and things are starting to connect
- You can manage the awkward shape with styling and it does not interfere significantly with your daily life
- Your target style requires more length than you currently have (long layers, curtain bangs grown into face framing, shoulder-length blended cut)
- A strategic blend trim every 8 to 10 weeks is keeping the shape intentional
Consider a strategic re-cut if:
- The layer disparity is so extreme that no styling routine is making it look intentional
- Your ends are significantly damaged or breaking, which means the perimeter keeps shortening anyway
- You are in the bulk peak phase and a shorter cut with minimal, longer layers would give you a cleaner grow-out baseline from a more manageable length
- The current shape is genuinely affecting your confidence and you have months to go before real blending is possible
- A mullet-like situation is developing where nape and back sections are dramatically longer than sides and top
A strategic re-cut is not giving up. One valid grow-out path is to let the shaggy layers grow to a medium length, then get a re-cut that creates longer, softer layers from that new baseline, and continue growing from there. This staged approach often gets to the goal faster than white-knuckling through 18 months of awkward without any adjustment. The key difference between a re-cut that helps and one that hurts your progress is this: if the stylist is removing length from the perimeter rather than reshaping the interior, push back or find someone who understands the goal.
Check in with yourself every two months. Ask whether the shape is progressing or just getting more chaotic. If your honest answer is that it looks worse at month four than it did at month two and nothing in your styling routine is helping, a consultation with a stylist who specializes in grow-outs is worth the appointment. There is no single right path here: your hair, your pace, your call.
FAQ
How do I grow out shaggy layers if I also have bangs, especially curtain bangs?
If your bangs sit much shorter than the rest, plan for the extra awkward phase in front. A practical approach is to grow them while keeping their edges shaped, then switch to a longer blending plan at your next trim window (around 8 to 12 weeks) so the front stops catching and lifting away from the sides.
What if my grow-out looks too bulky, can I trim without ruining the timeline?
Yes. If you need to remove some bulk for comfort, target interior “puff zones” with a dusting and interior blend, not a perimeter reduction. Even a small perimeter take-off costs time because it restarts the edge-length timeline, so ask for perimeter protection unless you have genuine splits.
Can I use flat irons or lots of heat to speed up how “blended” my layers look?
In most cases, straighten or blow-dry once and then stop touching. Excess re-heat and frequent combing can create frizz and separate layer lines. Use the lowest effective temperature, apply a heat protectant, and finish with a light hold product only where the short layers jump.
My crown looks fluffy and disconnected, what’s the fastest way to fix that during the awkward phase?
If you have straight hair and the crown is separating, use blow-dry direction to control placement, then add weight. A quick rule is: blow the crown downward and away from the face, apply smoothing cream before drying, and avoid layering oil at the roots because it can make separation look more obvious as it weighs differently.
What should I do if my layers tangle or mat while growing them out?
Don’t rely on trim to fix matting or tangles. Clarify once in a while (only as needed based on product buildup), then focus on conditioning at mid-lengths to ends and detangle gently before styling. If tangles keep forming, your layer lengths may need interior blending earlier, not more perimeter trimming.
Exactly what should I ask my stylist for at a grow-out appointment?
A good grow-out haircut appointment should include a perimeter check and a clear interior reshaping goal. Ask for dusting on the perimeter (only if needed) plus point cutting or point cutting combined with light razor work through the interior layers, so you soften the layer endpoints without creating new “shelves.”
Will dyeing my hair affect how easy it is to grow out shaggy layers?
Color can make disconnection more noticeable, especially if it’s high-contrast balayage. To minimize visual harshness, keep ends in good condition (leave-in and serum) and consider toning/refreshing only when it’s due, then let the next shaping appointment handle blending rather than trying to “fix it” with heavy color changes.
How do I know when I should stop waiting and book a stylist for a grow-out consult?
If the silhouette is getting worse after about two months and your routine isn’t improving it, it usually means the interior bulk and transitions were not set correctly for a grow-out. At that point, book a consultation and show photos from day one and now, plus mention whether you want to protect the perimeter length.
What are the best temporary styles when the triangle or boxy shape shows up?
If you’re in the hardest phase (often around weeks 6 to 12), try temporary styling that disguises the mid-section shift rather than trying to cut your way out immediately. Use half-up or clip-back to anchor shorter layers, and avoid heavy oils on the perimeter because they can emphasize the shelf effect where lengths meet.
What if my grow-out seems stuck because of breakage or split ends at the layer tips?
If you’re noticing breakage, especially at layer endpoints, pause any aggressive detangling and reduce heat frequency. Breakage makes the hair shorter than your plan and can make blending seem impossible. In that situation, ask your stylist about trimming only the damaged ends (dusting) and adjust the routine for gentler handling and more moisture.