Growing out face-framing layers takes roughly 6 to 12 months depending on how short the front pieces are and how fast your hair grows (about half an inch per month on average). The awkward part is real, but it's manageable if you know which stage you're in, how to style around it, and when to ask for a blending trim versus when to leave the scissors alone entirely.
How to Grow Out Face-Framing Layers Without Mess

Marcus Vickers
1 May 2026

What you're actually growing out (and why it gets awkward)
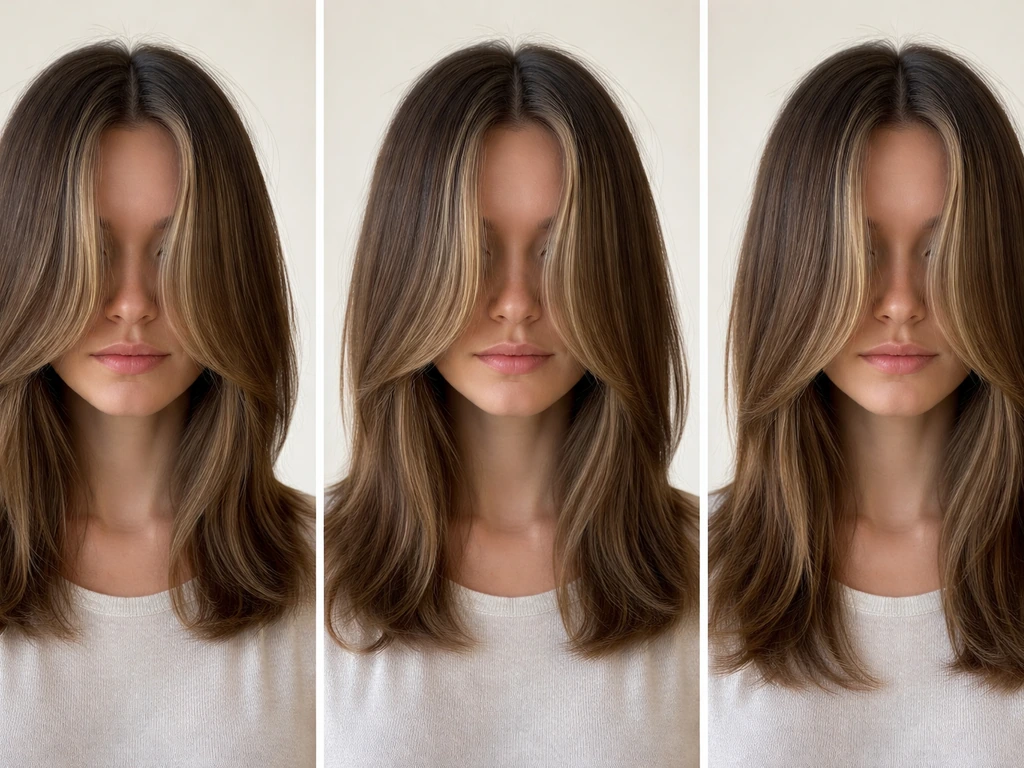
Face-framing layers are the pieces cut shortest around the front of your face, usually starting anywhere from cheekbone to chin. They might be curtain bangs that have grown past your eyes, a few short pieces around a bob or lob, or a full shag's front layers that are now poking out at jaw level. The cut type matters more than people realize.
A U-shaped front cut grows out rounder and softer, while a V-shaped or steeply angled cut tends to stay sharp-looking longer and can create obvious 'points' at the sides as it grows. Point-cut ends (where the stylist cut into the tips rather than straight across) also grow out more blended, but they can still look uneven if the shortest pieces were cut very short to begin with.
The 'awkward phase' kicks in when the shortest layers are long enough to get in the way but too short to tuck behind your ear, blend into the rest of your hair, or lay flat without flipping. For most people that window is roughly 2 to 5 inches of length on the front pieces, which can mean anywhere from 4 to 10 months of management. Your goal isn't to white-knuckle through it, it's to have a strategy for each sub-phase so you're never caught without options.
The grow-out timeline, stage by stage
Use your shortest face-framing piece as your reference point, not the back of your hair. That front piece is what determines your current stage and your next goal.
| Stage | Front layer length | What it looks like | Main challenge |
|---|---|---|---|
| Stage 1 | Under 2 inches (eye-to-cheekbone) | Looks intentional if styled, but stiff and wispy when unstyled | Pieces flip or stick out; can't be pinned back easily |
| Stage 2 | 2–3 inches (cheekbone to nose) | Starts looking shapeless; old cut has lost its shape | Front pieces fall in your face, frizz more, look disconnected |
| Stage 3 | 3–4 inches (nose to upper lip) | Almost chin-adjacent; bulk starts showing | Heaviness at jaw/chin, pieces may flip outward or under |
| Stage 4 | 4–6 inches (upper lip to chin) | Chin-length zone; very close to blendable | Frizz, flips, and layering may look uneven side to side |
| Stage 5 | Chin-length and beyond | Starts merging with the rest of your hair | Texture differences between front and back, shape still soft |
Once the front pieces hit chin length, they're generally blendable with a good trim and styling, which lines up with the 6 to 9 month mark that stylists typically quote. If your layers are growing out alongside bangs, a pixie or bob transition, or a shag (which has multiple layer lengths to contend with), the timeline compounds because you're managing several different lengths at once. If you want extra guidance, follow a dedicated plan for how to grow out a shag so the layers keep blending as they lengthen shag (which has multiple layer lengths to contend with).
How to style through each awkward stage
Styling is what keeps this process from looking chaotic. The good news is that at every stage there's at least one reliable approach that works.
Part placement
Your part is the single fastest fix. A deep side part moves weight and length to one side, which hides the asymmetry of layers that are growing at different rates. A center part works better once the front pieces are at least nose-length and roughly even. When you're in Stages 1 and 2, avoid a hard center part, it will put your shortest, least-even pieces on full display on both sides.
Blow-drying for control

Blow-drying with direction is your biggest tool for flips and frizz. Remove about 80% of moisture first (rough dry at the roots), then use a round brush to direct the face-framing pieces either inward (for a soft, blended look) or smooth and straight down. Direct your dryer's heat primarily at the roots to start, then work down the shaft, this is what actually sets the direction of the hair rather than just drying it. Finish with a medium-hold spray or a light serum for anti-humidity protection. If your hair flips outward no matter what you do, blow-dry those pieces inward while they're still warm, then hold them with your fingers until they cool completely.
Clips, pins, and low-heat styling
In Stages 1 through 3, clips and bobby pins are genuinely useful, not just a workaround. Pinning the face-framing pieces back at the temples with a thin clip looks intentional and keeps them out of the way while the rest of your hair gets longer. Braiding the front sections back (even loosely) is another option that works across hair textures. For heat-free texture, twist the front pieces back while damp, secure with a clip, and release when dry, this gives a soft wave that blends better than straight pieces against layered hair.
Anti-frizz and texture products
Anti-humidity serum or cream applied to damp hair (not dry hair) is the most effective way to keep face-framing layers smooth. Apply it mainly to the mid-shaft and ends of the front pieces, not the roots. If you use dry shampoo, apply it at the roots only and distribute it carefully before it sets, applying it too late or too close to the scalp on short face-framing layers can make them look stiff and unintentional. For wavy or curly hair, a light curl cream on the front pieces helps them spiral into the rest of your texture instead of frizzing out separately.
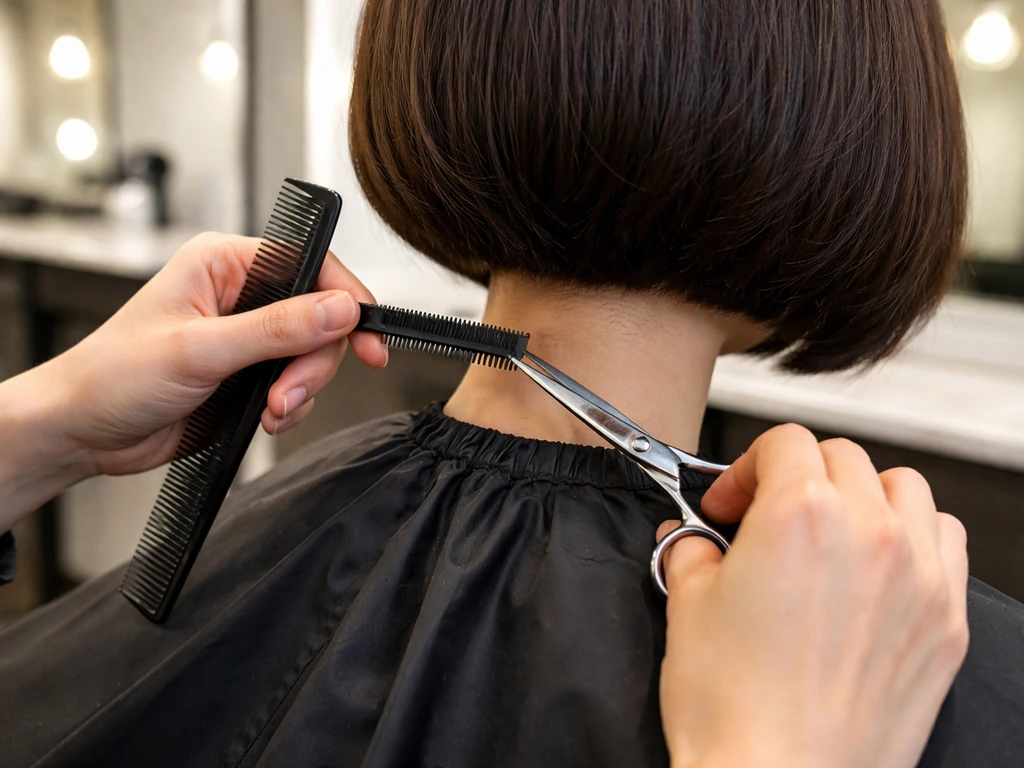
Trims, blending, and exactly what to say at the salon
This is where most people go wrong. Either they avoid the salon entirely and end up with straggly ends, or they ask for a trim and end up back at square one. The answer is somewhere in the middle, and it changes depending on your stage. If you want more specific guidance like other people share on how to grow out layers, search the exact phrase “how to grow out layers reddit” for practical tips and routines.
When to get a micro-trim
A micro-trim removes about 1/8 to 1/4 inch, just enough to clean up the ends and soften any bluntness without sacrificing real length. This is useful at Stages 2 through 4 if your ends look scraggly, if one side is noticeably longer than the other, or if the layers look completely disconnected from the rest of your hair. Ask your stylist specifically for 'a blending trim on the face-framing pieces only, I'm growing them out, so I only want to remove split ends and soften the line, not reshape the layers.' Point cutting the ends (cutting into the tips rather than straight across) keeps them soft as they grow and avoids creating a hard line.
When to skip the scissors entirely
In Stage 1 especially, the best move is usually to leave the front pieces alone and let them gain length. Trimming too frequently, even small amounts, can stall your progress noticeably. If you're getting micro-trims, aim for no more than every 8 to 10 weeks on the face-framing pieces. The back and sides of your hair can be trimmed on a normal 6 to 8 week schedule without affecting your front layer growth.
The 'strategic refresh' option
If your awkward phase is really bothering you in the Stage 3 to 4 window, you can ask your stylist to blend everything to a single intentional length, often around collarbone, rather than continuing to manage multiple lengths. This 'refresh trim' essentially resets the shape while keeping your overall length goal in sight, and it can make the next few months feel much more manageable. Just be clear that you want to blend, not start over.
Common problems and how to fix them
Uneven fronts
If one side of your face frame is noticeably longer or shorter than the other, part placement is your fastest fix while you wait for length to even out. Part on the side with the shorter pieces to push more hair forward on that side. If the difference is more than about half an inch, a micro-trim to even them up is worth it, just make sure your stylist takes from the longer side only.
Flipping and curling out
Layers that flip outward are usually responding to weight: they're too light and short to lay flat but too long to sit against your face. Blow-dry them inward and hold until cool, use a small amount of smoothing balm on the ends, or pin them temporarily while they air dry in the right direction. Once they hit chin length and have more weight, this usually resolves on its own.
Cowlicks at the front
Cowlicks at the hairline or crown redirect hair in a different growth direction, which is why you can't just smooth them flat, you have to work with the direction they're already going. Adjust your part slightly toward the cowlick rather than away from it. When blow-drying, move in the cowlick's natural direction first to set it, then redirect slightly. Fighting a cowlick with heat alone usually results in the hair springing back within a few hours.
Bulk and heaviness at the jaw or chin
This happens when the growing layers start to stack up at jaw level, creating a dense-looking line of hair all at the same length. A blending trim from your stylist (slide cutting or point cutting into those pieces) can reduce the bulk without shortening your length significantly. In the meantime, texturizing spray or light braiding while damp can break up the density and make the transition look softer.
Special situations: bangs, short cuts, undercuts, and colored hair
Growing out with bangs or a bang-to-layer blend
If your face-framing layers started as bangs (curtain bangs especially), you're managing two things at once: bang regrowth at the very front and layers growing on the sides. The bang pieces need slightly different handling, they're usually shorter and tend to separate or part awkwardly.
As they grow, shape them with a small amount of pomade or balm to keep them swept to one side, or use a narrow clip at the hairline while they close the gap to your face frame. Growing out layers and bangs at the same time is its own process worth planning separately if your bang section is more than an inch shorter than the rest of your face frame.
If you want a tighter game plan, see how to grow out layers and bangs for more stage-by-stage tips and timing Growing out layers and bangs.
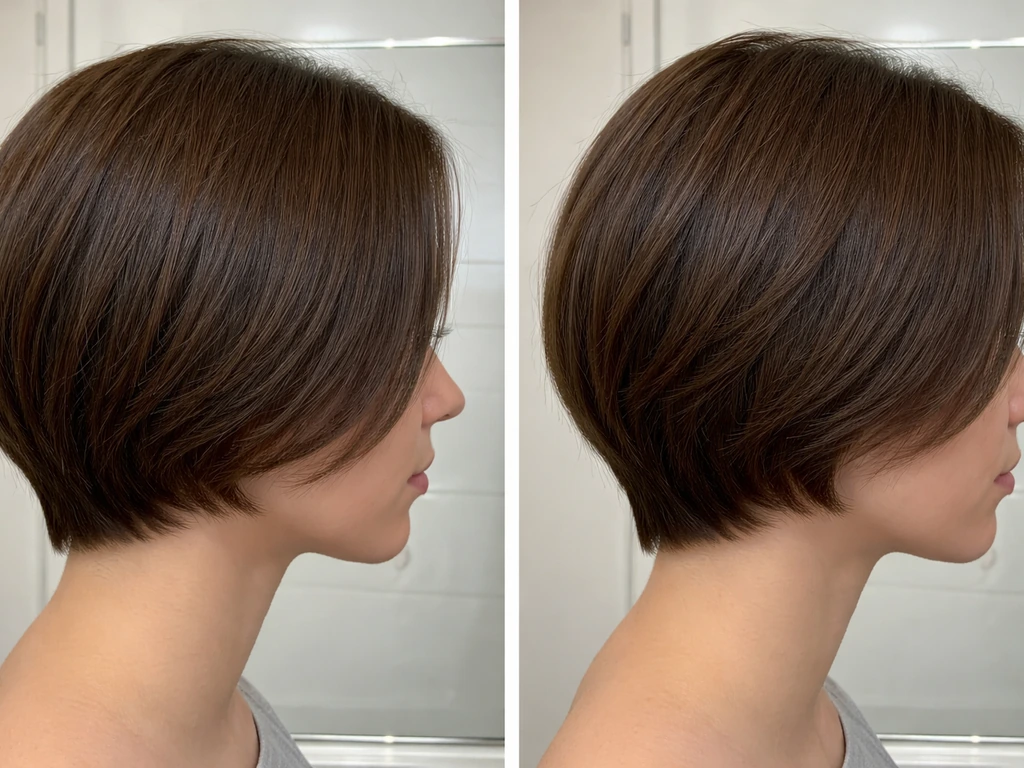
Pixie or bob transitions
If you're growing out a pixie or short bob, your face-framing layers are the pieces that have likely grown fastest and may already be longer than the rest of your hair. The challenge here is that the sides and back are catching up, which can create a round or boxy look. Salon visits every 6 to 8 weeks (for fine or medium hair) to shape the back and sides while leaving the front alone help keep the whole picture looking intentional rather than neglected. The front pieces will naturally blend in as the rest catches up.
Undercuts
If you have an undercut, shaved or very short sections underneath, your face-framing layers growing out will start to reveal the contrast more as the top gets longer. You can either maintain the undercut while the top grows (the most intentional-looking option) or stop shaving it and manage the gradual grow-in, which takes longer but eventually creates a single unified length. If you're growing the undercut out at the same time, expect an extra 6 to 12 months and consider more frequent shape-up trims to keep the transition gradual.
Colored or bleached hair
Bleached or lightened face-framing layers are more porous and fragile than natural or virgin hair, which means they break more easily and can appear shorter than they are if breakage is happening. Protect them with a bond-strengthening treatment or leave-in conditioner, and avoid frequent heat styling at high temperatures on the front sections. Bleach damage is cumulative and stays in the hair until it grows out or is cut off, so the ends of your lightened layers may look and behave differently from the new growth near the roots. If you're also managing color lines as they grow, be aware that overlapping bleach during touch-ups can cause breakage at the demarcation line, something worth discussing specifically with your colorist.
Your next-steps plan for this week
Start by measuring your shortest face-framing piece right now so you know your actual stage. That single step will tell you more than anything else about what you need to do next.
- Measure your shortest front piece from the root. Write it down and mark today's date—this is your baseline for tracking half-an-inch-per-month progress.
- Identify your current stage from the timeline above and pick one styling approach to try this week (a new part placement, a directed blow-dry, or a front pin-back).
- If your ends are scraggly or one side is noticeably uneven, book a micro-trim appointment and use the exact language from the salon section above.
- If you're in Stage 1 or 2 with no split ends, skip the salon and focus entirely on styling—length is your priority right now.
- Set a reminder 4 weeks from today to re-measure. Half an inch of new growth will be visible, and you can adjust your styling approach to the next stage.
- If you have colored or bleached layers, add a bond treatment or strengthening mask to your routine this week—fragile ends that break will undo your length progress faster than anything else.
If you're also growing out other parts of your cut, like shaggy layers throughout or multiple length zones from a shag haircut, the face-framing pieces are usually the most visible and the ones to prioritize first. If you are growing out shaggy layers throughout, keep your face-framing pieces as the visual priority so the rest of the blend catches up. Get those under control and the rest of the grow-out process tends to feel a lot less overwhelming. You're not starting over; you're just managing a transition, and most of it comes down to knowing which stage you're in and having a plan that fits today.
FAQ
How do I tell which stage I’m in if my front pieces are uneven?
Measure the shortest face-framing strand you can find, not the longest. Then decide your stage based on that length (for example, chin length usually means you can blend sooner). If one side differs by more than about half an inch, treat it as a two-stage problem, use part placement to “buy time,” and consider a micro-trim that removes from the longer side only.
Can I tuck face-framing layers behind my ears to get through the awkward phase?
Sometimes, but it depends on weight and texture. If the pieces are flipping out or standing off your face, tucking will look inconsistent and can create crease lines. A better option is pinning them at the temple with a thin clip or using a directed blow-dry inward while they are still warm, then holding until cool so they stay down.
What should I do on wash day when my layers never lie flat?
Focus on roots and direction first. Dry about 80% with the hair pulled in the direction you want, then use a round brush (or smoothing paddle) to set the front pieces from root to mid-shaft, finishing with a small amount of medium-hold spray or light serum. If they spring back within hours, your issue is usually weight, not styling technique, so revisit whether you’re due for a micro-trim.
Is it better to use a trim or styling products when my layers look straggly?
Straggly usually means ends need separation fixed, not just product. If the line looks blunt or disconnected and you see frizz at the tips, use a blending micro-trim to remove split ends and soften the border. If the ends are healthy but look puffy, try anti-humidity on damp hair (mid-shaft to ends only) and avoid applying it too close to the scalp.
How often can I ask for a micro-trim without stalling growth?
For the face-framing pieces, aim for no more than every 8 to 10 weeks, and only when the ends look damaged, one side is clearly off, or the layer border is getting harsh. You can keep the rest of your hair on a normal schedule (often every 6 to 8 weeks) so you are not trimming the same zone repeatedly.
Will curtain bangs that are growing out keep working with the same face-framing plan?
Partly, but bang regrowth often separates more and behaves differently from side layers. If the bang section is more than about an inch shorter than the rest, plan for separate handling, like sweeping with a small amount of balm or pomade and using a narrow clip at the hairline as the gap closes. Treat it like a second grow-out alongside the face frame.
How do I stop outward flips if blow-drying inward makes my hair look bulky?
Try reducing lift at the roots and setting the mid-shaft smoother. Dry the roots first, then direct the front pieces inward while warm, and finish with a light smoothing balm only on the ends. If you still get bulk, a stylist can do a bulk-reduction blend at jaw level (without shortening your length) so the hair has less weight to “kick out.”
When I use dry shampoo, my short front pieces look stiff, why?
Timing and placement are usually the problem. Apply dry shampoo at the roots only, distribute before it sets, and do not concentrate it near short face-framing layers close to the scalp. If your front pieces still stiffen, switch to a lighter touch or alternate with a small amount of anti-humidity serum on damp lengths to keep them flexible.
What’s the best way to blend my layers if I’m considering a “refresh trim” in Stage 3 to 4?
Ask for blending to a single intentional length (often around collarbone), but be explicit that you want continuity, not a full restart of the layer pattern. If your goal is a specific final length or shape (soft U, less pointiness, more face coverage), describe it and ask whether they’ll keep the front pieces integrated rather than re-cutting them shorter.
How should I manage face-framing layers if I’m growing out an undercut or shaved sides?
Expect the contrast to become more noticeable as the top length increases, so decide whether you want the undercut maintained or eventually unified. If you’re growing it out, plan extra shape-up visits, because the transition area looks unfinished longer than the face frame alone. If you keep it, focus trims on the top so the front stays intentional while the sides remain intentionally shorter.
Do bleached face-framing layers need different grow-out handling?
Yes, they often break and can appear shorter than the actual growth. Use a bond-strengthening leave-in or treatment and lower heat on the front sections, especially at higher temperatures. Also watch the demarcation line during touch-ups, overlapping bleach can increase breakage where the old and new color meet, which can make the face frame look uneven even if it’s growing.
What should I tell my stylist so they don’t reshape my layers accidentally?
Bring the specific goal: “I’m growing out the face-framing pieces, remove split ends and soften the line only.” Ask for a blending trim on the face-framing pieces only, and mention point cutting if your ends are prone to looking blunt or sharp as they grow. If you want minimal change, emphasize that you are trying not to alter the layer pattern, only the edges.