Growing out dyed gray hair is genuinely one of the trickier color transitions out there, but it is completely manageable with the right plan. The short answer: expect roughly 6 to 18 months depending on your current length, keep the dyed portions hydrated and toned, and use strategic trims and styling to make every phase look intentional rather than accidental. Below is the full roadmap, from understanding exactly what you're dealing with today to styling tricks that make the in-between period feel a lot less awkward.
How to Grow Out Dyed Gray Hair: A Step-by-Step Guide

Marcus Vickers
24 Mar 2026

What you're actually growing out (and why it matters)
Before you can make a plan, it helps to know exactly what's sitting on your head right now. There are two very different scenarios that get lumped together under 'growing out dyed gray hair,' and the approach for each one is a bit different.
The first scenario: you intentionally dyed your hair gray (silver, ash, platinum, or charcoal) and now you want to grow it out to either your natural color or to let your natural gray come in underneath. In this case, your dyed gray lengths may have required bleaching or a strong toner to achieve that cool, ashy tone, which means those lengths are chemically processed and more porous than your natural hair. The dye itself may have been permanent or semi-permanent.
Semi-permanent gray dye typically starts fading noticeably after 6 to 8 washes, and can wash out almost entirely within 4 to 6 weeks, especially on porous or bleached hair. Permanent gray dye (think an ash blonde or permanent silver toner over bleach) is more resistant because the color chemistry penetrates the hair cortex rather than just sitting on the cuticle, so it takes longer to fade and is harder to transition away from cleanly.
The second scenario: you've been coloring over your natural gray to hide it, and now you want to stop and let the gray grow in. If you are growing out dyed gray instead of coloring over natural gray, the companion advice in this guide can help you pick the right routine and timeline growing out dyed gray hair.
That situation is covered in depth in a companion guide on how to grow out colored hair to gray, but if that sounds like your situation, that's the article you want. If your situation matches coloring over natural gray, follow the companion advice for how to grow out colored hair to gray. The guide you're reading right now focuses on the first scenario: you have intentional gray dye on your hair and you're growing it out.
How long this will realistically take
Hair grows at about 1 centimeter per month on average, which works out to roughly half an inch. Hair grows at about 0.3 mm per day, or roughly 1 cm per month, according to a dermatology review about 1 centimeter per month on average. That number doesn't change much no matter what you do, so the timeline is almost entirely about how long your dyed hair is right now. The longer the dyed lengths, the longer the process.
| Current hair length | Approx. time to grow out dyed portions (no trims) | With regular trims (~every 10 weeks) |
|---|---|---|
| Short (pixie, buzz, ear-length) | 3 to 6 months | 4 to 8 months |
| Medium (chin to shoulder) | 8 to 14 months | 10 to 16 months |
| Long (past shoulder) | 18+ months | Could be 2+ years |
These are rough ranges, not promises. If you're also fading the dye as you go (more on that below), the visible transition can feel faster because the dyed section becomes less distinct over time. If you had your hair bleached before the gray dye was applied, those bleached lengths are more fragile and may need more frequent trims, which will add time. Be honest with yourself about the length you're starting from and set expectations accordingly.
The awkward phase: roots, demarcation lines, and brassiness
The hardest part of this transition isn't the length of time, it's the visual contrast during the in-between period. Here's what you'll likely encounter and why it happens.
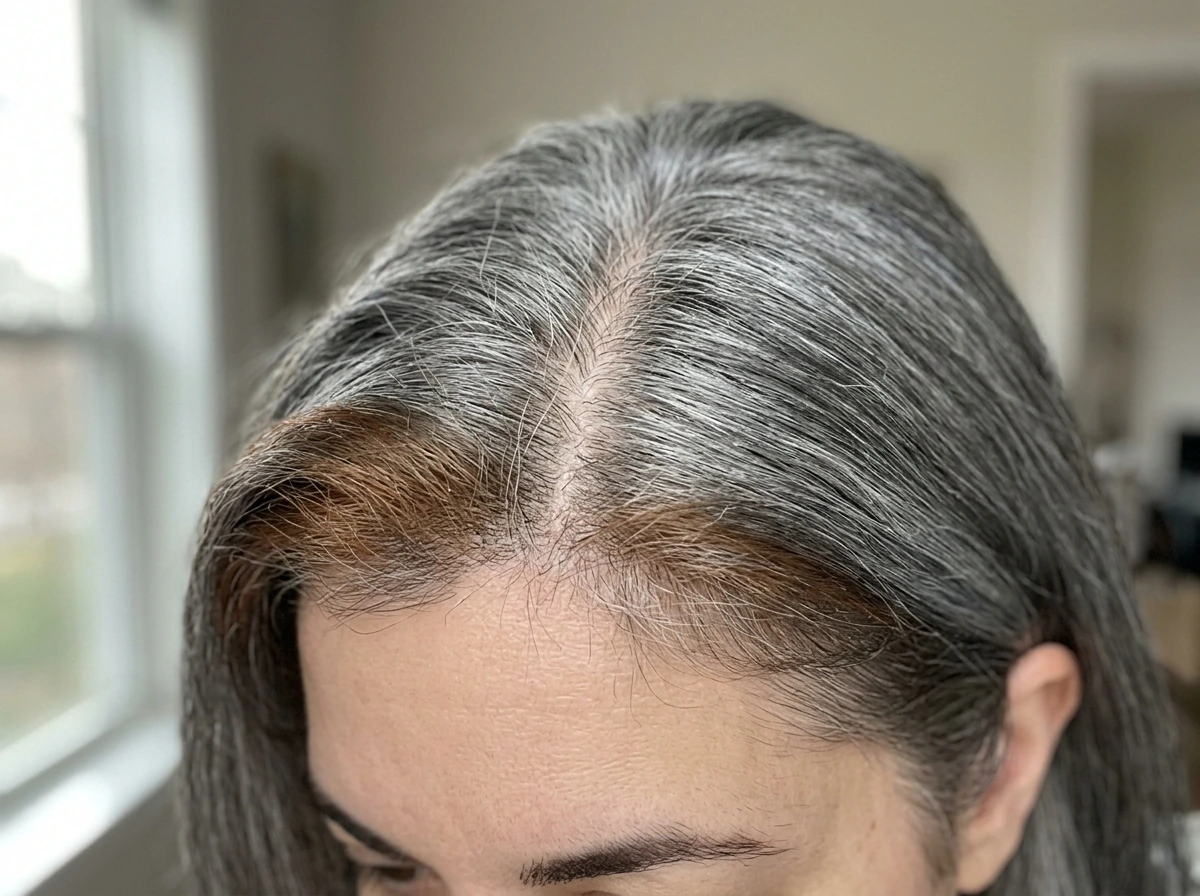
The line of demarcation
As your roots grow in, you'll see a visible line where new growth meets the dyed lengths. How stark that line is depends on how different your natural hair color is from the dyed gray. If your natural hair is very dark brown or black, the contrast against a silver or platinum gray dye is significant. If your natural hair is already lighter or already naturally graying, the line will be softer. This demarcation line is the central styling challenge of this whole process, and most of the techniques in this guide are aimed directly at blurring it.
Brassiness and undertone shifts
As your gray dye fades, it often reveals warm, brassy, or yellow undertones underneath, especially if the gray was applied over bleached hair. This happens because bleaching removes pigment in stages, and warm pigments are the last to go. When the cool gray toner on top fades, those warm tones resurface. Sun exposure, hot water rinses, and harsh shampoos all accelerate this. You might notice your gray starting to look more yellow, golden, or even greenish in some cases. This is normal, and it's fixable with the right routine.
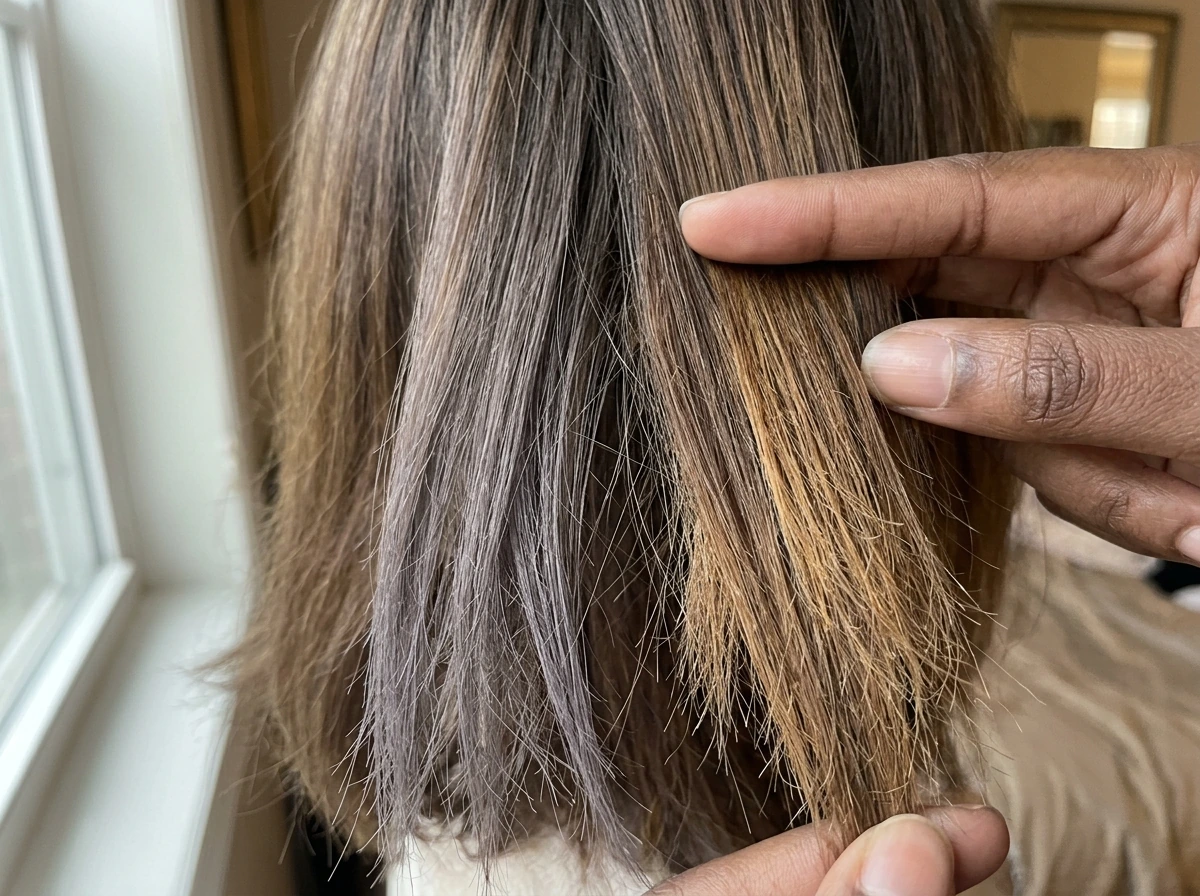
Uneven fading
Gray dye rarely fades at the same rate all over your head. The ends, which are the oldest and most porous part of the hair, usually fade fastest. Layers may fade at slightly different rates. You might end up with a patchwork of cooler gray near the roots and warmer or lighter tones at the ends before things even out. This is where styling and targeted toning can save you a lot of frustration.
The everyday routine that makes this process work
You can't speed up how fast hair grows, but you can control how the dyed portions look and behave as you grow them out. This routine is built around minimizing damage, managing fade, and keeping the tone as even as possible.
Washing and conditioning
Switch to a sulfate-free shampoo for your regular wash days. Sulfates are effective cleansers but they strip color quickly, especially from already-porous or bleached hair. Sulfate-free formulas clean without pulling out as much pigment. Rinse with cool water rather than hot, because hot water causes the hair cuticle to swell and release color faster. Follow every wash with a hydrating conditioner focused on the mid-lengths and ends, which are the most processed parts of your hair. If you currently co-wash or wash infrequently, keep it up, because fewer washes mean slower fade.
Clarifying strategically
A clarifying shampoo once or twice a month can remove product buildup and minerals that make gray or silver tones look dull, but use it sparingly. Clarifying shampoos cleanse aggressively, and overusing them will strip your dye and leave your hair dry. If you do clarify, always follow with a deep conditioning treatment the same session to restore moisture.
Purple or violet toning shampoo
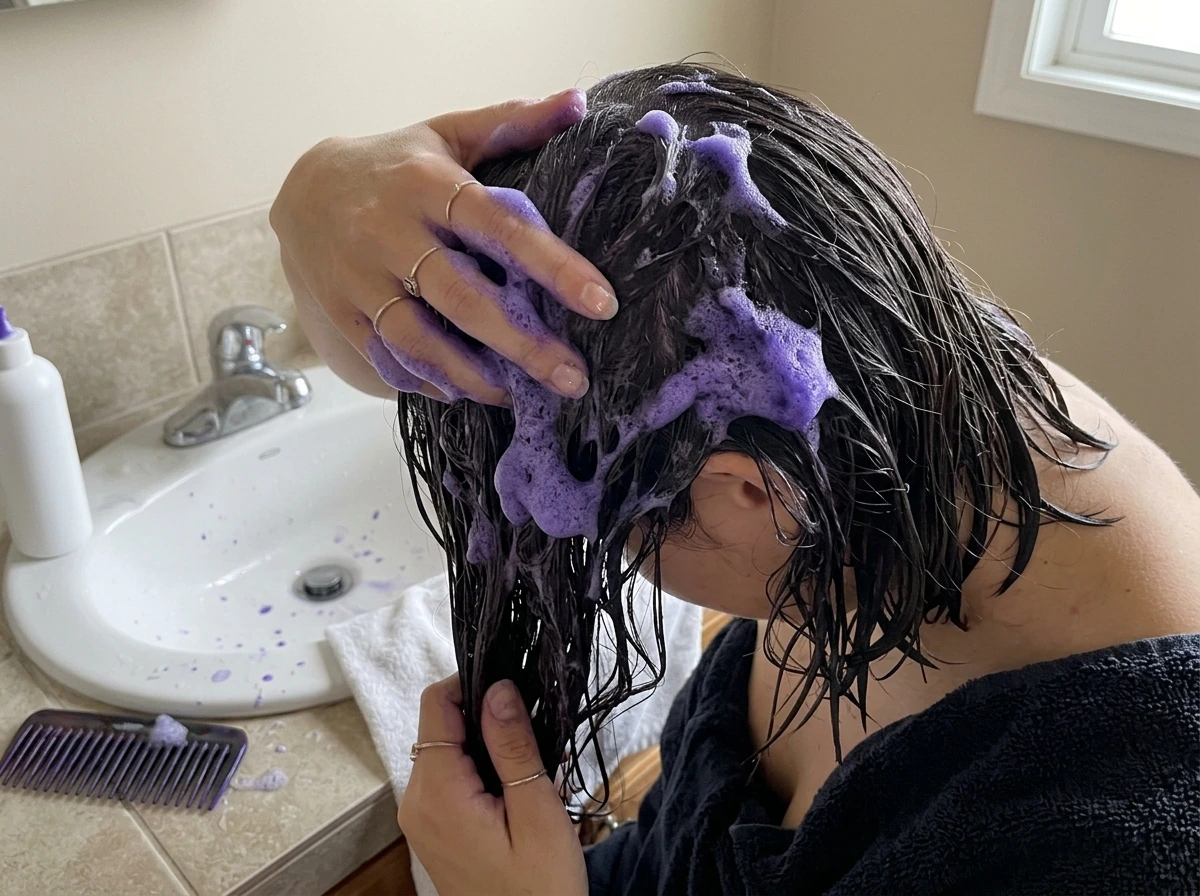
This is one of the most useful tools in this whole process. Purple shampoo neutralizes yellow and brassy tones by depositing cool violet pigment, which counteracts warm undertones on a color wheel. Use it once a week or once every two weeks, leaving it on for 2 to 5 minutes before rinsing. If you have silver or very pale gray tones, you may tolerate it a little more frequently, but be cautious: overdoing purple shampoo can turn hair ashy purple or grey-violet in a way that looks unintentional. Think of it as a toner maintenance step, not a replacement for your regular shampoo.
Heat protection and UV defense
Heat tools and sun exposure both accelerate color loss. Apply a heat protectant spray before blow-drying, flat-ironing, or curling, and consider a UV-protecting hair product or wearing a hat on prolonged sun exposure days. This is especially relevant for gray and silver tones, which can shift warm surprisingly fast in direct sunlight.
Deep conditioning once a week
Bleached and chemically processed hair is structurally more porous, which means it loses moisture faster than untreated hair. A weekly deep conditioning mask on the mid-lengths and ends keeps the dyed portions from becoming dry and brittle, which matters both for appearance and for preventing breakage. Healthy hair grows out looking clean and controlled; damaged hair breaks unevenly and makes the transition phase look messier than it needs to.
Styling tricks that make every phase look deliberate
The goal during grow-out is to keep the transition looking styled rather than neglected. The good news is that there are a lot of options here, and most of them are simpler than people think.
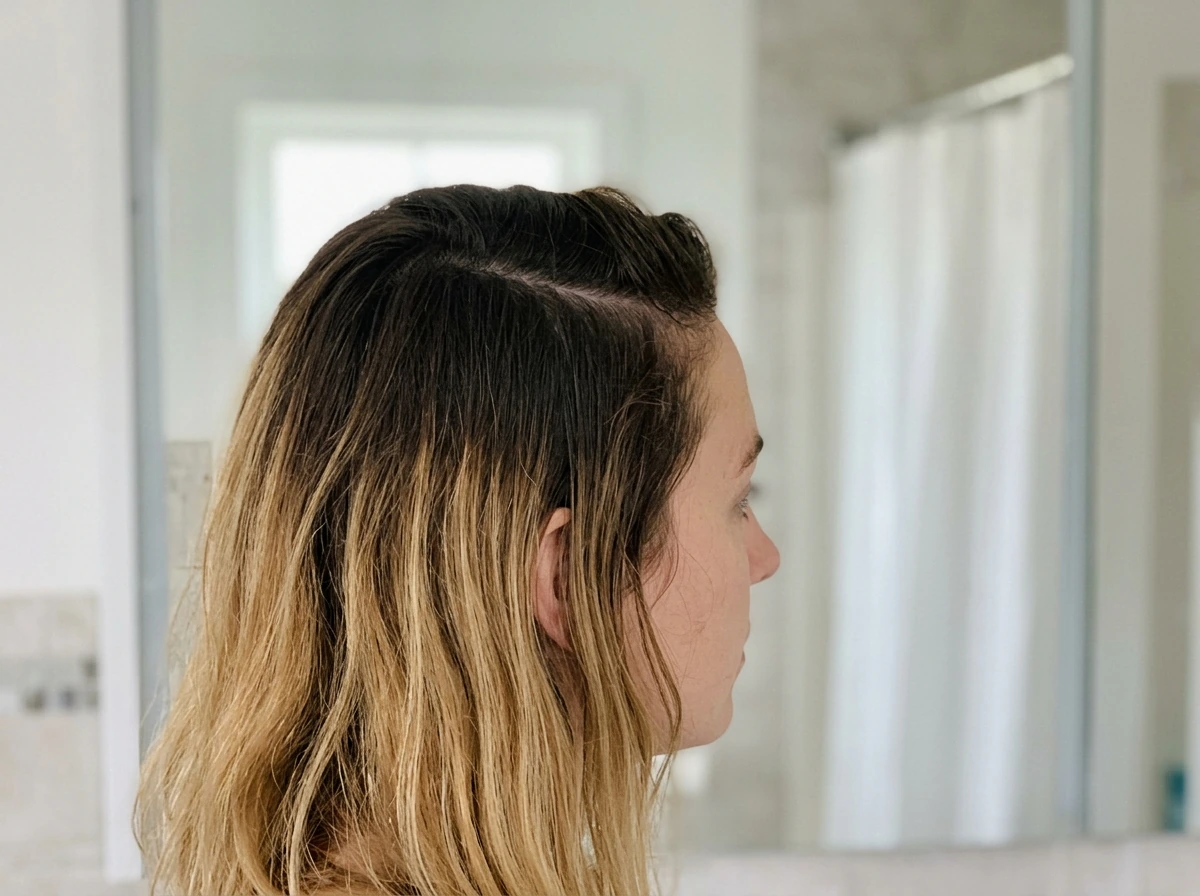
Change your part
Switching from a center part to a side part, or vice versa, is probably the fastest way to make roots look more intentional. A deep side part hides a clean root line and can make regrowth look like a deliberate shadow root or balayage effect rather than noticeable grow-out.
Ask for layers or a cut that blurs the line
Long one-length cuts show demarcation lines the most clearly because there's no visual interruption. Asking your stylist for face-framing layers, textured ends, or a slight graduation creates movement that breaks up the line between your natural root color and the dyed gray lengths. You don't need a dramatic haircut, just enough texture to make the color boundary look like dimension rather than a hard edge.
Bangs as a tool
If you're open to bangs, they completely conceal the hairline root area, which is often where the demarcation line is most visible. Even a curtain fringe that parts in the middle can camouflage a lot. Be aware that bangs grow fast (about 1 cm per month like the rest of your hair) and will eventually need trimming, so factor that maintenance into your decision.
Updos and braids
Pulled-back styles, buns, braids, and twists are legitimately excellent tools during this process, not just a fallback. A loose bun or low ponytail keeps the dyed lengths tucked away and makes the root color (whether natural or growing in) the focus. Braided styles blend different hair tones together naturally and can make a two-toned grow-out look intentionally ombre. If you have curly or textured hair, the companion guide on growing out gray curly hair covers protective styling in much more detail.
Embrace the ombre
This sounds almost too simple, but it works: reframe the grow-out as a deliberate ombre or balayage transition. Darker at the roots fading to lighter or different tones at the ends is a popular, modern look. If you style your hair with that framing in mind, and lean into it rather than fighting it, the grow-out period feels a lot shorter emotionally.
Trimming: how much, how often, and how to avoid setting yourself back
Trimming is one of the most anxiety-inducing parts of growing hair out, because it feels counterproductive to cut hair you're trying to grow. But skipping trims entirely usually backfires. Split ends travel up the hair shaft over time, causing breakage that removes more length than a preventive trim would have. A general guideline for most hair types is to trim every 8 to 12 weeks, taking off just enough to clean up the ends without losing meaningful length. For most people, that's about a quarter inch to half an inch per trim.
The important thing is to be specific with your stylist. Say 'I'm growing this out and I only want a dusting to remove splits, not a reshape.' If you go in without a clear direction, it's easy to walk out with more off than you intended. If you're also managing significant damage from bleaching, your stylist may recommend slightly more frequent trims in the first few months until the most compromised ends are removed. That's worth it because clean, healthy ends look better and grow out more evenly.
One thing that actually does set people back: getting a major cut impulsively during the frustrating middle phase. It's tempting when the in-between looks messy, but it restarts the timeline. If you feel the urge to cut it all off, try one of the styling fixes above first and see if it changes your perspective before picking up the scissors.
Your color options during the transition
You have more choices here than just 'keep the dye' or 'go cold turkey.' Here's a realistic breakdown of the main paths, with honest trade-offs for each.
| Approach | What it involves | Best for | Trade-offs |
|---|---|---|---|
| Just let it grow | No color appointments, rely on routine and styling to manage the transition | People close to a short length, or those whose natural color blends reasonably with gray | Most visible demarcation line; requires confidence and styling effort |
| Retone the gray | Use a deposit-only toner or purple/silver shampoo to refresh the existing gray tone between appointments | Keeping the dyed gray looking fresh while it slowly fades and grows | Doesn't address the root line; needs repeating every few weeks |
| Soften with highlights or lowlights | Ask a colorist to add dimension near the root line to blur the demarcation | Anyone with a noticeable hard line who wants a more seamless transition | Adds cost and appointments; lowlights are especially effective for darker natural colors |
| Corrective/transition color | Have a colorist blend the two tones (natural root and dyed gray) with a gloss, glaze, or transitional color applied mid-shaft | Those who want the transition to look polished throughout the process | More involved, may require multiple salon visits |
| Accelerate fade with clarifying | Use a clarifying shampoo more often to speed up fading of semi-permanent gray dye | People with semi-permanent or deposit-only gray who want to move on quickly | Can dry out hair significantly if overdone; only useful for semi-permanent dye, not permanent |
If your gray dye was permanent (or was applied over permanent bleach), the 'just clarify it out' approach won't work quickly. Permanent color is in the cortex of the hair strand and can't be fully removed by washing alone. In that case, your most practical options are either growing it out with regular trims, using color-blending techniques at the salon, or a corrective color service. Going from permanent gray or silver back to your natural color often requires a colorist's help rather than a DIY approach, especially if bleaching was involved. how to grow out gray hair with lowlights
If you're growing out to your natural gray rather than back to a darker color, the process is related but somewhat different. The guide on how to grow out grey hair gracefully covers that specific path in detail, including how to manage the visual transition when natural gray is coming in underneath previously colored lengths.
What to do starting today
Here's the honest summary: the best plan depends on where you're starting from, but most people will do well with this combination of steps. If you're wondering what the best hair color to grow out grey looks like during the awkward phases, use the right routine for your specific starting point best hair colour to grow out grey.
- Switch to a sulfate-free shampoo and cool water rinses immediately to slow the fade on your existing dyed lengths.
- Add a purple toning shampoo once a week to neutralize any brassiness as the gray fades.
- Do a deep conditioning treatment once a week, focusing on the dyed mid-lengths and ends.
- Book a trim in the next 8 to 10 weeks, and be specific with your stylist: a light dusting only, plus any layers or texture that will blur your root line.
- Decide on your color strategy: are you leaving the dye alone to fade, retoning occasionally, or booking a blending appointment? Pick one approach and commit to it for at least 2 to 3 months before reassessing.
- Practice at least one of the styling tricks (part change, braid, or updo) for the days when the in-between looks messy. Having a go-to style for those days matters more than it sounds.
- Set a realistic timeline for your current length using the table above, and mark a rough checkpoint date on your calendar to reassess your progress.
There's no single 'right' way through this process, and you don't have to do it all at once or perfectly. The people who come out of this transition the happiest are the ones who made a plan early, stuck to a consistent care routine, and stopped expecting the hair to look finished before it is. Give it the time it needs, keep it healthy, and it will get there.
FAQ
My ends are turning yellow or green before my roots meet the dyed parts, is that normal and what should I do first?
If your gray was achieved with toner over bleach, you may see warm tones before any visible root line, even when your roots are still growing in. To spot this early, check your hair in natural daylight and look for yellowing or greenish hints near the ends first (where porosity is highest). If that’s happening, tighten your wash routine (cool water, sulfate-free) and use purple shampoo only on the affected lengths, not the entire head, so you can correct undertones without over-toning the roots.
How often can I use purple shampoo when I’m growing out dyed gray, and how do I avoid it turning my hair purple?
Yes, but with a limit. For porous bleached hair, leaving purple shampoo on too long can create a patchy gray-violet cast, especially around previously highlighted sections. A safer decision aid is to start with 2 minutes (not 5) and increase only if the yellow is still obvious after rinsing and drying. Also, keep it off the scalp and root area if your root regrowth is darker or warmer, since staining and uneven tone are harder to fix than brassiness.
Does heat styling really make the gray fade faster, and what’s the best way to protect especially the ends?
If you use heat often, your goal is not just protection, it’s consistency. Always apply heat protectant to damp or fully dry hair as directed (some are meant for damp hair), and avoid stacking multiple heavy leave-ins that can insulate unevenly and leave certain sections drier. On grow-out hair, the ends usually need the most protection, so prioritize applying product from mid-lengths to ends even if you concentrate your styling on the top layers.
If my hair feels rough or breaks at the ends, how should I approach trims so I don’t lose too much length?
A “dusting” may not be enough if your hair is breaking, but you can still avoid a big haircut. Ask for a targeted end cleanup (removal of splits and 1 to 2 cm only where needed) rather than a uniform overall length reduction. If your stylist can, show them photos of where breakage or fraying is worst, because damaged ends can break and climb upward, making the grow-out look more patchy even if the overall length seems unchanged.
Should I book salon color correction now, or wait until the demarcation line gets worse?
You can try to blend visually without changing the chemistry, but expectations matter. Styling can camouflage most contrast (root line and undertones), while dye can actually alter the timeline if your goal is to reach natural color. If you want the lowest-maintenance option, use a deliberate shadow-root or side-part shift, then book salon color-blending only when the demarcation line becomes clearly noticeable in photos or natural light. This prevents repeated corrective sessions that can over-process ends.
My grow-out line looks harsh even though the color is fading, is it a conditioning problem or do I need more layers?
During grow-out, your “line” can look harsher because it’s both color and texture contrast. If the dyed lengths are more porous, they may feel drier and catch light differently. The fix is usually conditioning plus a cut adjustment, not additional dye immediately. Use a weekly mask on mid-lengths and ends, and consider adding soft layers or textured ends so the boundary sits in a moving shadow rather than a single flat stripe.
If my natural gray is a different shade, what’s the safest way to blend it into the dyed gray (lowlights vs. toning)?
It depends on what you’re trying to match. If your natural gray is lighter or already has a cool tone, blending your dyed ends with lowlights or toning can help camouflage the transition. But if your natural color is darker or warmer, lightening or toning the wrong direction can make the contrast worse for months. A good decision aid is to bring in a picture of your natural gray roots (no filter, natural light) and ask for a plan that first targets undertone matching near the roots, then gradually blends lengths, rather than an all-over “fix.”
What’s the quickest non-cut option to make roots look intentional while I grow it out?
The fastest way to “reset” visual contrast without restarting the grow-out is to change the part and fringe strategy, not cut length. Try a deeper side part to hide the cleanest root line, or add bangs or a curtain fringe if you want maximum coverage of the hairline root area. If you do choose bangs, plan for trimming as frequently as about monthly growth, because an untrimmed fringe can shift your overall blend point and make the roots look more noticeable.
Do protective styles like buns, braids, or twists help, and how do I keep them from damaging the dyed ends?
Protective styles help, but they need to be loose and gentle to prevent additional breakage. Avoid tight tension that pulls on the dyed ends, and don’t rely on slick, heavy products that can make gray look dull or dirty faster. If you braid, keep the braid moderate tension and consider braiding on slightly conditioned hair so the ends do not feel brittle and snap when you take the style down.