Growing out a female undercut is absolutely doable, and you do not have to cut it short again to get through the awkward phase. The short version: your undercut will take roughly 12 to 24 months to fully blend with your longer hair, depending on how short the shaved or clipped section was and how fast your hair grows. During that time, a mix of smart styling, a little patience, and some optional micro-maintenance will get you from "this looks weird" to "this actually looks intentional." Let's walk through exactly what happens, when, and what to do at each stage.
How to Grow Out an Undercut for Women Without Cutting

Marcus Vickers
12 Apr 2026
Understanding the grow-out stages of a female undercut
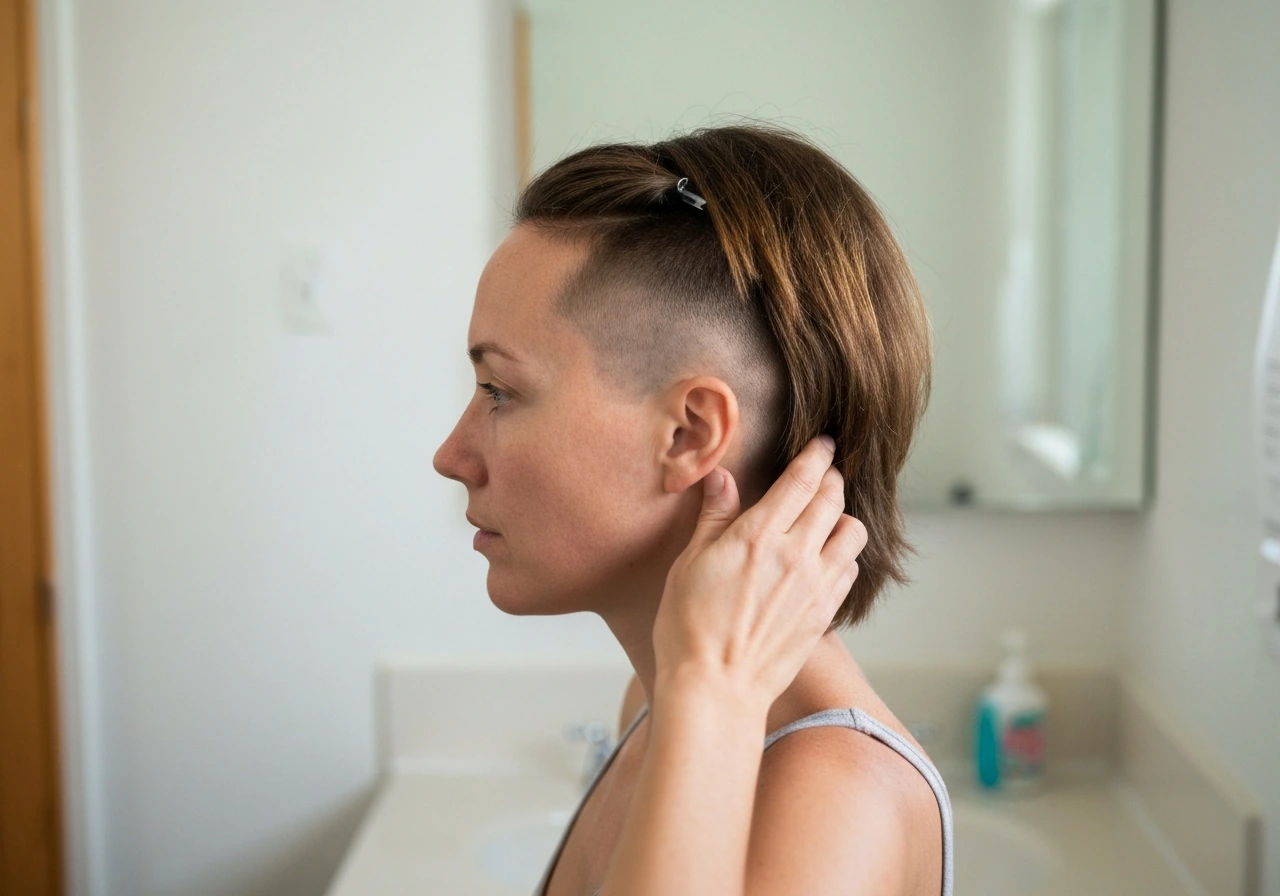
An undercut, whether it's at the nape, the sides, or both, creates a dramatic length contrast. The shorter section is usually cut to anywhere from a tight buzz (3–6 mm) to a clipper grade of about 1–2 cm. Your longer top and crown hair might already be 15–30 cm or more. That gap is what makes the grow-out feel so challenging, because you're not just waiting for short hair to get longer, you're waiting for two very different lengths to meet somewhere in the middle.
Stage 1 is the first 0–3 months. The undercut section starts as a true short cut (think fine, sometimes spiky texture) and begins growing in as soft, slightly wispy regrowth. It's not long enough to lay flat or blend, and it's especially noticeable when your longer hair moves. This is the phase people hate most, but it's also the most manageable with the right styling moves.
Stage 2 is roughly months 3–6. Your regrowth has reached somewhere between 1.5 and 5 cm, depending on your personal growth rate. It starts to show as a visible layer under your longer hair. If you have a nape undercut, this is when it starts to peek out in a ponytail. If it's a side undercut, the regrowth might look like a disconnected layer along your temple. This stage benefits most from blending techniques and strategic pinning.
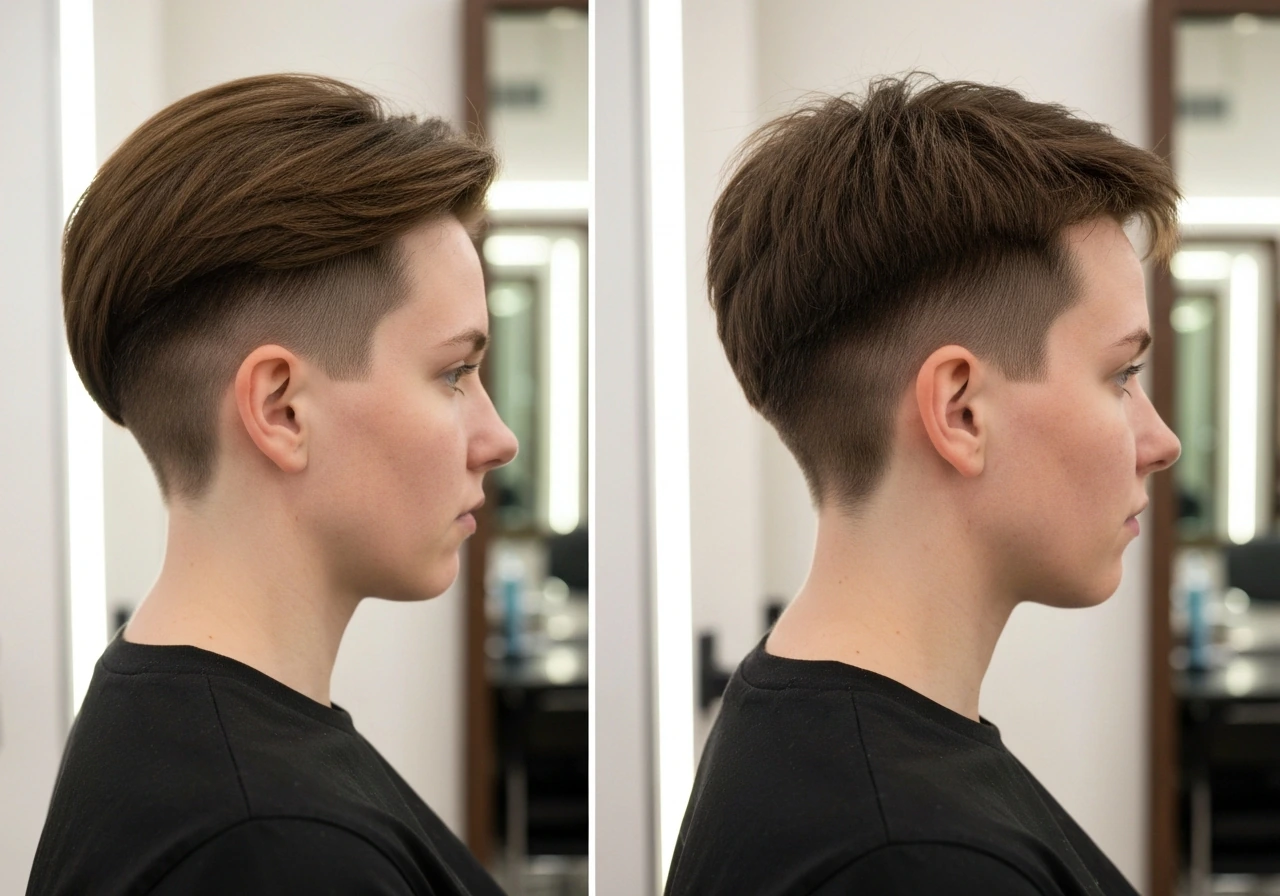
Stage 3 is months 6–12. The regrowth is now long enough to tuck, braid, or incorporate into styles but short enough to pop out unexpectedly. Think of it as the "it keeps escaping the updo" phase. This is also when cowlicks and natural growth patterns in the undercut area become more obvious, because the hair is long enough to have direction but not long enough to be weighted down.
Stage 4 is months 12–24. The undercut section is catching up. It's not fully blended yet, but you're working with significantly less contrast. By month 18–24, most people find the lengths have merged enough that the undercut is no longer the first thing anyone notices. Full visual blending depends on your original undercut length and the total length of your top hair. If you're also dealing with a nape undercut growing alongside long hair on top, the contrast can feel especially stark, but the same stage-by-stage approach applies.
The realistic timeline, month by month
Hair grows at roughly 0.5 inches (about 1.25 cm) per month on average, though the real range is wider than most people expect, anywhere from 0.6 cm to over 3 cm per month depending on genetics, age, health, and nutrition. For most people, planning around 1 cm per month is a safe, realistic baseline.
| Timeframe | Approx. regrowth length | What you'll notice | Priority action |
|---|---|---|---|
| Weeks 1–4 | ~1 cm | Soft stubble or very short fuzz in the undercut zone | Pin, tuck, or cover with longer hair; start heat-protectant habit |
| Months 1–3 | 1–3 cm | Wispy layer starting to appear; noticeable in updos | Use side-swept styles and strategic pinning to hide the regrowth |
| Months 3–6 | 3–6 cm | Visible under-layer; may poke out in ponytails or buns | Braid or twist the regrowth section into updos; try slick-back styles |
| Months 6–9 | 6–9 cm | Enough length to tuck but prone to escaping; cowlicks more obvious | Train growth direction with blow-dry technique; use flexible-hold products |
| Months 9–12 | 9–12 cm | Regrowth starts layering naturally with longer hair | Begin blending layers if desired; continue moisture and breakage prevention |
| Months 12–18 | 12–18 cm | Significant blending underway; contrast reduces noticeably | Style as one cohesive length; consider a true micro-trim only if split ends appear |
| Months 18–24 | 18–24 cm | Near-full blend for most undercut depths | Enjoy the length; maintain health and evenness with occasional trims under 1/2 inch |
If you want to speed things up, a deeper dive into how to grow out an undercut faster covers nutritional, scalp health, and lifestyle strategies that can push your growth toward the higher end of that range.
Cutting vs. no-cut: what actually works
This is probably the biggest tension point for anyone growing out an undercut. You've decided to grow it out, so the last thing you want is to be told "just go get a trim." The good news is that you genuinely do not have to cut anything to grow this out successfully. The no-cut approach works, but it helps to understand exactly what you're managing.
The no-cut path means you're working entirely with styling to manage the contrast between your short regrowth and longer hair. This works best when your top hair is long enough (ideally 10 cm or more) to cover or incorporate the undercut section in most styles. You'll pin regrowth into buns, use headbands or scarves to anchor escaping pieces, and train the growth direction with blow-drying. It does take more daily effort in the early stages, but it's completely viable.
The case for strategic micro-maintenance, which is not the same as "cutting it again," is that occasional tiny trims to the regrowth area can prevent the undercut edge from creating a harsh, visible line as it grows in. This is specifically about cleaning up the perimeter, not reshaving or maintaining the undercut style. If the outline of the old undercut starts to look disconnected or ragged at month 4 or 5, a skilled stylist can soften that edge by just a few millimeters without setting back your progress. A trim is technically anything under 1/2 inch, and in this context you're usually talking about much less than that, just enough to smooth the transition line.
Bottom line: if the idea of scissors anywhere near the undercut section stresses you out, skip it entirely and style your way through. If you're open to one or two tiny touch-ups to keep the blend looking clean, that's a legitimate tool. Your hair, your pace.
Styling through the awkward phase
Covering and blending early regrowth (months 1–4)
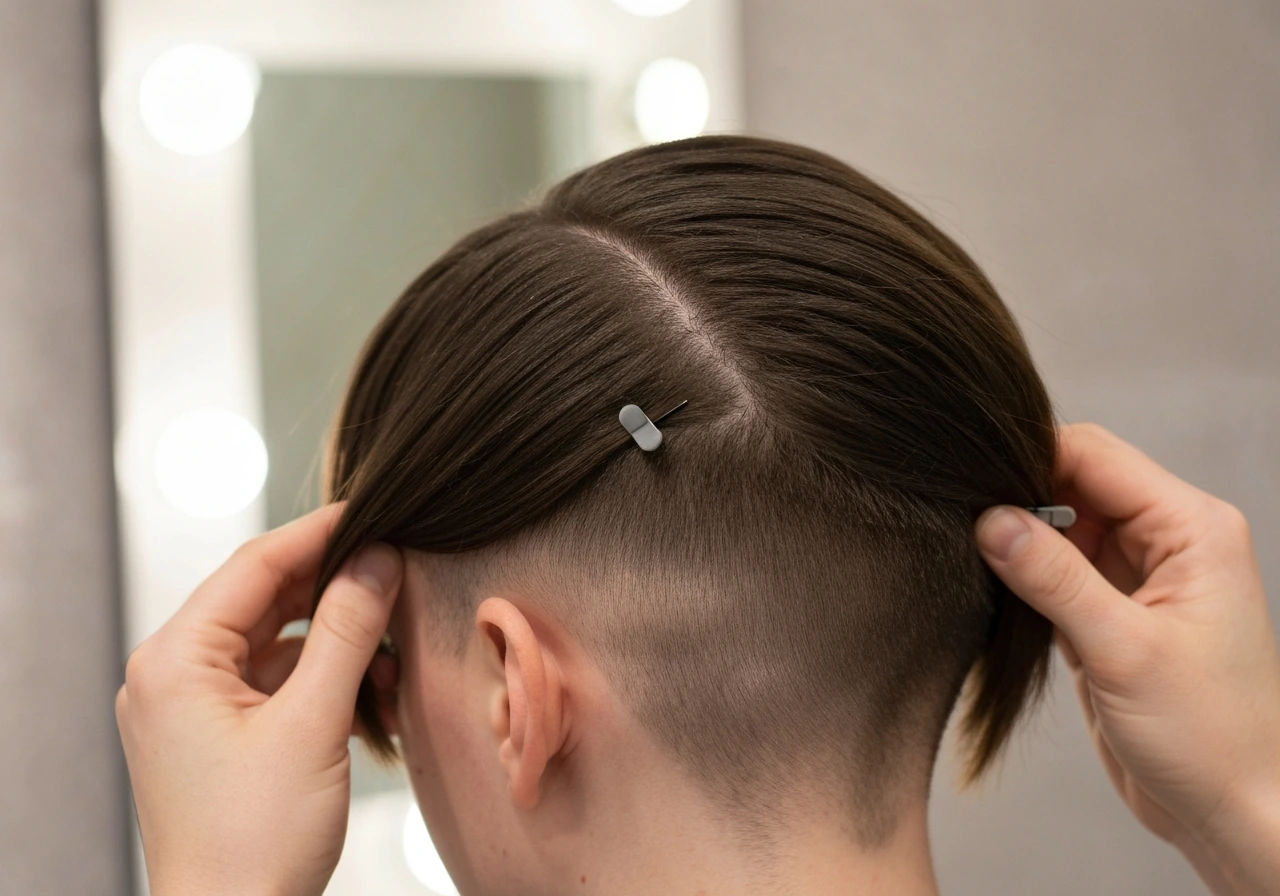
In the first few months, your goal is simple: get the regrowth to stop being the first thing people see. The most effective moves are side-swept styles (sweep your longer hair across the undercut zone), half-up styles where the longer top section covers the sides or nape, and low buns where you can tuck the shorter regrowth underneath. Accessories like wide headbands, silk scarves tied loosely, and claw clips are genuinely useful here, not just decorative.
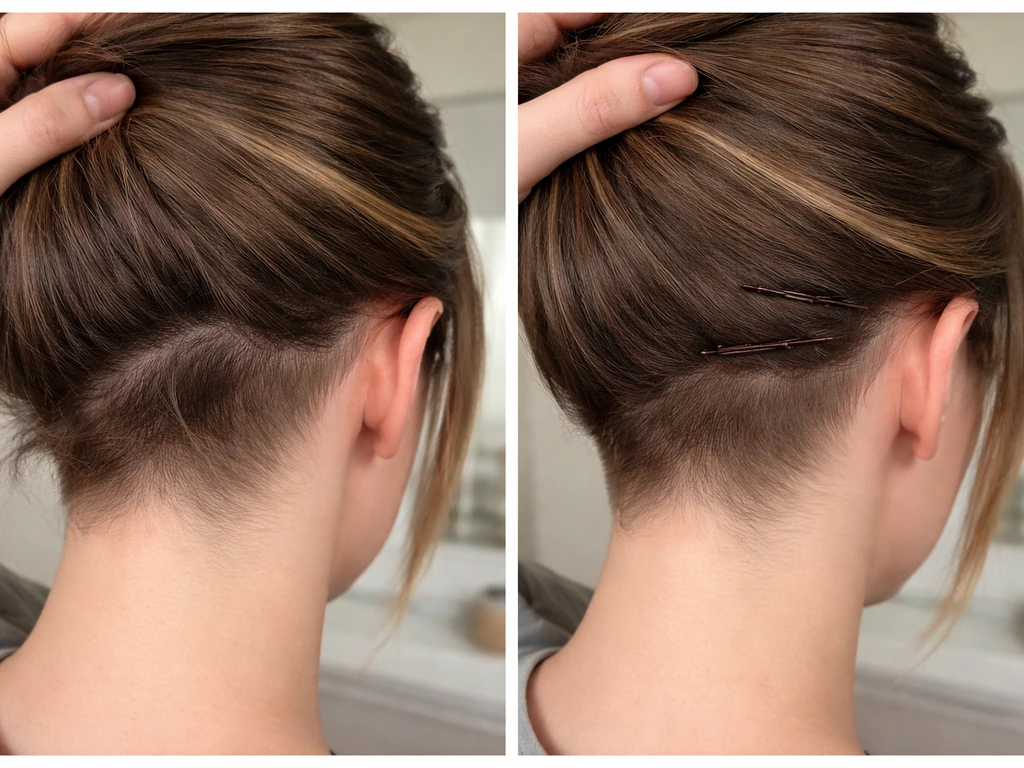
Pinning is your best friend in this phase. The trick for securing short, slippery regrowth is to twist the hair upward first, then insert the bobby pin so it grips against the twist rather than sliding through. If you're new to this technique, the method is to position the pin opening downward, push it in against the direction of the twist, and anchor it to the longer hair beneath. Growing out an undercut in general covers a wider range of these pinning and blending approaches in detail.
Slick-back and updo strategies (months 4–9)
Once the regrowth hits about 4–6 cm, you have enough to work with. Slick-back styles are particularly effective because they deliberately flatten the regrowth against the head, making length contrast much less obvious. Use a medium-hold gel or styling cream, comb everything back from the face and sides, and secure with a low elastic or a French twist. The regrowth blends right into the slicked surface.
Braids are another strong option at this stage. If you have a side or nape undercut, incorporating the regrowth into a Dutch braid or a simple rope braid along that section gives it somewhere to be instead of poking out. It also trains the hair to lay in a particular direction, which helps with the later stages. Messy buns work similarly: gather everything, let the regrowth get tucked into the body of the bun, and pin any escapees with bobby pins placed in a direction that anchors them against the longer hair.
Natural blending as lengths converge (months 9–18)
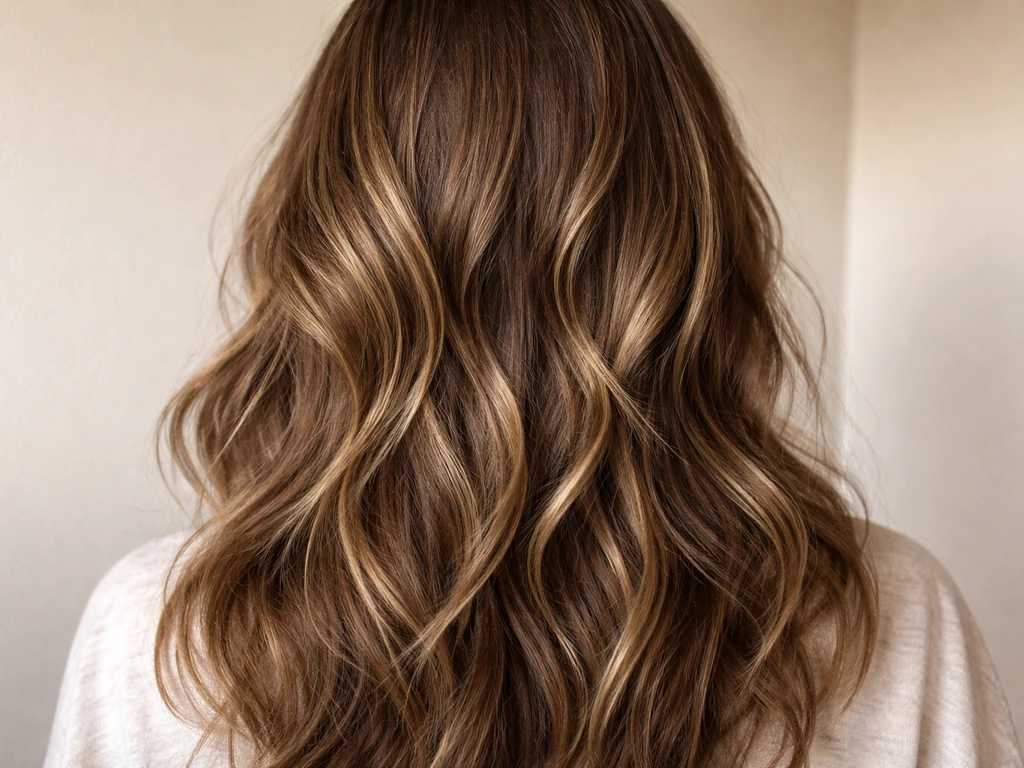
This is the rewarding phase. Your regrowth is now long enough to start behaving like the rest of your hair. Loose waves, textured blowouts, and natural air-dry styles all work in your favor because texture masks length differences better than sleek, pin-straight styles. If your top hair is layered, ask your stylist (at any point-in-time trim) to blend toward those layers rather than cutting the regrowth section as its own unit. The goal is to make the undercut zone look like a natural layer, not a separate section.
Keeping your hair healthy while it grows
Regrowth is fine and fragile, especially in the first several centimeters. The undercut section has been cut clean, which means it has no split ends at first, but it's also shorter and more exposed. As it grows, it's subject to the same stressors as the rest of your hair, and because it's shorter and lighter, it can break more easily than your longer strands.
The fundamentals matter here: condition every time you wash, and detangle starting at the ends, gradually working upward toward the root. Never drag a comb straight from root to tip through dry, tangled hair. This is especially important for the regrowth zone, where short hairs can snap at the base if snagged. The American Academy of Dermatology recommends this ends-first detangling approach specifically because it minimizes breakage.
Heat styling during a grow-out is tempting because you're using it to manage and train the hair, but it adds stress. Always use a heat protectant product before any blow-dry, flat iron, or curling tool, ideally one rated for protection up to 450°F to cover most styling tools. This applies to the regrowth zone especially, since those hairs have fewer natural oils built up and are more vulnerable to thermal damage. Reducing heat damage is also one of the most effective ways to prevent split ends in the regrowth, because split ends in short hair don't just look bad, they can cause the hair to break off at that point and effectively reset your length progress.
Silk or satin pillowcases and hair ties without metal clasps are small changes that genuinely reduce friction breakage overnight, which adds up over a 12–24 month grow-out. If your hair tends to tangle at night, a loose braid or bun before bed keeps the regrowth from matting against longer strands.
When a tiny trim is actually worth it
Here's an honest take on micro-maintenance: it's optional, but there are specific moments where it earns its place. The key is being precise about what you're asking for and what you're not asking for.
The best time to consider a micro-trim is when you notice a specific problem that styling can't fix: a harsh, visible transition line at the edge of the old undercut that keeps looking disconnected no matter how you style it, or split ends in your longer hair that are starting to travel upward and create texture that fights your blending efforts. In these cases, a true trim, meaning less than 1/2 inch off the length, or a targeted edge-softening pass by a skilled stylist, can reset the visual without meaningfully setting back your timeline.
Some people find the "micro-cut" approach useful: a stylist twists freshly washed hair into small sections and snips only the visibly split or frayed ends, preserving overall length while cleaning up texture. This is very different from reshaping the undercut or cutting back into the short section. If your stylist is pushing you to re-buzz or re-shave the undercut area "to keep it clean," that's not micro-maintenance, that's resetting your grow-out, and you don't have to do it.
A practical micro-maintenance plan looks like this: check in with your hair every 10–12 weeks. If your longer sections have visible split ends or the undercut outline is creating a stark, un-blendable line, schedule a trim. If everything looks manageable through styling, skip it. You're in control of the pace.
Common problems and how to fix them
Cowlicks in the regrowth zone
Cowlicks are one of the most annoying surprises of an undercut grow-out. When the undercut section was short, the cowlick was barely visible. As the hair grows in, it starts to spiral or stick up in ways that feel impossible to control. The fix is a blow-dry training technique: while the hair is damp, brush in the opposite direction of the cowlick, blow-dry briefly, then flip to the direction you actually want and blow-dry again. Doing this consistently over several weeks starts to train the hair to lay the way you want it. It works best when the regrowth is at least 3–4 cm long, giving the weight of the hair something to work with.
Uneven blending along the sides or nape
If one side of your undercut is growing faster or if the original cut wasn't perfectly symmetrical, you'll notice unevenness as the hair comes in. This is very common. The styling fix is to work with your longer, faster-growing side first when doing your style, then mirror the shorter side to match it as closely as possible. On the nape, layers of longer hair draped over the area disguise unevenness better than sleek styles that let the contrast show. If the asymmetry is driving you genuinely crazy after month 6, a stylist can equalize the undercut regrowth without reshaving anything, just shaping the perimeter to make both sides look intentional.
Neckline and side regrowth that keeps popping out
Short hairs along the neckline are the hardest to keep tucked, especially in ponytails and updos. The practical fix for this is gel or pomade applied directly to the neckline hairs before you put your hair up. Use a fine-tooth comb or a small brush to press them flat and smooth against the neck, then style the rest of your hair on top. A small amount of strong-hold hairspray over the top seals it. It's a few extra minutes but it genuinely holds through most of the day. This is an especially relevant issue for anyone dealing with a side undercut, where the regrowth tends to curl outward from the temple area.
Tapering problems and disconnected sections
If your undercut was tapered (gradually faded from short to longer rather than cut at one length), the grow-out can create a visible "stripe" or banding effect where different lengths of regrowth are growing at different rates from different starting points. This looks like a distinct horizontal line of shorter hair beneath the longer sections. Texture is your best tool here: wave-enhancing products, beach spray, or diffusing curly hair all create enough visual noise to make the banding much less obvious. Sleek, straight styles will show the banding most clearly, so avoid flat-ironing through this phase if you can.
If you had a specific man-bun undercut or a disconnected undercut style that your partner or another person at home is also navigating, the approaches overlap significantly with those for growing out a man-bun undercut, especially around managing the taper and the crown-length contrast.
Your next steps right now
If you're in the early stage (under 3 months of regrowth), start with the pinning and side-sweep techniques today. Get a heat protectant, switch to ends-first detangling, and decide whether you're fully no-cut or open to micro-maintenance checkpoints every 10–12 weeks. Write down your start date so you have a realistic benchmark to track against.
If you're in the middle stage (3–9 months), lean into slick-back styles and braiding. Start the cowlick blow-dry training routine if you haven't already. This is the phase where consistency in your routine matters most, because the regrowth is long enough to cause problems but not yet long enough to solve them on its own.
If you're past month 9, you're close. Focus on blending through texture, keep your longer hair healthy to avoid split ends that complicate the visual, and trust the process. The undercut grow-out does resolve. It just needs time and a few smart styling habits to stay looking intentional along the way.
FAQ
Can I grow out an undercut female without any trimming at all?
Yes, if your longer hair is long enough to cover the regrowth most days (roughly 10 cm or more). If your regrowth starts creating an unblending, sharp edge at the perimeter, you can still avoid cutting the undercut itself by choosing only a tiny edge-softening appointment (a few millimeters), or skip it if styling consistently hides the line.
How do I know whether I should do micro-maintenance versus leaving it alone?
If the issue is purely visual and doesn’t involve broken or lifting ends, micro-maintenance is usually enough. If you see split ends traveling upward, increasing tangles, or fraying that no style can tame, your best “reset” is focused on removing the damage at the ends (less than 1/2 inch) rather than reshaping the undercut.
What if my undercut was very short (buzzed) and my hair growth is slow?
Plan on the longer end of the timeline (around 18 to 24 months for full blend). To reduce contrast sooner, concentrate on styles that flatten or anchor the regrowth (slick-back, braids, low buns) and use blow-dry training once the regrowth reaches about 3 to 4 cm so it starts behaving instead of poking out.
My regrowth won’t stay tucked, even in ponytails. What should I change?
Apply gel or pomade directly to the neckline hairs before you secure your updo, then smooth with a fine-tooth comb. If it still slips, add a small amount of strong-hold hairspray over the top after you pin, and consider styling the bun or ponytail slightly lower to reduce tension on the short hairs.
How can I hide banding or “stripe” effects during a fade-style undercut grow-out?
Avoid high-sleek looks that show length differences. Switch to wave-enhancing products, diffused curls, or beach spray to create texture, then detangle and style when hair is damp so the wave pattern forms evenly across the regrowth.
Do I need to wash differently to prevent short undercut hairs from snapping?
Use ends-first detangling and start at the tips, working gradually upward. Short regrowth breaks more easily when snagged, so detangle slowly in small sections, and avoid pulling knots straight through dry tangles around the undercut area.
Is blow-drying my only way to fix cowlicks during grow-out?
You can reduce cowlick visibility without heat sometimes by using damp styling and a firm pinning plan, then air-drying. For stubborn cowlicks, blow-dry training is most effective after the regrowth reaches about 3 to 4 cm, because the extra length gives the hair something to “settle” into.
What’s the safest heat setup if I’m using tools to manage the regrowth?
Always use heat protectant before any tool, and keep passes controlled (avoid repeatedly going over the same spot). Short regrowth has fewer natural oils, so it’s more vulnerable, and once split ends start forming, heat becomes harder to “style away” and can speed up breakage.
Will an uneven grow-out correct itself on its own?
Often, yes if the difference is small, because you can style the faster-growing side first and mirror the slower side. If asymmetry is obvious after about month 6 and isn’t improving through styling, a stylist can equalize by shaping the perimeter without re-buzzing the undercut.
Should I ask my stylist to blend the undercut area into layers, and when?
Yes, ask for blending that treats the regrowth as part of the natural layered structure, not a separate “section” to cut. If you’re not ready for any cutting, you can still plan the request for when your regrowth is long enough to tuck or incorporate (around 6 to 12 months for many people), so the stylist can match direction more accurately.
Can I use extensions or clip-ins to make the grow-out easier?
They can help temporarily, especially in the first 0 to 6 months when contrast is most noticeable. Choose clip-ins that match your top hair texture, place them where your longer hair covers the regrowth edge, and avoid heavy frequent use that increases traction on short, fragile hairs.