Growing out an undercut is absolutely doable, but it takes longer than most people expect and goes through some genuinely awkward phases before it starts looking good again. The short answer: plan for 6 to 18 months depending on how shaved your sides are and how long you want your hair to end up. The longer answer is what this guide is about, because the timeline alone won't save you from the weird in-between stages. You need a strategy for each one.
How to Grow Out an Undercut: Timeline, Styling, Barber Tips

Marcus Vickers
5 Apr 2026
What growing out an undercut actually involves

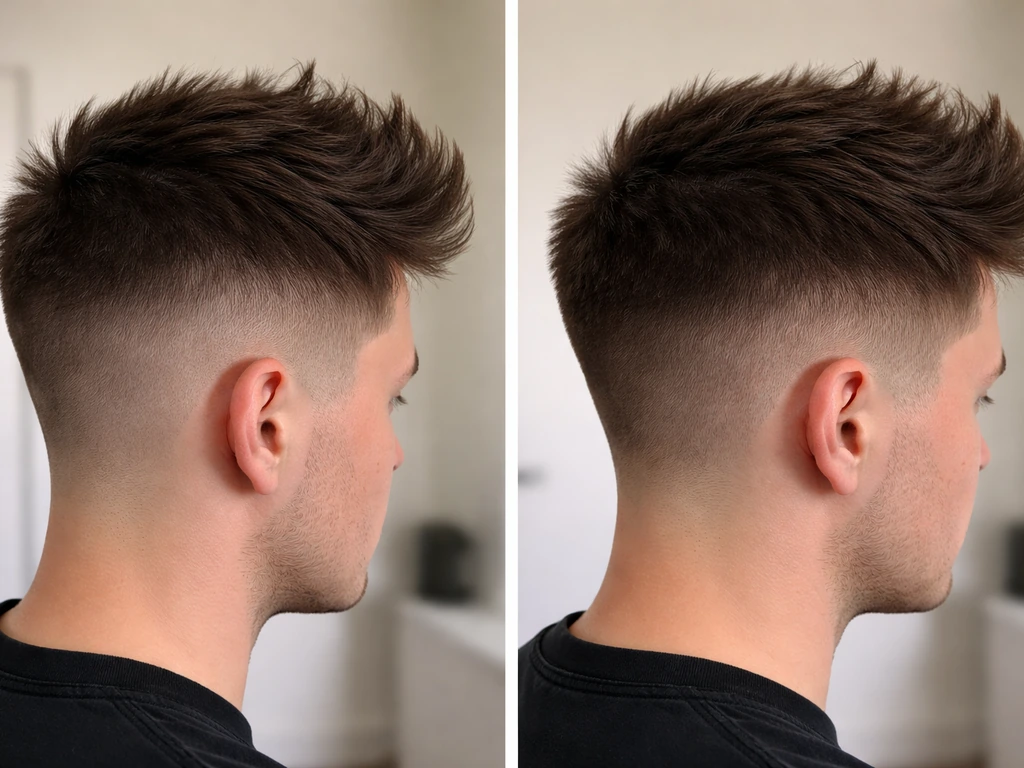
An undercut means the sides and back are cut very short (often shaved or clipper-cut close to the scalp), while the top is left longer. When you stop cutting the sides, you're waiting for two different lengths of hair to eventually meet in the middle. That's the core challenge. The top might already be several inches long while the sides are starting from near zero. There's a visible shelf or ridge where the two lengths contrast, and that line becomes more obvious before it becomes less obvious.
Hair grows roughly 0.5 inch (about 13 mm) per month on average, though some people see closer to half a centimeter and others push toward 1. Dyson’s explainer cites the American Academy of Dermatology estimate that scalp hair grows at about 0.5 inches (1.25 cm) per month (around 6 inches per year). 7 cm. That means if your sides were shaved to nearly nothing, it takes about 6 months just to get them to 3 inches, and 12 months to reach 6 inches. The top has a head start, so the gap closes slowly. Understanding this upfront prevents the most common mistake: giving up at month 3 because it looks messy, when month 6 is actually when things start clicking.
A realistic month-by-month timeline
Here's what to expect at each stage. Keep in mind that "sides" below refers to the shaved or very short undercut sections, not the overall shape of your hair.
| Stage | Side Length (approx.) | What It Looks Like | Main Goal |
|---|---|---|---|
| Months 1–2 | 0.5–1 inch | Stubbly, obvious contrast with longer top | Keep it clean; don't panic |
| Months 3–4 | 1.5–2 inches | Floppy, poofy sides that don't lie flat | Start blending with a barber |
| Months 5–6 | 2.5–3 inches | Sides have volume but no length control | Use product and side-part techniques |
| Months 7–9 | 3–4.5 inches | Starting to integrate with top if managed well | Commit to a blended style |
| Months 10–12+ | 4.5–6 inches | Near full blend possible for most cuts | Style freely; trim top to match |
These are averages. Genetics, diet, stress, and scalp health all influence growth rate. Medical News Today notes that average scalp hair growth is about 0.5, 1.7 cm per month, depending on factors such as genetics and overall health blank" rel="noopener noreferrer">Genetics, diet, stress, and scalp health all influence growth rate. If you're looking for ways to support faster progress, the guide on how to grow out a undercut fast goes deeper into growth-supportive habits worth adding to your routine.
Styling through the awkward phases
The hardest stretch is roughly months 2 through 5. The sides are long enough to be noticeable but not long enough to behave. Here's how to make each phase look intentional instead of accidental.
The early stubbly phase (months 1–2)
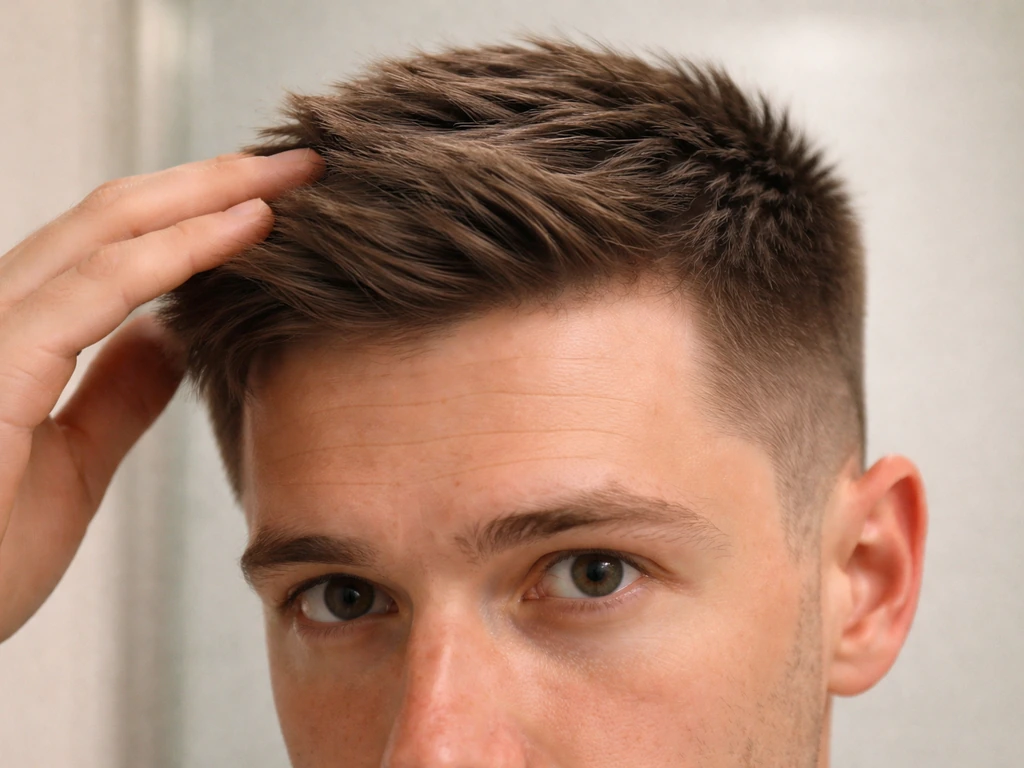
This stage is actually the easiest to manage aesthetically. The contrast between short sides and longer top is stark, but it reads as a deliberate disconnect undercut. Keep the top styled with intention: a side part, a slick-back, or a textured quiff all work well here because they draw the eye upward and away from the sides. If your top is long enough, letting it fall slightly over the shorter sides hides the transition line without much effort.
The poofy, floppy stage (months 3–4)
This is where most people throw in the towel, and it's a mistake. The sides are now long enough to stick out but not long enough to weigh down or sit flat. A medium-hold pomade or clay pressed into damp hair and combed to the side is your best friend right now. A deep side part helps a lot: comb everything to one side, let the longer top fall naturally over the growing-out sides, and it looks like an intentional long-side cut rather than a botched grow-out. Avoid products that add volume here. You want weight and hold, not lift.
The integration phase (months 5–9)
Once the sides hit 2 to 3 inches, you have more options. A low taper or blended cut from a barber can dramatically smooth the transition without costing you any length. You're not cutting it shorter, you're asking for a blend that softens the shelf line between the growing sides and the longer top. Side-swept styles, curtain cuts, and tousled textures all work well at this stage because the length difference is shrinking and can be disguised with movement. This is also when you can start thinking about what your final style will actually look like.
Growing out an undercut when your top is already long
If your top is already past your ears or touching your shoulders, the grow-out dynamic is different. You're not waiting for the top to catch up, you're waiting for the sides and back to match the length you already have. This is actually a faster-feeling process visually, because the end goal (long all over) is already half-achieved.
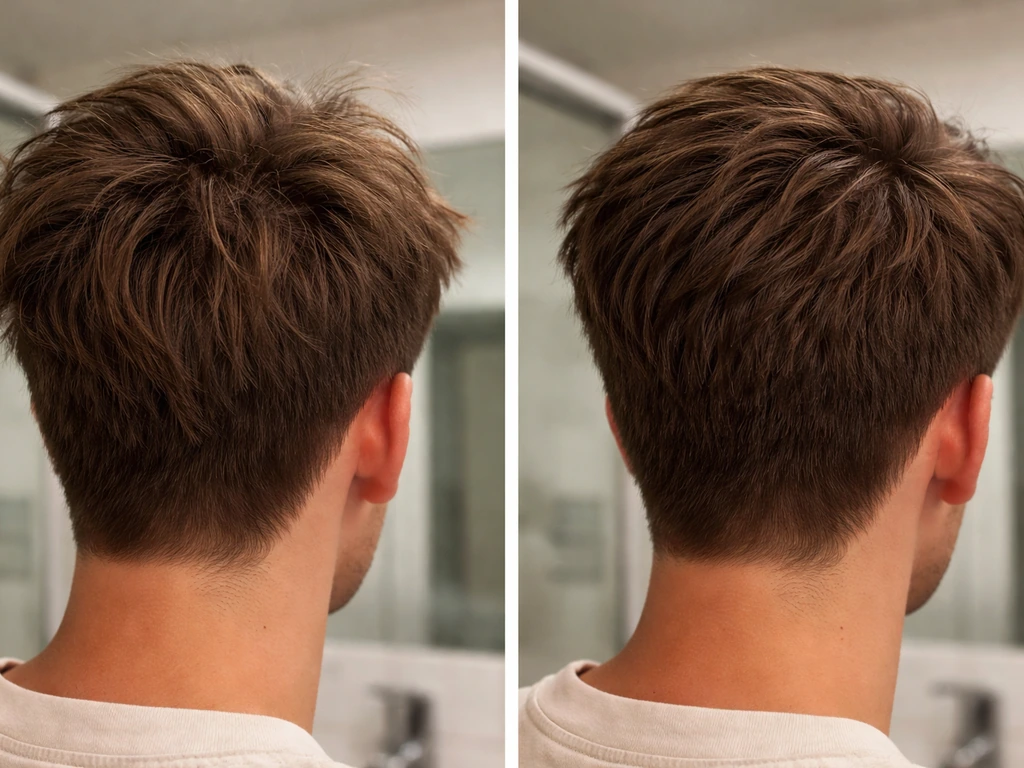
The main challenge with a long top and shaved or short sides is managing the weight and bulk that builds at the sides as they grow. The sides can look stringy or uneven compared to the fuller top. Ask your stylist to use point-cutting or soft feathering techniques around the nape and sides to remove bulk without creating a hard line. This keeps the grow-out looking intentional rather than neglected.
Updos, half-up styles, braids, and hair ties become genuinely useful tools at this stage. Pulling the top back into a loose bun or braid while the sides are still shorter makes the contrast much less visible and lets you look polished while waiting. For a much deeper dive on this specific scenario, the article on how to grow out a nape undercut with long hair covers the nape-specific challenges in detail, which is the trickiest area when you already have length on top.
If you had a man bun on top paired with an undercut, that's its own situation. The sides need to grow in considerably before the bun stops looking top-heavy. The guide on how to grow out a man bun undercut addresses that specific transition, including how to handle the volume imbalance as the sides fill in.
Curly hair and Black hair: the grow-out looks different for you
If you have curly or coily hair, the standard timeline and styling advice only gets you partway there. Curl pattern, shrinkage, and regrowth texture change everything about how the grow-out looks and feels.
Shrinkage changes your visual timeline
Curly hair shrinks when it dries. Type 3 curls (loose to medium coils) can shrink 25 to 50 percent of their actual length. Type 4 coils (tight coils and zig-zag patterns common in Black hair) can shrink 50 to 75 percent or more. This means your sides can be growing at the same rate as straight hair, but they look much shorter because the curl pulls the length upward. A side that's actually 2 inches long might look like half an inch when dry. Don't measure progress by eye alone. Stretch a curl out gently to check true length. This also means your sides may look stuck at a certain stage for longer than expected, even when real growth is happening.
Styling strategies for curly and coily regrowth
In the early stages, a twist-out or braid-out on the growing sides can stretch the curl slightly and give more visual length, helping the contrast with the top look less dramatic. As the sides grow more, a wash-and-go works beautifully because the curl pattern on the sides and top will start to look more unified, even if the lengths are still different. Use a defining cream or gel to encourage the regrowth to curl in the same direction as your established hair.
Moisture retention is especially important during a grow-out for coily hair. Dry, brittle regrowth breaks before it can reach useful length, which defeats the whole process. Seal moisture in with an oil or butter after your leave-in conditioner, and protective styles can help reduce manipulation and breakage on the fragile new growth. That said, be careful with tension: tightly installed protective styles on regrowth areas that are only 1 to 2 inches long can put stress on the follicle and cause thinning at exactly the areas you're trying to grow. Keep protective styles loose, especially on the sides where the new growth is shortest.
For women and femme-presenting people working through this with natural hair, the texture-specific styling decisions are worth thinking through carefully. The article on how to grow out undercut female includes more targeted advice for those situations, including styling for longer natural lengths on top.
Maintenance that actually helps (without cutting your progress short)
The instinct to leave everything completely alone while growing out an undercut is understandable but counterproductive. Strategic maintenance makes the grow-out look intentional and keeps the shape from becoming a total mess.
Trim the top, not the sides
If your top hair is getting split ends or becoming shapeless, a light trim there is fine and won't hurt your progress (the sides are what you're growing). In fact, keeping the top looking healthy and shaped makes the growing sides look less wild by comparison. Just be clear with your stylist: trim for health, not for style shape.
Neckline and sideburn management
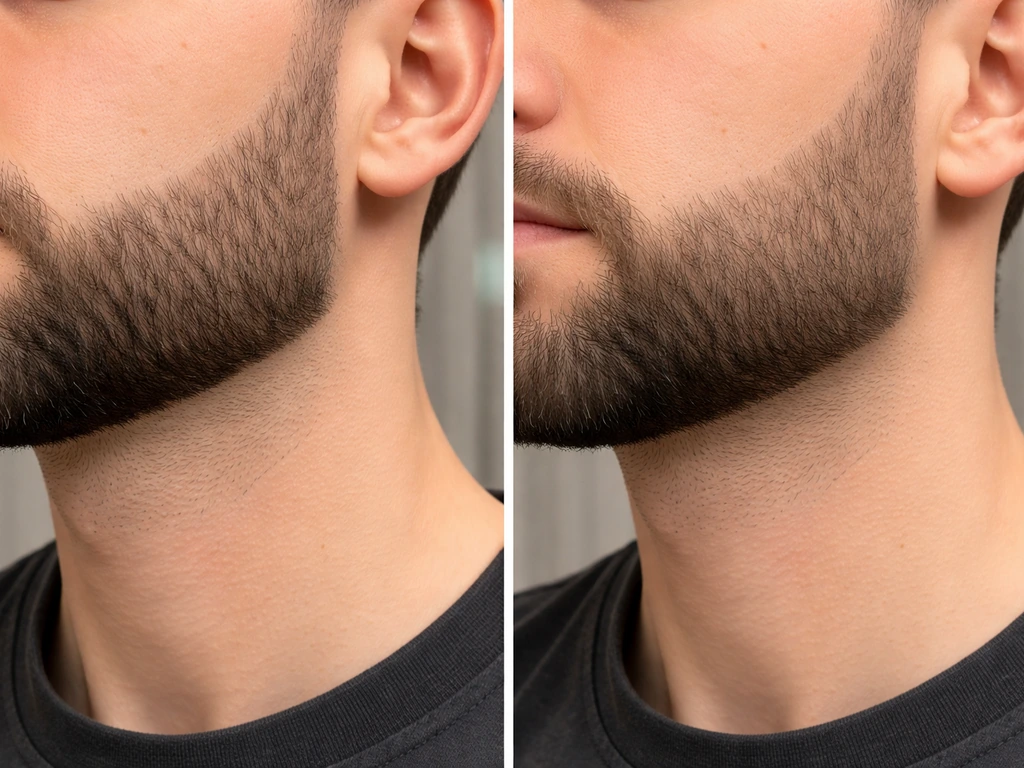
This is where people make the most mistakes. The natural instinct is to keep the neckline razor-sharp as it grows, but a hard line at the neckline actually makes the grow-out look worse over time because the line becomes more visible as hair grows above it. Instead, ask for a tapered neckline: a soft, feathered edge that blends the new growth into the neckline rather than cutting a hard boundary. This is exactly what GQ's grooming advice points toward: avoid hard lines and use a taper so the neckline grows out naturally without looking unkempt.
Around the sideburns, the same principle applies. A blended, graduated finish at the sideburn lets the hair grow in smoothly. A sharp line at the sideburn will just create a new awkward ridge as the hair grows past it. Every 4 to 6 weeks, a quick cleanup that softens (not shortens) the edges is the right call.
Blending the sides as you go
At months 3 to 4, a professional blend is worth the visit. Using graduated guard lengths and gentle upward clipper flicks, a barber can soften the shelf between your growing sides and your longer top without removing meaningful length from either. This technique stacks the transition gradually so there's no hard ledge visible. Bulk sometimes collects at the occipital bone (the ridge at the back of your skull) where the shortest fade meets the longer hair above, so make sure your barber addresses that area specifically.
When to go to a barber and what to actually say
Visit a barber at months 3 to 4 and again at months 6 to 7. Those are the two most critical checkpoints. The first visit is about managing the poofy transition phase; the second is about committing to a blended style that takes you toward your end goal. Here's exactly what to say:
- "I'm growing out my undercut. I don't want anything taken shorter, I want you to blend the sides into the top."
- "Can you use a taper or fade technique to soften the line between the sides and the top without shortening the sides overall?"
- "Please keep the neckline soft and tapered, not a hard line, so it grows out naturally."
- "I'm aiming for [your goal length]. What do you suggest to get there without a major setback?"
- "Can you point-cut or feather the sides to reduce bulk without losing length?"
If a barber or stylist immediately reaches for clippers and starts suggesting you clean everything up, be firm. A good barber who understands grow-outs will use guard steps from the shortest sections upward, blending with soft clipper flicks to create a gradual taper rather than a hard shelf. They should never be removing length from the longest sections unless you ask for it. If they seem confused by what you're asking, show them a reference photo of a low taper or blended undercut grow-out. Visuals communicate faster than words in any barbershop.
One last thing: the awkward phase is temporary and it's survivable. The difference between people who successfully grow out an undercut and those who cut it short again at month 3 usually isn't hair type or luck. It's having a plan for each stage and knowing that the mess is part of the process, not a sign that something went wrong. Stick with it, use the maintenance checkpoints, and trust that 6 months from now you'll be glad you didn't pick up the clippers.
FAQ
When should I book my first barber appointment to stop the awkward shelf line?
If your sides were shaved close to the scalp, plan on your first “make it look intentional” appointment around months 3 to 4. Ask for a graduated taper that softens the shelf line, but explicitly request they do not remove length from the longest top section.
How often should I maintain my grow-out while waiting for it to catch up?
Going too long between touch-ups is what makes the transition harder, not what makes it “more natural.” Use cleanup appointments every 4 to 6 weeks to soften edges (neckline and sideburn area), and reserve any real blending for the month 3 to 4 and month 6 to 7 checkpoints.
Can I trim at home, or should I only visit a barber?
If you do at-home trims, keep them to health only. Use small, careful snips to remove split ends on the top, and avoid cutting the sides shorter, because that restarts the length gap you are trying to close.
What type of hair product works best during the months 2 to 5 awkward stage?
For most people, the “best” product during the hardest months is medium hold with some weight. Pomade or clay worked into damp hair (then styled down and to one side) usually outperforms volumizing products, which can make the sides look puffier and the transition more obvious.
What if my top is not long enough to cover the transition line with a side part?
A deep side part is most effective when the longer top can fall naturally over the shorter sides. If your top is too short to cover, switch to a side-swept, textured look, or use light heat plus a comb to direct hair over the transition while you wait for length.
Can I use protective styles or hair ties during the early grow-out?
Yes, but do it intentionally. Avoid tight tension styles when regrowth is only 1 to 2 inches, and choose loose braids, a loose bun, or a soft half-up with clear parting so you do not create new ridges as the hair grows.
My sides look bulky and uneven. What should I ask a stylist to do?
If your sides feel “stringy” or uneven, the fix is usually bulk control, not more cutting length. Ask for point-cutting or soft feathering around the nape and sides to remove thickness while keeping the overall length target.
How can I track progress if I have curly or coily hair and lots of shrinkage?
Use two checkpoints, one visual and one tactile. Measure a stretched section to check true length, especially for curly or coily hair, and compare how the transition line behaves when your hair is fully dry versus gently stretched.
What should I prioritize for curly hair so the grow-out does not break before it reaches useful length?
For curls, moisture retention and regrowth behavior matter as much as growth speed. Keep a consistent leave-in plus sealing (oil or butter) and use styling that encourages regrowth to curl in the same direction, so the sides stop looking “stuck” even when they are growing.
How do I plan the timeline based on my final hairstyle goal?
Whether you are able to hide it depends on your end style. If you want a uniform long look, plan a second professional blend at months 6 to 7. If you want to keep more contrast, plan earlier blending and longer styling coverage so you do not end up stuck in the middle.
Is it ever worth giving up and cutting it shorter again at month 3?
Do not assume you should “just shave again” if it looks messy at month 3. If you have not reached the month 6 to 7 checkpoint, the transition is usually still in its hardest phase, and a taper blend visit is the better course than restarting.
What should I say or show a barber so they blend correctly during a grow-out?
If you want to show a barber what you mean, bring a reference that includes both the neckline and sideburns. Also be clear about the guard step approach (blend from the shortest sections upward) and that they should not take length from the longest top unless you request it.
How is growing out a man bun undercut different from a regular undercut?
If your undercut includes a man bun on top, the sides must fill enough that the bun no longer looks top-heavy. Expect the timeline feel to change, and ask for a plan that reduces side volume without shrinking the top length you rely on for the bun.