Growing out a nape undercut with long hair takes roughly 6 to 18 months depending on how short your nape was clipped, but the good news is that most of that time is manageable with the right styling and the occasional blending trim. You do not need to cut your long hair shorter to make it work. The awkward phase is real, but it is survivable, and there are specific things you can do every week to keep the back looking intentional rather than unfinished.
How to Grow Out a Nape Undercut With Long Hair

Marcus Vickers
14 May 2026

Figure out exactly where you are starting from

Before you make any plan, stand in front of a mirror with a hand mirror behind you and honestly assess three things: how short the nape actually is, how high up the undercut travels, and your hair's natural texture. These three factors will completely change what strategy makes sense for you.
For the nape length, check whether it was clipped with a very short guard (around a number 1 or 2, which leaves 3 to 6 mm of hair) or a longer guard (number 4 or above, which leaves closer to 12 mm or half an inch). The shorter the clip, the longer the grow-out timeline and the more obvious the contrast will be during the middle phase. For the height, note whether the undercut sits just at the neckline and hairline or extends several inches up the back of your head. A high undercut that reaches toward the crown creates a much more dramatic line of contrast with your long hair above it.
Your hair texture matters a lot too. Fine, straight hair shows the undercut line very clearly because the longer hair above lies flat and the shorter nape hair does not blend underneath it easily. Curly or wavy hair is actually easier to work with here because the texture helps disguise the transition zone. Thick hair tends to create a shelf effect at the demarcation line, which looks obvious from behind when hair is down. Knowing your type helps you pick the right styling approach for each phase.
Pick your grow-out strategy before you do anything else
There are three real strategies, and the best one depends on how much contrast exists between your nape and the rest of your hair, plus how much patience you have.
The first is the leave-it-alone approach. You stop all cutting at the nape entirely and just let it grow. This is the fastest path to full length because you are not removing any growth. The downside is that the middle phase, roughly months 2 through 6, will look noticeably choppy from behind. If you wear your hair up or pulled back a lot, this phase can be pretty obvious. This strategy works best for people who mostly wear their hair down, have wavy or curly texture, or simply do not mind the transition look.
The second is the occasional blending plan. Every 8 to 12 weeks you visit a stylist or barber for a very targeted nape taper, where the goal is to soften the hard line between the short nape and the longer hair above it without actually removing much length from either section. This slows the growth slightly but makes the back look far more presentable during the whole process. For most people with long hair as the goal, this is the best balance of speed and appearance.
The third is the compromise cut, where you take the long hair down a few inches to close the gap between the nape length and the rest of the hair. This is the fastest way to eliminate the awkward phase visually, but it means sacrificing some of your long hair length. It only makes sense if your long hair is very long (past mid-back) and the undercut extends high enough that blending trims alone will take more than a year to close the gap.
Realistic grow-out timeline, stage by stage
Hair grows about half an inch (1.25 cm) per month on average, which works out to roughly 3 mm per week. Use that number to plan. A nape clipped to a number 1 (around 3 mm) needs about 2 to 3 inches of growth before it can start to tuck under the longer hair, which is roughly 4 to 6 months. A nape that was clipped to a number 3 or 4 (around 9 to 12 mm) might look reasonably blended in 3 to 4 months.
| Stage | Approx. Timeline | What You Will See | Main Goal |
|---|---|---|---|
| Early growth | Weeks 1–6 | Nape is clearly shorter, hard line visible, hair may stick up slightly | Protect, moisturize, style to cover |
| Mid phase | Months 2–5 | Nape reaches 1–2 inches, contrast line is most obvious, possible shelf effect | Blend with styling, consider blending trim |
| Tuck-under phase | Months 4–8 | Nape hair long enough to start lying under longer layers | Guide it downward, reduce visible line |
| Near-blended | Months 6–12 | Shorter section blends into layers, line softens significantly | Refine with one or two blending trims |
| Fully grown out | Months 10–18 | Nape matches or blends seamlessly with rest of hair length | Maintain health, optional final trim to even layers |
These timelines assume you are not trimming the nape at all. If you get blending trims every 10 weeks or so, add a month or two to the total timeline but subtract a lot of the visual frustration in the middle phases. Sacred Barbers also recommends ‘line-up/neck taper’ appointments about every 2 to 3 weeks to keep sharp edges from looking dull without resetting the whole haircut blending trims every 10 weeks or so. The tuck-under phase is the turning point most people feel relieved by because the shorter nape hair finally starts to hide under the weight of the longer hair above it.
How to style through each awkward phase
Early growth (weeks 1 through 6)
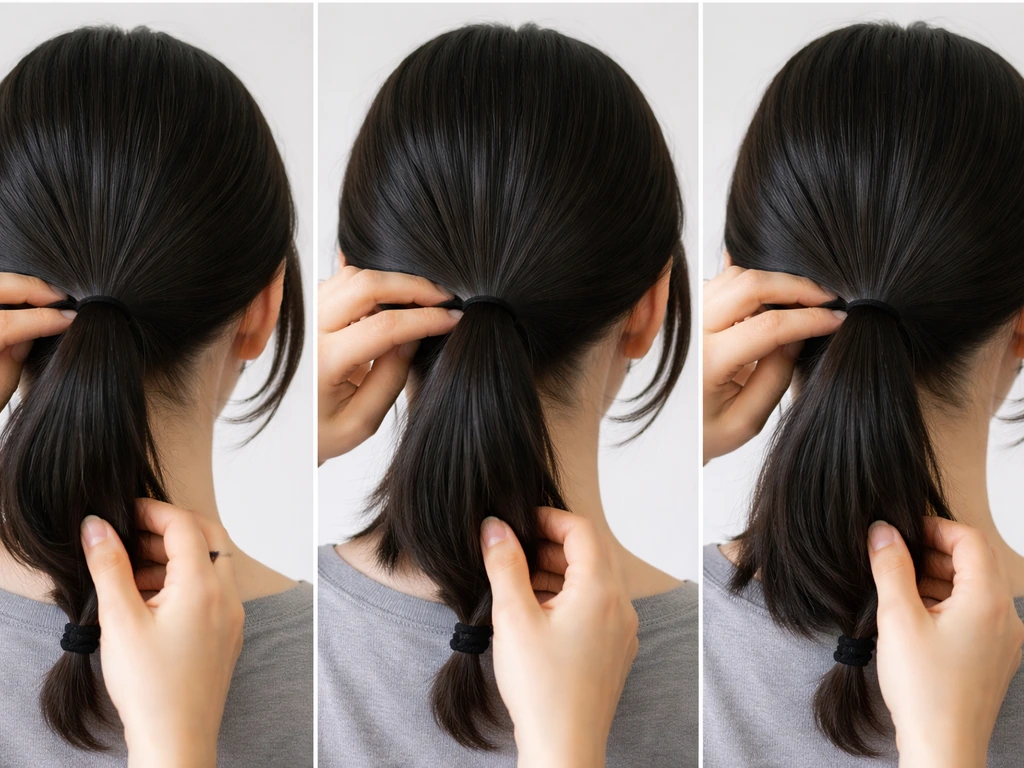
In the first six weeks, your main tool is keeping hair down and low. A low ponytail secured at or below the nape is your best friend here because it covers the undercut area completely. The key is keeping the tie low enough that the long hair drapes over the shorter nape section. High ponytails and buns are the enemy at this stage since they pull all the long hair up and expose the entire nape. If you are working toward a man bun undercut as the length comes in, plan to keep the bun low so the nape is covered during the awkward phases how to grow out a man bun undercut. If you want hair up, try a low chignon or a twist secured just above the neckline so the end result covers the shorter section.
Braids also work extremely well at this stage. A single low braid down the back draws the eye along the length of the braid rather than to the nape. Half-up styles where the bottom half stays down are another solid option. If you have the patience, a scarf tied loosely around the neckline like a headscarf worn low can cover the area while looking intentional. This is not about hiding permanently, just buying yourself some styling flexibility while the first inch or two of growth comes in.
Mid phase (months 2 through 5)
This is the phase most people find hardest because the nape hair is long enough to be visible but not long enough to tuck under the longer layers above it. You will likely see a visible ridge or shelf at the back when you look in a mirror from behind. Styling the long hair with a little wave or texture helps a lot here because textured hair disguises the contrast line far better than sleek, straight hair. If you normally blow-dry your hair straight, try using a diffuser or letting it air-dry with some curl cream to add movement that softens the line visually.
Layering the long hair over the back is also helpful. When you blow-dry or style, use a brush to guide the longer hair backward and downward over the nape area so it sits on top of the shorter section. A little light-hold hairspray or texture spray can help the longer hair stay positioned over the shorter area rather than parting and revealing the contrast. If you use clip-in extensions or a small hair topper placed at the back, these can be layered just above the nape to add coverage and bulk that helps disguise the shorter section below.
Tuck-under phase (months 4 through 8)

Once the nape hair reaches about 2 to 3 inches, it starts to lie down and tuck under the longer layers above. This is a significant milestone. At this point, you can start wearing your hair in more styles without the back being an issue. The remaining challenge is a slight bulge or bump at the back where the shorter section adds volume underneath. Using a paddle brush or flat brush to smooth the back during blow-drying, directing the heat downward along the nape, helps train the shorter hair to lie flat. If you have cowlicks at the nape (common in this area), blow-dry in the opposite direction of the cowlick while it is still damp, using a round brush with good tension, until the hair dries in a flatter direction. This takes about 3 to 4 minutes of focused drying but makes a real difference.
Near-blended phase (months 6 through 12)
By now the shorter section is long enough that most people cannot tell there was an undercut unless they are looking carefully. The remaining visual issue tends to be uneven layers at the back where the formerly short section meets the longer hair above it. One blending trim at the salon at this stage, specifically asking for the nape area to be softened into the layers above, will clean everything up significantly. This is also the point where you can go back to wearing your hair however you like, including up.
Keeping your hair healthy during the whole process
Growth speed is mostly genetic, but hair health absolutely affects how the grow-out looks and how much you retain the length you already have. The nape area in particular can be prone to breakage because it is often subject to friction from collars, scarves, and rubbing against seats. Using a leave-in conditioner on the nape and mid-lengths helps maintain the moisture balance in that area, and detangling from ends upward with a wide-tooth comb or detangling brush (rather than starting at the root and dragging through knots) prevents unnecessary breakage. Avoid brushing through the hair when it is soaking wet since that is when the hair bonds are weakest.
If you use heat tools regularly, keep a heat protectant spray in your routine and try to keep temperatures at or below 375 to 400 degrees Fahrenheit on straight or wavy hair. For finer hair, 300 to 350 degrees is sufficient and much less damaging. The nape hair is newer growth and tends to be more delicate than the longer hair that has been around for years, so it benefits from extra care. Trim the long ends of your hair every 10 to 12 weeks to prevent split ends from traveling up the shaft, which would reduce your visible length gains.
When to go to the salon and exactly what to ask for
If you are doing occasional blending trims, the first visit should happen around the 8 to 10 week mark after you decide to grow it out. At that point, there is enough nape growth to actually blend rather than just re-clip, and the process will not set you back noticeably.
What to say at the salon matters. Be specific. Tell your stylist you are growing out a nape undercut and your goal is to blend it into your long hair without losing length on top. With that in mind, the best approach depends on your start point and how much contrast you currently have at the nape how to grow out an undercut. Ask for a 'nape taper' or 'soft neckline blend' using scissor-over-comb technique rather than clippers. The critical instruction is: no clippers on the nape, and no shortening the long hair above the undercut. You want the stylist to work only within the transition zone, softening the hard line between the shorter nape and the longer hair above by using scissors and a comb to gradually feather the length. If the stylist mentions a 'disconnected undercut', that is the opposite of what you want. In many guides, a “taper” is described as a “nape finish,” focusing on the neckline/nape area rather than leaving a disconnected undercut line. You want a connected, blended, tapered transition.
A useful way to frame it: point to the line where the undercut meets your longer hair and say 'I want this line to disappear. Please blend only this area, no clipper work, no shortening anything above this point.' Most stylists who work with longer hair will understand that immediately. If they are uncertain, ask if they are comfortable with scissor-over-comb blending at the neckline before sitting down.
Common problems during the grow-out and how to fix them
The line at the back is very visible
This is the most common complaint, especially in months 2 through 5. The line appears because the shorter nape hair and the longer hair above it have a sharp length difference. Two things help: adding texture to the longer hair (waves, curls, or just rough-drying) so it falls less precisely over the line, and using a light-hold product to smooth and layer the longer hair over the nape rather than letting it part and reveal the contrast. A blending trim at the salon, as described above, is the most permanent solution for a very sharp line.
The nape hair is sticking up or flipping out
This usually happens between 1 and 3 inches of nape growth, which is long enough to have some movement but not long enough to lie flat from its own weight. Blow-dry the nape downward using a round or paddle brush with firm tension while the hair is damp. Hold the dryer close and move it downward along the hair shaft in the direction you want the hair to lie. Apply a small amount of smoothing serum or even a light pomade to the nape area after drying to hold the hair flat. As the hair continues to grow and gains more weight, this problem resolves on its own.
Cowlicks at the nape
Nape cowlicks are incredibly common and become more noticeable during the grow-out because the shorter hair is more susceptible to the growth direction. When your hair is damp, blow-dry in the opposite direction to the cowlick using a round brush. Keep the tension consistent and do not release the hair until that section is fully dry. Doing this every wash will gradually train the hair to lie in the preferred direction. For particularly stubborn cowlicks, a small amount of firm-hold gel or styling cream applied to the damp nape area before blow-drying gives extra control.
Bulk and a shelf effect at the back
If your long hair is thick, the transition zone can look like a shelf sticking out from the back of your head, especially in the mid phase. This happens because the shorter hair underneath adds volume that pushes the longer hair above outward. Blow-drying the back of the head with the dryer directed downward, combined with using a flat brush to smooth everything down, minimizes this. A lightweight anti-frizz or smoothing serum applied to the back section helps the longer hair lie flat over the shorter section. If the shelf effect is severe, this is actually a case where one blending trim from a stylist makes a dramatic difference.
Uneven growth across the nape
It is normal for the nape to grow unevenly, with some areas seeming to lag behind others. This is often just different hair densities in different areas rather than a real growth speed difference. If one section is notably slower, check whether that area is subject to more friction or whether you have a habit of sleeping on that side. A silk pillowcase reduces friction-related breakage, which can make a visible difference over several months. Do not try to even things up by trimming the faster-growing sections since that defeats the purpose.
If your nape undercut is colored or chemically treated
This adds a layer of complexity that is worth addressing directly. If the undercut area was bleached, dyed a bold color, or processed differently from the rest of your hair, you will have a color transition to manage alongside the length transition.
The most natural-looking approach for growing out a color-contrasting nape is root smudging or a color melt, where a toner or demi-permanent gloss is applied at the regrowth line and blended 2 to 3 cm into the colored area. This blurs the harsh demarcation between your natural root color and the dyed or bleached section without removing the color entirely. Ask your colorist for a root smudge or shadow root specifically at the nape transition. This technique works well every 8 to 12 weeks and is far gentler on the hair than full recoloring.
If the nape area was dyed a bold fashion color (vivid pink, blue, etc.) and you want to transition out of that color as you grow, fading can be encouraged gradually by washing with a clarifying shampoo and avoiding color-protecting products on that section specifically. Bold colors fade significantly faster than permanent hair dye, often within 6 to 10 washes. For bleached nape hair growing out, a tinted gloss in a shade close to your natural color can deposit enough tone to reduce the visual contrast while you wait for the bleached section to grow out and eventually get trimmed away. At-home glossing can be done every 3 to 4 weeks; professional glossing is typically scheduled every 4 to 6 weeks.
One important note for chemically processed nape hair: bleached or heavily colored hair is more fragile than untreated hair, so the breakage prevention steps (gentle detangling, leave-in conditioner, lower heat settings, silk pillowcase) matter even more for this section. Breakage in a bleached nape area can set your grow-out back by months and create uneven patches that are hard to style around.
Your next steps starting this week
If you have read this far and want a clear action plan, here is what to do right now rather than just thinking about it.
- Today: assess your nape length and undercut height using a hand mirror. Note whether the shorter section is above or below the occipital bone (the bump at the back of your skull). This tells you roughly how long the transition zone is.
- This week: switch to low hairstyles, including low ponytails, low buns, and braids. Stop high ponytails and sleek pulled-back looks until the nape is long enough to tuck under.
- This week: add a leave-in conditioner or detangling spray to your routine and start detangling from ends up rather than roots down. If your nape area is colored or bleached, treat it especially gently.
- Within the next two weeks: if you have any cowlick or sticking-up issues at the nape, start the blow-dry training routine. Damp hair, round brush, blow downward in opposition to the cowlick growth, and hold until dry.
- At 8 to 10 weeks: book a blending trim with a stylist who understands longer hair. Use the specific phrasing from the salon section of this article. This one appointment will make the next several months much easier to get through.
- Ongoing: resist the urge to re-clip or re-shave the nape for a fresh look. Every time you reset it, you are starting the clock over and adding months back to your grow-out timeline.
The grow-out for a nape undercut with long hair is not a fast process, but it is genuinely one of the easier hair transitions to manage because the longer hair above already exists to work with. You have more tools available to you than someone growing out a full undercut or a pixie from scratch. The strategies for general undercut grow-outs, female-specific undercut transitions, and even man-bun undercut situations all overlap here, but the nape-specific situation is particularly forgiving because of how well the longer hair above it can cover and disguise the shorter section at almost any phase. Stay consistent with the basics, do not reset by re-clipping, and the back of your head will look like you planned the whole thing.
FAQ
What if I accidentally cut the nape too short while trying to grow it out?
If you accidentally trim the nape even a little (or let a barber “clean it up”), you usually extend the awkward phase because you reset the tuck-under milestone. Instead, keep track of your current nape length and stick to either the leave-it-alone plan or a single planned taper visit (about 8 to 10 weeks in). If the line already looks rough, use temporary coverage (low braid, low chignon, scarf at the neckline) rather than cutting to “fix” it.
Does my hair type mean I have to choose a different grow-out strategy?
You can, but it changes the timeline and the look. Fine, straight hair often hides a blend worse during months 2 through 6, because the longer hair lies flat and exposes the demarcation. If your hair is fine and straight, prioritize a blending trim plan around 8 to 10 weeks and use texture (diffuser air-dry, curl cream, light hold) so the transition does not rely on gravity as much.
Can I wash and style as normal while growing out the nape undercut, or does it slow things down?
In most cases, washing more often does not hurt the grow-out, but it can make styling harder if you rely on “slick” hair to hide the line. Use a leave-in conditioner on the nape, detangle gently, and use a light-hold product so you can position the longer hair over the nape without frequent re-parting. If you get more frizz, that can actually help camouflage the line.
What exact wording should I use so the stylist blends the nape correctly (and does not recreate the undercut line)?
Do not ask for “just a cleanup” with clippers. Your safest wording is: scissor-over-comb nape taper, no clipper work on the nape, and no shortening of the long hair above the transition line. If your stylist uses thinning shears, ask them to blend into the existing long layers rather than creating a new short graduation that can reappear as a bump later.
How do I deal with nape cowlicks so the back looks smooth during the mid phase?
Yes, cowlicks can be trained, but timing matters. For strongest control, blow-dry the nape right after washing while it is damp, blow-dry opposite the cowlick direction first, then keep the hair under tension until fully dry (a few minutes of focused drying). If you wait until the hair is dry, you will usually need more product and you still may get inconsistent settling.
How many blending trims should I expect to need, and when should I do the first one?
A single blending trim can be enough, but only once the nape has enough length to feather rather than just re-cut. Plan the first taper visit around the 8 to 10 week mark, then reassess after that. If your undercut was extremely short (number 1 or 2), you may need one additional touch-up later, but repeated trims too early can keep the short section visible longer.
My back looks worse than yesterday, what should I do right away without cutting?
Quick fix: switch to low coverage that drapes over the nape, then reset your styling routine. In practice, use a low ponytail or a single low braid for a few days, and blow-dry the longer section downward with a brush so it settles over the shorter hairs. Avoid high buns and high ponytails during the period when the nape hair cannot tuck on its own.
Is it safe to use a straightener or high heat to force the nape to lie flat?
Heat is fine, but the goal is controlled direction, not maximum temperature. Keep heat at or below the levels you typically use for your hair type (lower for finer hair), always apply heat protectant, and use a smoothing serum very lightly on the nape and just above it to reduce flyaways that can expose the line.
If my nape was bleached or dyed, how do I blend the color as it grows out, not just the length?
Color complicates the transition, but you can manage it without fully re-dyeing. Ask for a demi-permanent gloss or root smudge specifically at the nape transition so the tone blends 2 to 3 cm into the colored area. For vivid fashion colors, expect faster fading and consider clarifying strategically, but keep the nape moisturized to reduce breakage during the process.
What should I do if one spot at the nape seems to grow out slower or looks chunkier?
If your undercut regrowth is uneven, the most common causes are hair density, friction patterns (sleeping side, collars, scarves), and cowlick behavior, not truly slower growth. Start by reducing friction (silk pillowcase), detangling carefully, and choosing a coverage style that sits the same way every day or two so styling does not fight the same way all the time.