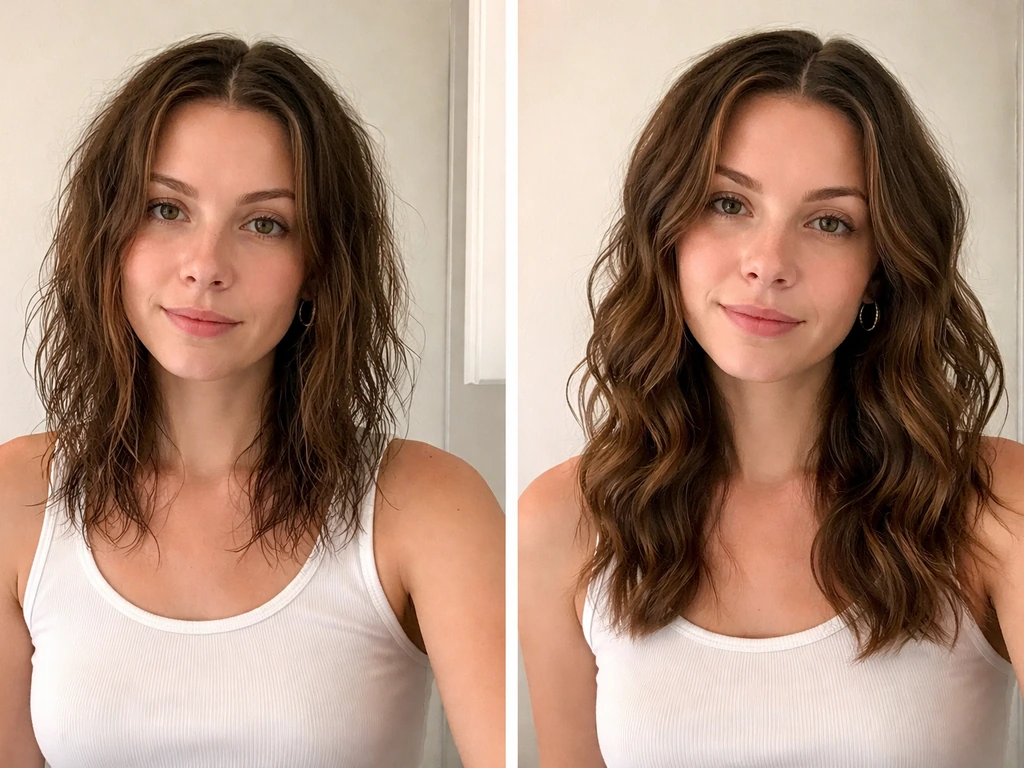
Wavy caps is that frustrating in-between phase where your hair has grown past a close cut but hasn't settled into a clear, intentional wave pattern yet. It sits on top of your head like a cap, looks neither short nor long, and the texture seems confused. The good news: waves are in there. They just need the right conditions to show up, and a consistent routine is almost always the thing that unlocks them.
How to Grow Wavy Caps: Routine for the Awkward Stage

Marcus Vickers
30 Apr 2026
What "wavy caps" actually means in your grow-out
The wavy caps phase is what happens when hair that was cut short, buzz cut, pixie, close-cropped fade, grows out to roughly one to four inches and starts to sit like a rounded cap across the top of your head. At this length, hair is too short to hang with gravity pulling it down, so it forms a dome or cap shape. If you have naturally wavy texture, this is also when your wave pattern starts trying to emerge but produces weird, inconsistent results: one section forms a clear wave, another section goes straight, another goes full frizz.
This is completely normal. The wavy hair transition period, whether you're coming from a buzz, growing out a bob, or just starting to embrace your natural texture, is genuinely a phase where waves look inconsistent and imperfect before they settle. Expecting polished results at this stage will only frustrate you. What you can do is set up conditions that speed things along and make the waves you do have look intentional, not accidental.
If you're also working through growing out wavy hair long, managing 360 waves, or transitioning from waves back to longer lengths, the routine principles in this guide overlap in useful ways, but the wavy caps phase has its own specific challenges around length and root flatness that deserve their own attention. If you want the best results during the grow-out, follow the steps for managing 360 waves closely and keep your routine consistent.
Prep your hair and scalp before anything else
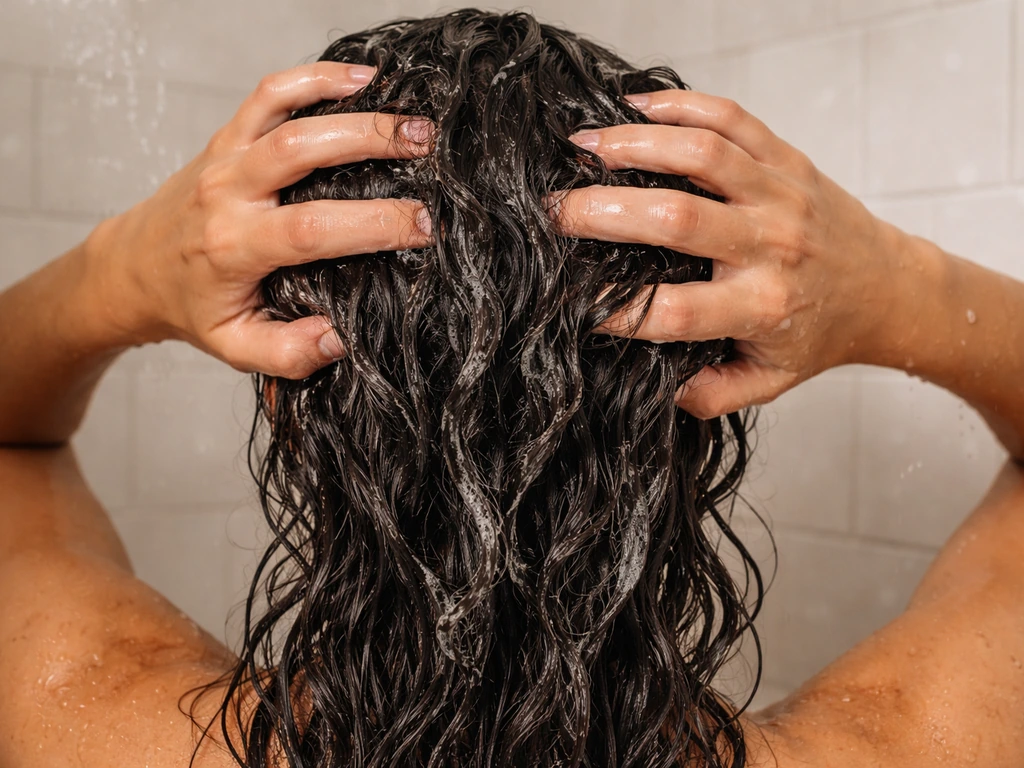
Healthy waves start at the scalp, not the ends. If your scalp has buildup from old products, sebum, or residue from styling aids you used when your hair was shorter, your follicles are partially blocked. That means new growth comes in weaker, drier, and less able to hold a wave pattern. Before you invest in a new wave routine, do a clarifying wash first.
Use a sulfate-free clarifying shampoo and focus your attention across the entire scalp, including the hairline, nape, and temples, not just the crown. Massage with your fingertips, not your nails, and don't bunch or scrub sections of hair together. Roughing up the cuticle that way creates frizz that will work against your wave formation before you've even started styling.
After that initial clarifying wash, the goal is a clean but not stripped scalp. Going forward, clarify every four to five washes if you're co-washing regularly, or every two to three weeks if you're using a gentle shampoo each wash day. Buildup left on the scalp can cause irritation, and irritation disrupts consistent wave formation over time.
On the cut side: if your layers, undercut, or shape are fighting your wave pattern, a trim is not the enemy. A wave-friendly cut at this stage isn't about taking length off, it's about removing split ends that cause frizz and asking your stylist to work with your texture rather than against it. Curls and waves cut damp respond much better to shaping than cuts done on dry, blown-out hair, so if you're seeing a new stylist, mention that upfront.
Choosing products that actually work for wave formation
At the wavy caps length, your product choices matter more than at longer lengths because there's less hair to distribute product through, and less weight to pull waves down into shape. That means product amount and formulation both need to be calibrated carefully.
The core products you need are simple: a gentle or sulfate-free shampoo (or a co-wash for alternating use), a rinse-out conditioner, a leave-in conditioner, and a light wave-enhancing gel or cream. That's it. You don't need a ten-step routine, cleanse, condition, leave-in is a solid foundation.
For the leave-in, match it to your hair's current need. If your hair feels weak, breaks easily, or has been through chemical processing or heat damage, reach for a protein-rich leave-in to rebuild elasticity. If your hair feels dry and rough but not particularly damaged, a moisture-focused leave-in will serve you better. Don't mix both at once until you know how your hair responds.
The most common mistake at this phase is using too much product. At one to three inches, a small amount of gel goes a long way. If your waves look greasy, flat, or limp after styling, too much product is usually the culprit before anything else. Start with less than you think you need and add from there.
| Product Type | Best For | Wavy Caps Tip |
|---|---|---|
| Sulfate-free shampoo | Regular cleansing without stripping | Use every wash day or alternate with co-wash |
| Co-wash | Moisture retention between shampoo days | Apply 3–8 pumps per section, distribute with wide-tooth comb |
| Rinse-out conditioner | Detangling and hydration | Focus on mid-lengths and ends, not scalp |
| Protein-rich leave-in | Weak, damaged, or fine hair needing structure | Small amount on damp hair before styling products |
| Moisture leave-in | Dry, coarse, or porous hair | Smooth through hair with praying hands technique |
| Light wave gel or cream | Defining and holding waves | Less is more — start with a dime-sized amount |
The wash-day routine that builds waves
The single biggest factor in whether your waves show up is what you do during and immediately after washing. Here's how to run a wash day that encourages wave formation instead of fighting it.
- Wet hair thoroughly, then apply shampoo or co-wash section by section. Massage the scalp with fingertips using gentle circular motions. Do not scrub sections of hair together — this roughens the cuticle and creates frizz.
- Rinse completely. Apply rinse-out conditioner from mid-lengths to ends. Use a wide-tooth comb to detangle while the conditioner is in. Work from the ends up toward the roots to avoid snapping hair.
- Rinse the conditioner out — fully. Product left in at this stage can interfere with your leave-in and styling products layering correctly.
- Do not towel-dry by rubbing. Instead, gently squeeze sections with a microfiber towel or an old cotton T-shirt to absorb excess water without disrupting the wave pattern starting to form.
- Apply your leave-in immediately, while hair is still soaking wet — not damp, not towel-dried to dry. Wet application is important because it helps products distribute evenly and lock moisture in while waves form.
- Apply your wave gel or cream using a combination of raking (to distribute evenly through each section), scrunching upward (to encourage wave shape), and smoothing with praying hands (to flatten the outer layer and reduce frizz).
- Dry without touching. This is where most people lose their waves — touching, adjusting, or fluffing hair while it's drying breaks the wave pattern before it sets.
For drying, you have two options: air dry or diffuse. Air drying takes longer but is lower risk at this length. If you diffuse, use low heat and low airflow, don't blast your roots on high. Keep the diffuser cupped around sections and move slowly around your head rather than dragging the diffuser through your hair. At the wavy caps length, a diffuser can actually be helpful because it encourages root volume that counteracts the flat-cap look.
If you're using a gel, wait until your hair is completely dry (100%, not mostly dry) before scrunching out the cast. Scrunching too early is one of the main reasons waves turn frizzy, the cuticle is still open and disrupting it at that stage locks in frizz instead of shine.
Surviving the awkward grow-out stages
The wavy caps phase doesn't last forever, but it does move through a few distinct uncomfortable stages. Knowing what to expect at each one makes it easier to stay the course instead of grabbing scissors.
The cap stage (roughly 1–2 inches)
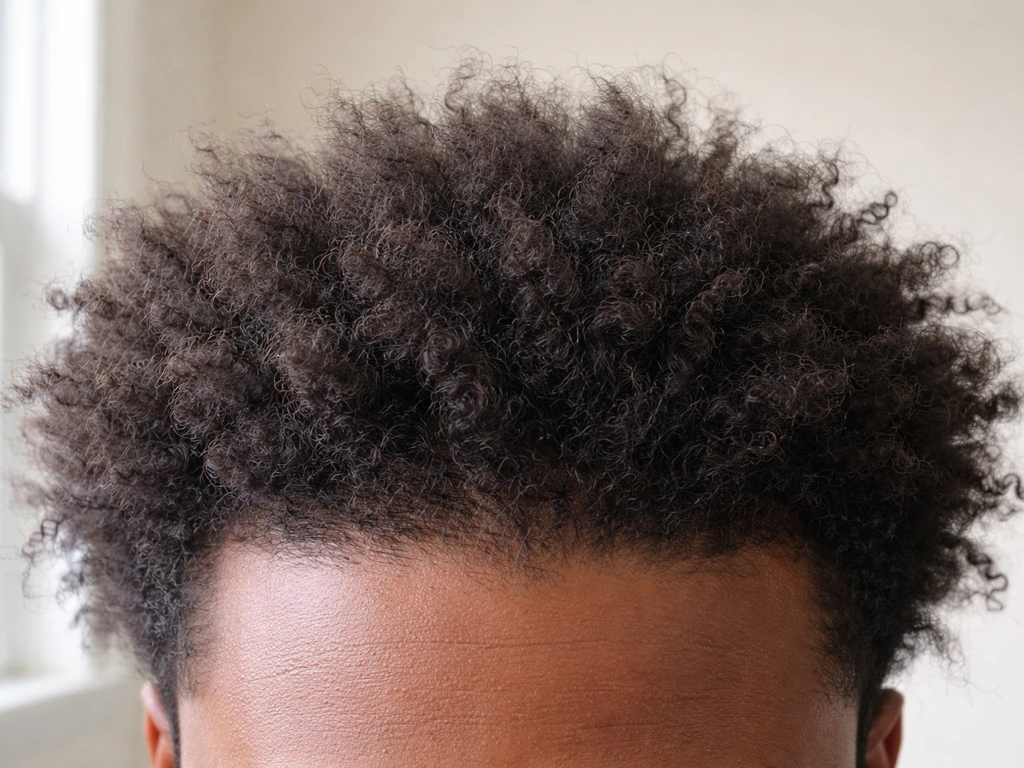
This is the dome phase. Hair sits on top of your head with minimal hang. Waves may show up only on the top or only at the nape, not uniformly. Your job here is not to force a style, it's to build the habit of your wave routine and keep your scalp and hair healthy. A light hold gel and diffusing at low heat to encourage root lift will help break up the cap shape visually.
The puff-out phase (roughly 2–4 inches)
This is where it often gets worse before it gets better. Hair is now long enough to puff outward but not long enough to hang down. Wave patterns get more inconsistent. If you have an undercut growing in, the shorter sides will lag behind the top, making the top look disproportionately full. If you have bangs growing out, they'll hit your forehead or eyes and do their own thing. This is the phase where most people give up, don't.
For undercuts: keep the sides and back trimmed cleanly so they don't look ragged while the top grows. You're not cutting length off the top, you're managing the outline. For bangs growing out: use a small amount of wave cream and either direct them to the side while wet or incorporate them into your overall wave pattern by scrunching them along with the rest of your hair.
For layers that are growing out unevenly: this is where a trim focused on shape (not length) earns its keep. Ask for a cut that removes bulk and blends the layers rather than one that shortens everything. A good textured-hair cut at this stage works with your wave pattern to blend awkward sections rather than flatten them.
The transition into longer waves (4+ inches)
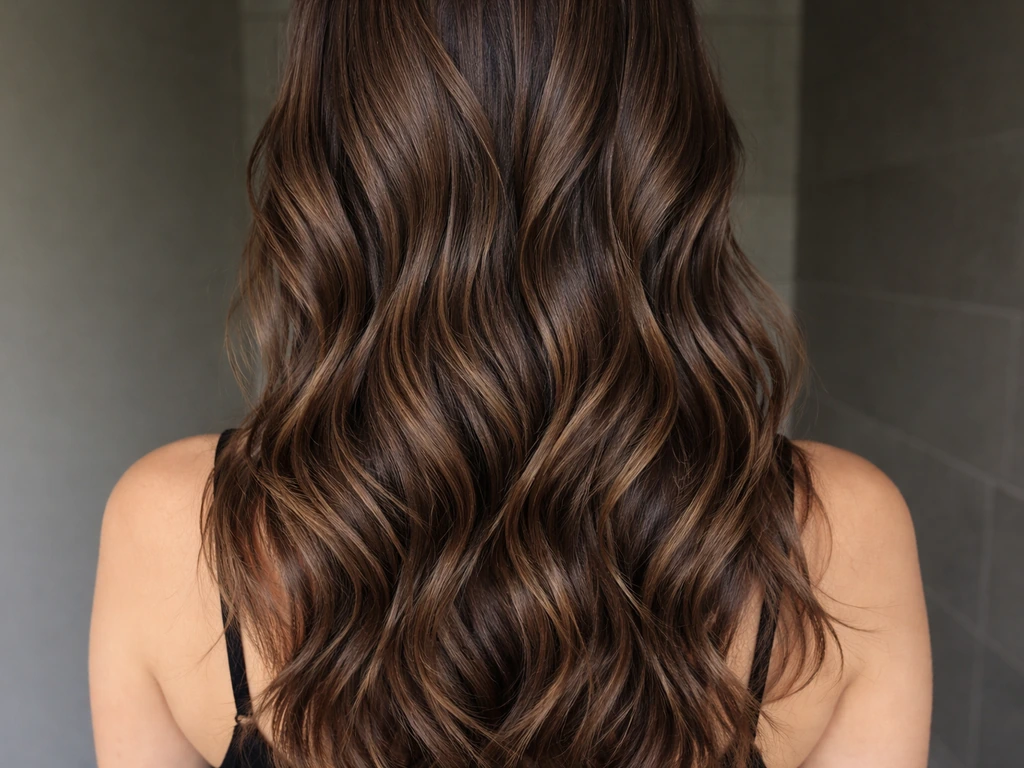
Once you have more than four inches, gravity starts doing some of the work. If you want to grow hair out from waves, stick to a gentle wash routine, use the right lightweight products, and adjust as your length increases. Waves begin to hang more consistently, the cap shape softens, and your wave pattern starts to look more intentional. Your routine can stay largely the same, the main adjustment is that you may need slightly more product at this length, and your drying time increases. This is also when growing out wavy hair long becomes the dominant goal rather than just managing the cap phase. If you want the next step, check the guide on how to grow out wavy hair long-term so you can carry this routine into longer lengths. If you’re specifically aiming for how to grow messy long hair, keep the same wash and product fundamentals, then shift toward lighter hold and a more intentionally undone finish. If your goal is specifically how to grow wavy hair long, keep tweaking product amount and drying time as your length increases.
When waves won't show: troubleshooting flat, frizzy, and uneven texture
Flat waves, frizzy waves, and waves that only appear in one area are all common during this phase. Most problems trace back to one of a few causes.
Flat roots or no wave at the crown
The most likely cause is product weighing the roots down. Try using less gel or cream at the root area specifically, and diffuse roots on low heat first before working down the lengths. Flipping your head upside down while diffusing can also help roots lift off the scalp and form a wave rather than lying flat.
Frizz instead of definition
Frizz almost always means one of three things: you touched your hair while it was drying, you scrunched out a gel cast before it was fully dry, or your hair doesn't have enough moisture. Check your detangling step, if you're detangling dry or with too little conditioner, you're lifting the cuticle before you even start styling. Add more conditioner on wash day, apply your leave-in to wetter hair, and commit to not touching your hair until it's completely dry.
Uneven wave patterns (one side waves, the other doesn't)
Uneven waves are extremely common during transitions and don't mean your hair is broken. The side you sleep on is often the flatter or frizzier side due to friction. Try a satin or silk pillowcase to reduce overnight disruption. You can also apply a small amount of wave cream to the weaker side on non-wash days to encourage it to pattern more consistently.
Texture changes as hair grows
It's common for hair to feel or look different at different lengths. Hair that was slightly wavy at two inches may become more defined at four inches as weight and gravity start influencing the pattern, or it may go more frizzy as the ends accumulate damage. If your texture shifts dramatically, revisit your product formulation, you may need to move from a moisture-focused leave-in to a protein one, or vice versa. A simple test: if your hair feels mushy and stretches without snapping, it needs protein. If it snaps quickly and feels brittle, it needs moisture.
Waves that disappeared after switching products
If your waves showed up for a few weeks and then stopped, check whether you changed anything, new product, new cleanser, change in washing frequency. Product buildup is a quiet saboteur. If you've been co-washing for several weeks without a proper clarifying shampoo wash, do a clarifying wash and see if your waves come back. Healthline describes clarifying shampoo as a deep-clean option for heavy product buildup or very oily hair, and notes it is not necessarily meant for frequent everyday use proper clarifying shampoo wash. They usually do.
Maintenance between wash days

You don't need to re-wash your hair every day to maintain waves. In fact, over-washing at this phase strips the natural oils your scalp is producing, which are part of what helps waves hold their shape. On days between washes, refresh waves by lightly misting your hair with water (or a diluted water and leave-in mix), then scrunching gently upward. This re-activates the wave pattern without the full wash-day process.
At night, either loosely pineapple your hair (gather it at the top of your head in a loose, high ponytail) or use a satin pillowcase. At the wavy caps length, a full pineapple may not be practical depending on your hair's length, so the pillowcase is often the better option. Don't go to sleep with hair still damp, waves set while drying, and sleeping on wet hair just sets flat or frizzy shapes into your hair instead.
On trim timing: plan a shape-maintaining trim every eight to twelve weeks during this grow-out phase. Not to remove length, you're growing it out, but to remove split ends that cause frizz to travel up the hair shaft and to keep the overall shape from going full triangle or mushroom. A good textured-hair cut at these intervals will keep waves looking intentional at every stage of the grow-out, not just once you've reached your target length.
The wavy caps phase is one of the more testing parts of growing hair out, but it's also the phase where the right routine makes the most visible difference. Commit to consistent wash days, protect your hair while it dries, keep your scalp clean, and give the process a few weeks before judging results. If you are wondering how to grow waves beyond the awkward cap and puff-out stages, the same routine ideas can still carry you to longer, more consistent wave patterns. Waves take time to settle, and yours are coming.
FAQ
How do I know if I should start using protein or moisture in my leave-in during the wavy caps stage?
Use the snap test on freshly washed hair. If it stretches and feels mushy without a quick snap, switch to a protein-rich leave-in for a short period, then reassess. If it snaps quickly, feels brittle, or tangles feel rough, go back to a moisture-focused leave-in. Also, apply the leave-in to wetter hair so it distributes evenly when your hair is only a few inches long.
My roots look flat and my top looks different from the sides, what should I change first?
Start with root handling before changing products. Use less gel at the scalp, diffuse roots on low heat and low airflow first, then finish with your normal drying approach for the lengths. If one side is flatter, try diffusing with the weaker side facing up for an extra minute, and sleep on satin or silk to reduce overnight friction.
Can I use curl cream instead of gel at the wavy caps stage?
Yes, but you will often need more definition work than you would with gel. Curl cream alone can be too slippery for a durable wave cast, so waves may look softer but less consistent. If you switch to cream, use a smaller amount, apply to soaking-wet hair, scrunch, and make sure your hair dries fully before touching. If frizz increases, reintroduce a light gel on top of the cream.
How should I refresh waves on non-wash days without making buildup or greasiness?
Mist only as much as you need, focus on the areas that look dry or puffy, then scrunch upward. Avoid reapplying leave-in or extra gel every day, instead use a diluted water plus a tiny amount of leave-in if your hair gets crunchy. If your scalp starts to feel coated, return to your regular clarifying schedule rather than layering products.
What if my hair feels greasy or limp after styling, but I’m also getting frizz?
This usually means the product is too heavy, applied too much, or rinsed away unevenly. Use less gel or cream overall, and apply it on the first half of your hair soaking wet, then add only a fingertip amount to the longest sections if needed. If frizz is happening, do not scrunch out any cast until hair is fully dry, and ensure you are using enough rinse-out conditioner during the wash.
Should I detangle before or after I apply leave-in during the wavy caps stage?
Detangle in the shower with rinse-out conditioner, not after your leave-in is on. Detangling after product can tug and cause uneven wave formation, especially at 1 to 4 inches where hair can clump and break the pattern. Use your fingers or a wide-tooth comb gently, then rinse lightly, scrunch, and apply leave-in to wetter hair.
How do I prevent my bangs or front pieces from flipping straight during the awkward phase?
Apply a small amount of wave cream and direct the bangs to your preferred direction while wet. If they still won’t hold, incorporate them into the rest of the wave pattern by scrunching them along with your crown area rather than treating them separately. For ongoing control, consider a small shape trim for the fringe every 6 to 10 weeks while the rest of your hair grows out.
Is it normal that my waves change every time I wash, and what should I track to fix it?
Variation is common early on, but you can debug it by tracking three things each wash: product amount, drying method (air dry versus diffuse), and whether you touched the hair before it was fully dry. If changes are dramatic, check if you changed shampoo, washing frequency, or water quality, then return to a consistent product amount and drying sequence for at least two wash cycles.
How often should I get trims at this stage if I’m trying not to lose length?
Aim for shape-maintaining trims every 8 to 12 weeks, but keep it conservative. Ask for split-end removal and blending, not a reduction in overall length. If you are seeing triangle or mushroom volume, ask your stylist to focus on shape around the crown and sides so the wave pattern has fewer “bulk” zones to fight against.