Growing out a barbershop cut, the classic short sides, longer on top style, takes roughly 6 to 12 months to reach a fully transitioned, longer look, depending on where you're starting from. The sides are usually the hardest part: they go through a puffy, shapeless stage around weeks 4 to 8 that makes most people bail and get it all cut off again. You don't have to. With the right routine, a few strategic trims, and some honest expectations about what each month actually looks like, you can grow it out without losing your mind or your confidence.
How to Grow a Barbershop Hairstyle: Month by Month Plan

Marcus Vickers
6 May 2026
What kind of barbershop cut are you actually growing out?
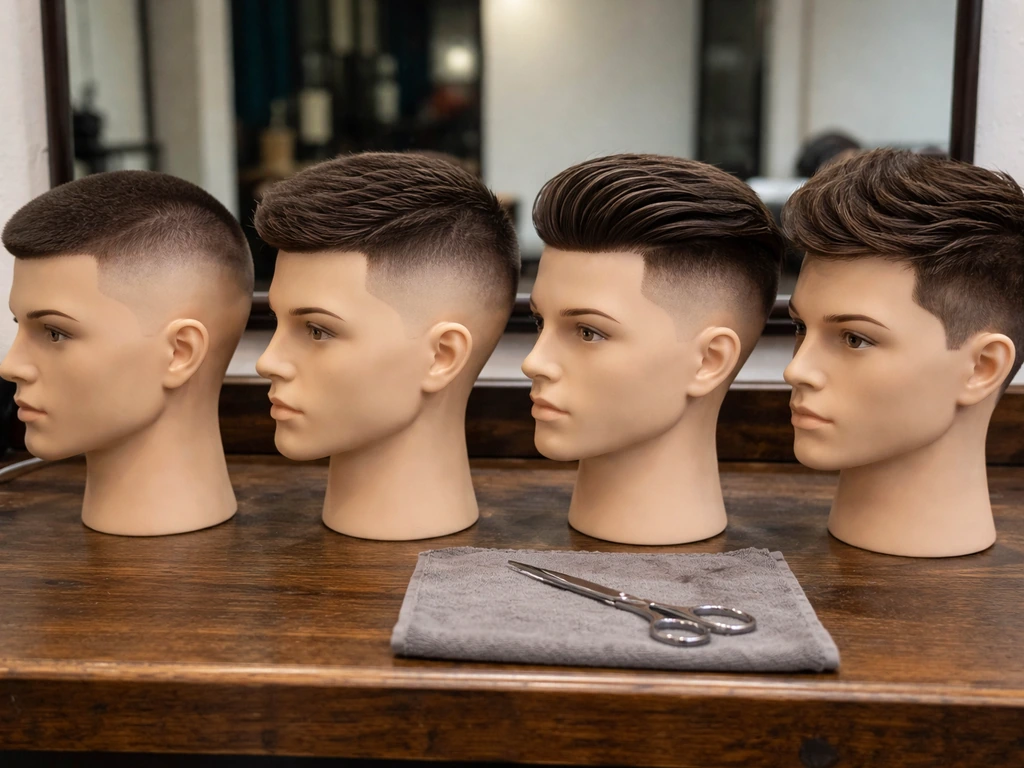
Before anything else, identify what you're working with, because "barbershop cut" covers a pretty wide range of starting points, and each one has different grow-out challenges. The most common is a taper or fade on the sides with anywhere from 2 to 4+ inches on top. But you might also be coming from a harder undercut (where the sides are cut much shorter than the top, sometimes with a sharp disconnection line), a textured crop, a side-parted classic cut, or even a buzz cut that a barber gave you on a short day. Each of those has a different timeline and problem zone.
Here's how to identify your starting point specifically. Look at the sides: is there a visible fade (gradual lightening to the skin) or a blunt cut line? A skin fade grows out with visible dark shadow and patchy density. A scissor-tapered side grows out more evenly but gets puffy fast. Then look at the top: is it layered, textured, or blunt-cut? And check whether you have a fringe or bangs cut in. All of these details affect the grow-out plan, so knowing them now saves frustration later.
One note on the anatomy here: most barbershop cuts define their shape by three key zones. The sides below the parietal ridge (the widest curved area of your head) are where fades and tapers live. The crown is where the top curves down toward the back. And the temple area just above and in front of each ear is where a lot of awkward regrowth first shows up. Keeping these zones in mind helps you understand why hair looks messy at certain stages, it's usually because the density is uneven between these areas, not because anything is wrong with your hair.
The first 2 to 4 weeks: stop the chaos and set a base routine
The first month is about making a decision and sticking to it. The biggest mistake people make is continuing to get their usual barbershop trim every 2 to 3 weeks out of habit. That resets everything. Make a mental commitment: you are not trimming the sides for at least 6 to 8 weeks minimum, and you're not touching the top length at all.
What you should do in this window is establish your washing and styling routine, because consistency here makes an enormous difference to how manageable the grow-out looks. Wash your hair every 2 to 3 days if possible, not daily, over-washing strips natural oils that help hair lie flat and behave. How often you should wash your hair depends on the person, because hair shedding or hair loss is not necessarily caused by shampooing frequency itself; scalp irritation, oil buildup, and other factors matter Wash your hair every 2 to 3 days if possible, not daily. After washing, apply a light product (more on which ones below) while hair is still damp and either let it air dry in the direction you want it to eventually grow, or use a medium-heat dryer with a round brush to train it. This early "direction training" is underrated and actually works over time.
Also: get your scalp health sorted now. Dry, flaky scalp becomes very visible as hair grows out and lies flatter against the head. Start using a scalp-focused shampoo or add a scalp serum if you don't already. The American Academy of Dermatology describes dandruff and seborrheic dermatitis shampoos as a treatment option for mild-to-moderate cases scalp-focused shampoo or add a scalp serum. Healthy, well-moisturized hair grows faster and looks better at every length, this is not optional if you want the grow-out to look intentional rather than neglected.
Month-by-month grow-out timeline: sides, top, and fringe
Hair grows about half an inch per month on average, so use this as your rough anchor. The actual experience varies by hair type, health, and starting length, but this breakdown gives you something real to work with.
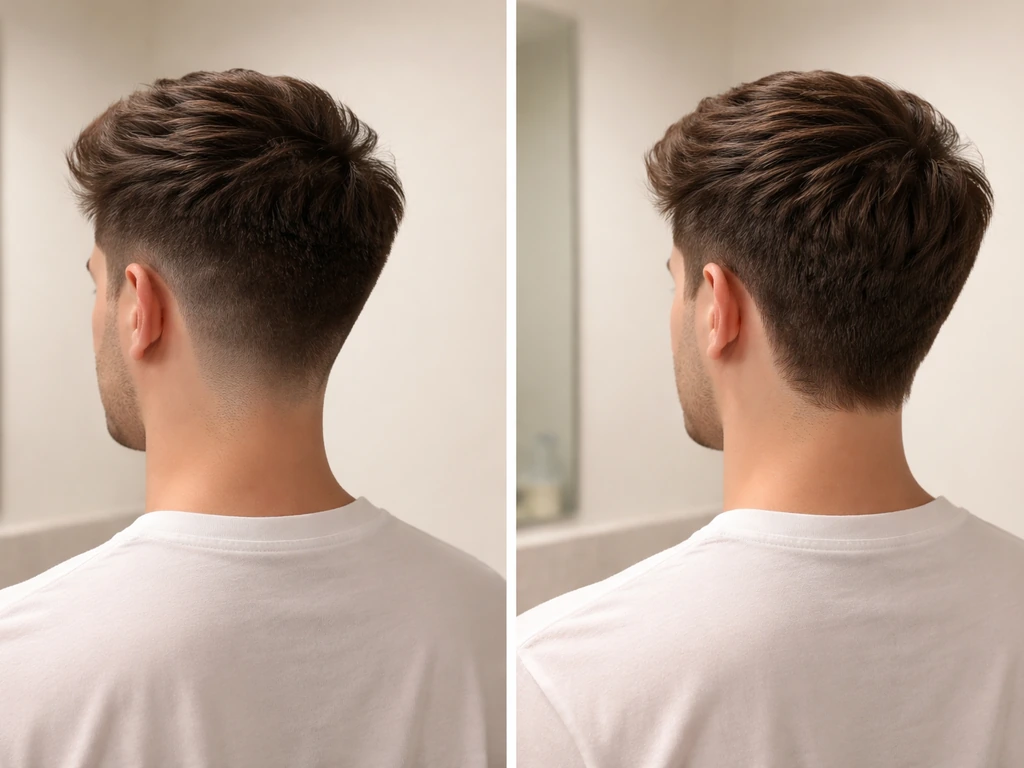
Months 1 and 2: the shadow and puff stage
If you had a skin fade, the sides develop a visible dark shadow within 1 to 2 weeks. By week 4, the fade line has softened and the sides look less sharp but more full. This is the stage most people hate, the sides look neither short nor long, and they start to puff outward, especially around the temple area and just below the parietal ridge. The top is probably fine at this point since it had more length to begin with, so there's often a strange imbalance where the top looks styled and the sides look like an afterthought.
What to do: keep styling the top the same way you always did. Use a matte paste or clay to push it to one side or add texture so it stays looking deliberate. For the sides, a tiny amount of product smoothed downward can flatten them and reduce the puff. The goal right now is just "managed," not "styled." That comes later.
Months 3 and 4: the hardest stage, everything is awkward
This is the stage where most people quit. The sides are now roughly 1 to 1.5 inches long, long enough to stick out but too short to tuck behind the ear or lie flat with just product. The top has grown enough to lose its original shape, and if you had layers or texture cut in, they're now growing out unevenly. Any fringe or bangs are probably flopping forward or hanging at an annoying in-between length.
This is also when the disconnect between an undercut's top and sides becomes very visible. If you had a hard undercut, there's a clear line of demarcation that can look like a shelf. Resist the urge to get it "cleaned up" into a new undercut, that just restarts the clock.
What to do: lean into a hat, a headband, or slicked-back styling if the top is long enough to push back. This is a genuinely hard phase, and the most useful thing is just to have a go-to "uniform" style that works for your life while you push through. Side-parting the top with a light pomade is often the most controlled option at this length. For bangs, pushing them slightly to one side with a small amount of gel can make them look like a choice rather than a mistake.
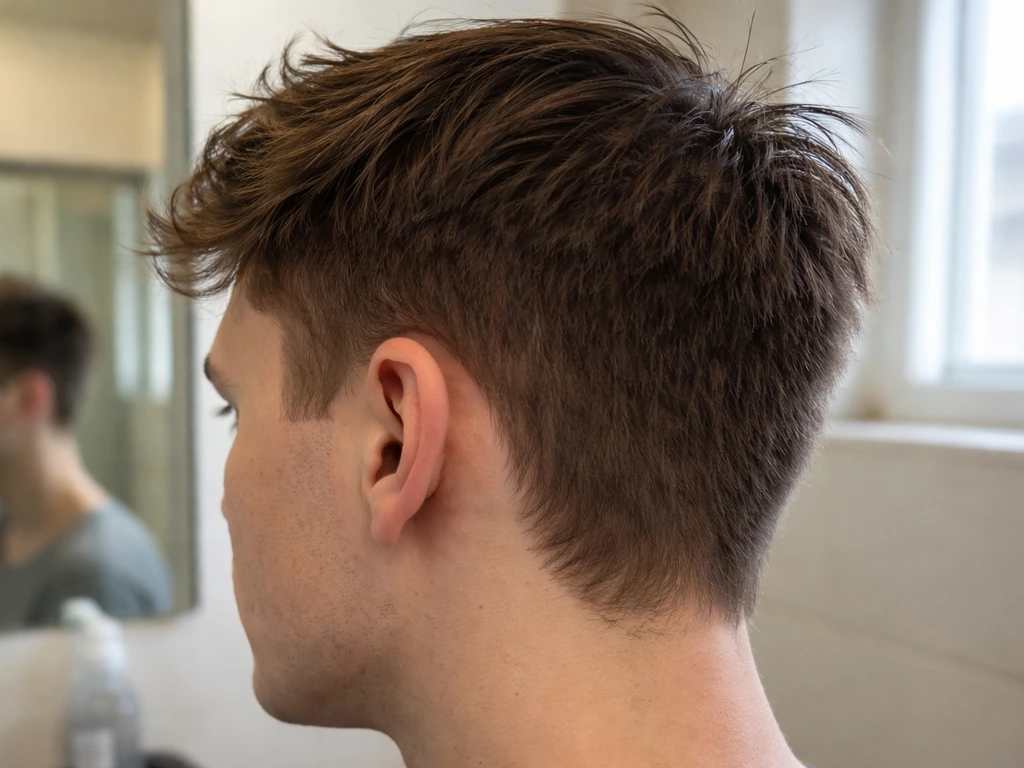
Months 5 and 6: the transition click
Around the 5 to 6 month mark, something shifts. The sides are now 2 to 2.5 inches and can actually be styled, they'll start to connect with the top in a way that looks like a coherent haircut rather than a grow-out. You can start to see the shape of longer styles taking form: a medium-length shag, a longer textured look, or a side-swept style. This is also when you'll have enough length to start using a round brush effectively on the sides and train them in a consistent direction.
Bangs and fringe at this stage are usually long enough to tuck, clip, or style back. If you've been pushing them consistently in one direction since the start, they may have settled into a natural sweep by now.
Months 7 to 12: forming a real style
From month 7 onward, you're in the clear in terms of the worst awkward phases. Now it's about shaping what you have into something intentional. Most people at this stage can reach a medium-length look, think shoulder-grazing if you started from a buzz, or collar-length if you had 2 to 3 inches on top at the start. This is when getting a shape-up trim (not a length trim) from a trusted stylist becomes genuinely useful.
Styling fixes for the most annoying awkward-phase problems
Cowlicks and flips at the crown
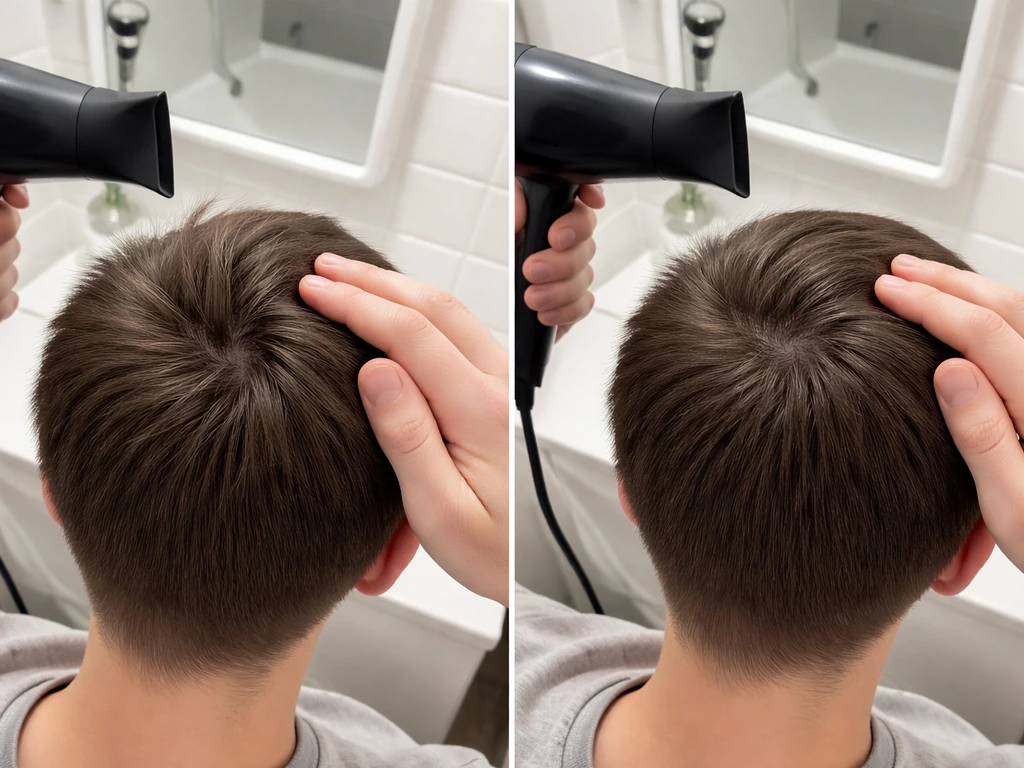
Cowlicks become a real problem as the crown area grows in, because the short hairs there want to stand up or swirl and there's not enough weight yet to pull them down. The fix: blast the crown with a medium-heat dryer immediately after washing, using your hand or a medium brush to hold the hair flat in the direction you want it to go for about 60 seconds. Do this consistently every wash day and the hair will gradually train itself. A small amount of a flexible hold gel applied to damp hair at the crown before drying also helps anchor it.
Sides flipping out or sticking forward
The most common complaint during months 3 and 4 is that the sides flip outward like wings, especially around the ear and temple. This is almost always a weight issue: the hair isn't heavy enough yet to fall straight. Using a medium-hold cream or paste smoothed downward along the sides after washing, then drying with a paddle brush pressing the hair toward the scalp, tames this significantly. For very thick or coarse hair, a light serum added before the cream adds slip and helps hair lie flatter.
Bulk and puffiness at the parietal ridge
As the sides grow out, hair tends to build up volume right around the parietal ridge, the widest point of the head. This makes the overall silhouette look round and wide. At a trim appointment, you can ask your barber or stylist to point-cut (not shorten) the bulk in this zone, which removes density without touching length. Between appointments, a shine-reducing matte product helps the area look less voluminous by reducing light reflection.
Shape loss on top
If your original cut had a lot of texture or disconnection on top, the growing layers will look increasingly shapeless. A light, feathery trim on the top (removing no more than a quarter inch) can restore some movement without sacrificing length. Ask specifically for "texture work only" and no length taken off the perimeter.
When to trim and when to step away from the scissors
This is where most grow-outs fail. People either avoid all trims and end up with a shapeless mop, or they get talked into a "little cleanup" that resets weeks of growth. Here's the rule of thumb: trim the shape, never the length. If you want a plan that fits your current cut and timeline, follow these steps for how to grow bar hair trim the shape, never the length..
What that means in practice: you can and should get the outline, your neck, ears, and sideburns, cleaned up every 4 to 6 weeks. This keeps you looking groomed without touching actual length. You should not get the sides or top shortened, even by a small amount, for the first 4 to 5 months of the grow-out. After month 5, selective texture trims on the top are fine and sometimes helpful. But stay firm: if your barber suggests "just taking a little off the sides," the answer is no.
| Phase | What to trim | What to avoid |
|---|---|---|
| Weeks 1–4 | Neck outline, sideburn edge only | Sides, top length, any fade refresh |
| Weeks 5–12 | Neck, ears, sideburns; occasional fringe tweak | Side length, shortening the top |
| Months 4–6 | Outline + point-cut bulk on sides if needed | Any scissor-over-comb on the sides |
| Months 7+ | Shape and texture on top, outline maintenance | Major length removal unless intentional restyle |
Products and tools, matched to your hair type
The right product makes the awkward phase dramatically more manageable. The wrong one, usually something too heavy or too stiff, makes it look worse. Here's how to choose based on what your hair actually does.
| Hair Type | Best product | Tool recommendation | What to avoid |
|---|---|---|---|
| Straight, fine | Light hold cream or texturizing spray | Round brush + low-heat dryer | Heavy wax or thick pomade — weighs hair flat |
| Straight, thick | Matte clay or medium-hold paste | Paddle brush + medium heat | Shine serums — adds unwanted volume illusion |
| Wavy | Curl-enhancing cream or light mousse | Diffuser attachment | Brushing dry — disrupts wave pattern and creates frizz |
| Curly | Leave-in conditioner + defining cream | Diffuser or air dry | Blow-drying without diffuser — causes shrinkage and frizz |
| Coarse/thick any texture | Smoothing serum + medium hold cream | Boar bristle brush + medium heat | Products with alcohol — dries out coarse strands fast |
In terms of tools, a quality hair dryer with a concentrator nozzle is genuinely worth it during the grow-out. It lets you direct heat precisely at the problem zones (crown cowlicks, side flips) rather than blasting everything at once. A round brush in a medium size handles both sides and top styling. If you have wavy or curly hair, a diffuser attachment is the single most useful thing you can add, it encourages your natural texture to form rather than fighting it, which actually looks more deliberate at every length stage.
Staying confident and making smart appointments
The psychological part of growing out hair is real and it's worth addressing directly. There will be 2 to 3 weeks during months 3 and 4 where you look in the mirror and think it was a mistake. If you want a deeper, repeatable plan for how to grow as a barber, focus on routines, client habits, and consistency over the long timeline. That's normal, almost every person growing out a barbershop cut hits this wall. The key is having a go-to style that works for your life right now, not a style you're hoping will work in 6 months. Find one look, even if it's just a slicked-back look with a medium hold cream, that you can reliably execute in under 3 minutes. That's your uniform during the hard phase.
On the appointment side: plan to see your barber or stylist every 6 weeks for outline maintenance only. Be explicit about your goal when you sit down, say "I'm growing this out, I just want the neck and ear outline cleaned up" so there's no miscommunication. If you trust a particular stylist, you might also look into how stylists approach growing out clients, since the skills involved overlap with how barbers think about building clientele around long-term grow-out plans. If you want to grow clientele as a hairstylist, showing clients a clear long-term grow-out plan can help build trust and repeat bookings. That same long-term mindset is also the foundation for how to grow your barber business, because retaining clients who commit to a full grow-out plan builds steady demand. Having a stylist who's genuinely invested in your grow-out goal makes a big difference.
Scalp health is also a confidence issue. Dry scalp, dandruff, or itchiness gets worse as hair gets longer and sits closer to the scalp, and it's very visible. Use a gentle, sulfate-free shampoo as your base, and add a weekly scalp treatment (oil massage or dedicated scalp serum) to keep things healthy. Hair that grows from a healthy scalp genuinely looks better and is easier to manage at every length.
Common mistakes and how to fix them
- Getting a full trim at weeks 4 to 6 because it looks messy — this resets 4 to 6 weeks of growth. Fix: schedule an outline-only appointment instead.
- Not styling at all during the awkward phase and just wearing a hat every day — the hair doesn't get trained and the grow-out is harder later. Fix: spend 3 minutes styling even when it doesn't look perfect.
- Using the same product you used on your short barbershop cut (usually a strong-hold wax or gel) on growing hair — it looks crunchy and emphasizes unevenness. Fix: switch to a lighter, more flexible product as length increases.
- Ignoring the neckline and ear outline — this is what separates a deliberate grow-out from looking like you just forgot to get a haircut. Fix: clean these up every 4 to 6 weeks.
- Washing hair every day — this strips oils and makes hair harder to control. Fix: move to every other day or every 2 days, using dry shampoo if needed in between.
- Not telling your barber your goal — they may trim more than intended. Fix: be direct at every appointment about the grow-out plan.
Your month-by-month action plan
- Month 1: Stop trimming length. Establish a wash routine (every 2 to 3 days). Start scalp care. Train hair direction while damp with a light cream.
- Month 2: Book an outline-only appointment. Switch to a lighter hold product. Accept the shadow and puff — it's temporary.
- Month 3: Find your go-to awkward-phase style (side part, pushed-back, or hat look). Use a dryer and brush daily to train cowlicks. Hold firm on no length trims.
- Month 4: Ask for point-cutting only on bulk areas if needed at your next appointment. Consider adding a weekly scalp treatment. Push through — this is peak awkward.
- Month 5: Evaluate texture on top and consider a shape-only trim. Start experimenting with new styles now that sides have more length to work with.
- Month 6+: Book a real styling consultation with your target look in mind. Adjust products to match your new length. Celebrate — the hardest part is done.
FAQ
Should I keep getting my usual barber trim during the grow-out?
If your sides are still at the “awkward short” stage (roughly months 2 to 4), avoid asking for a cleanup that shortens the perimeter. Instead, book for outline maintenance only (neck, ear, sideburn line). This keeps your grow-out timeline intact while removing the parts that make regrowth look messy.
How long will it take if my hair grows slower than average?
Plan for 6 to 12 months based on starting point, but use your own growth rate to adjust. If you are averaging much slower than about half an inch per month, expect the worst phase to stretch and delay your first “shape connects” milestone by a few weeks.
Can I speed up the process by shaving the sides or starting over?
Yes, if you do it strategically. During months 1 to 4, keep it to a uniform that manages shape (slick back, side part, or headband look) rather than cutting. If you absolutely must change length, do it only on the top after month 5 as texture work, not on the sides or perimeter.
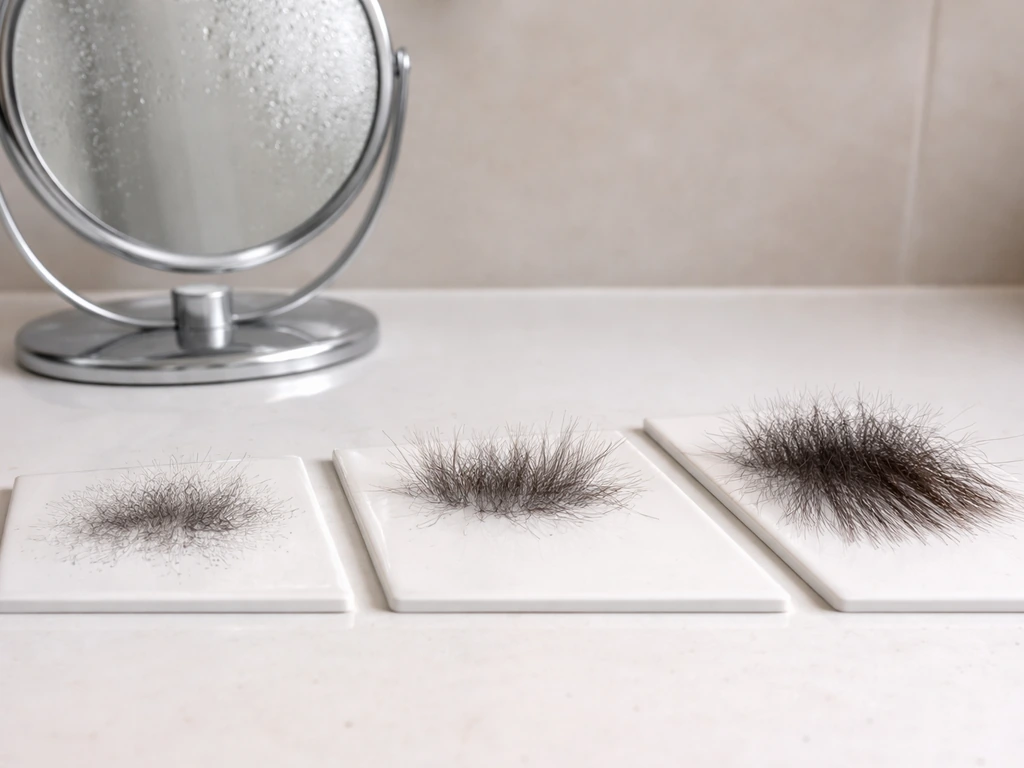
What if my hair looks like it’s thinning while I’m growing it out?
Hair shedding that happens during grow-out is usually normal, especially around wash days, but if you see sudden thinning, patchy bald spots, significant itch, or scalp pain, treat it as a scalp or hair health issue rather than a styling problem. In those cases, address scalp inflammation first and consider a dermatology consult.
My sides keep flipping outward, what’s the best fix if product isn’t working?
For flyaways, switch to a damp-then-dry routine with a lighter product. Use a small amount of medium-hold cream or paste on damp hair, then dry with a paddle brush pressing toward the scalp. Heavy waxes and stiff gels often make the sides “stand out” more.
How often should I wash during the grow-out if I get oily?
Wash frequency can be based on your hair type, not a strict rule. If your hair gets oily quickly, aim every day or every other day and focus on technique, rinse thoroughly, and avoid overloading product at the sides and crown. The goal is clean hair that lies flat, not stripped hair that puffs.
How do I avoid over-styling during the awkward months?
Use the “one-zone rule”: only manage the areas that are currently causing the problem. For example, during months 3 to 4, smooth the sides downward and train the crown immediately after washing, but do not add extra product to the top if it is already behaving.
Is it okay to ask for point-cut thinning on top, and what should I tell the barber?
Ask for a “point-cut” or “density reduction” in the widest area, usually around the parietal ridge, but confirm they should remove volume without shortening the perimeter. If your barber can’t promise that, skip it and choose your uniform style until you are at the month 5 plus shaping stage.
My fringe is too short to tuck, what should I do instead of cutting again?
If your bangs are too short to tuck, style them as a choice by pushing slightly to one side with a light gel or using clips. Do not cut them again until they reach a controllable length. Frequent micro-trims keep restarting the in-between phase.
What exactly should I say to my barber to avoid resetting my timeline?
Bring a simple photo reference that matches your target direction (not the full final length), and say your boundaries clearly: “No length taken from the sides or top during the first 4 to 5 months. Keep the outline clean only.” Miscommunication is the most common reason timelines get reset.
How can I make side training and round-brush styling last longer?
If you want a round-brush look but it never holds, you may need more heat or a slightly different product category. Try medium-heat drying with a concentrator nozzle and finish with a flexible hold product rather than a hard styling wax, then avoid touching it for the first few minutes after drying.
What should my go-to grow-out hairstyle be during months 3 and 4?
Use a “uniform” you can do consistently, and plan it around your schedule. Choose one quick method (side part with matte clay, or slicked-back with medium-hold cream) that you can repeat in under 3 minutes, then reserve experiments for days when you have extra time.
Does hair dye or hard water affect how the grow-out looks?
Color, hard water, and dryness can make regrowth look harsher. If you notice buildup or dullness, clarify occasionally (not during every wash), and use a gentle conditioner on lengths. If you dye your hair, grow-out can show different tones, so ask for a color-matched plan with minimal contrast.