The best styles to grow out short hair are the ones that make your in-between length look deliberate rather than forgotten. That means a side part and some mousse at the pixie stage, a claw-clip updo or swoopy ends at the grown-out bob stage, pinned-back fringe at the bangs stage, and a tapered blend from your barber during buzz or undercut regrowth. Hair grows roughly half an inch per month, so a pixie-to-shoulder journey takes about two years, but with the right approach at each stage, none of those months have to feel embarrassing.
Best Styles to Grow Out Short Hair: Stage by Stage Guide

Marcus Vickers
15 May 2026
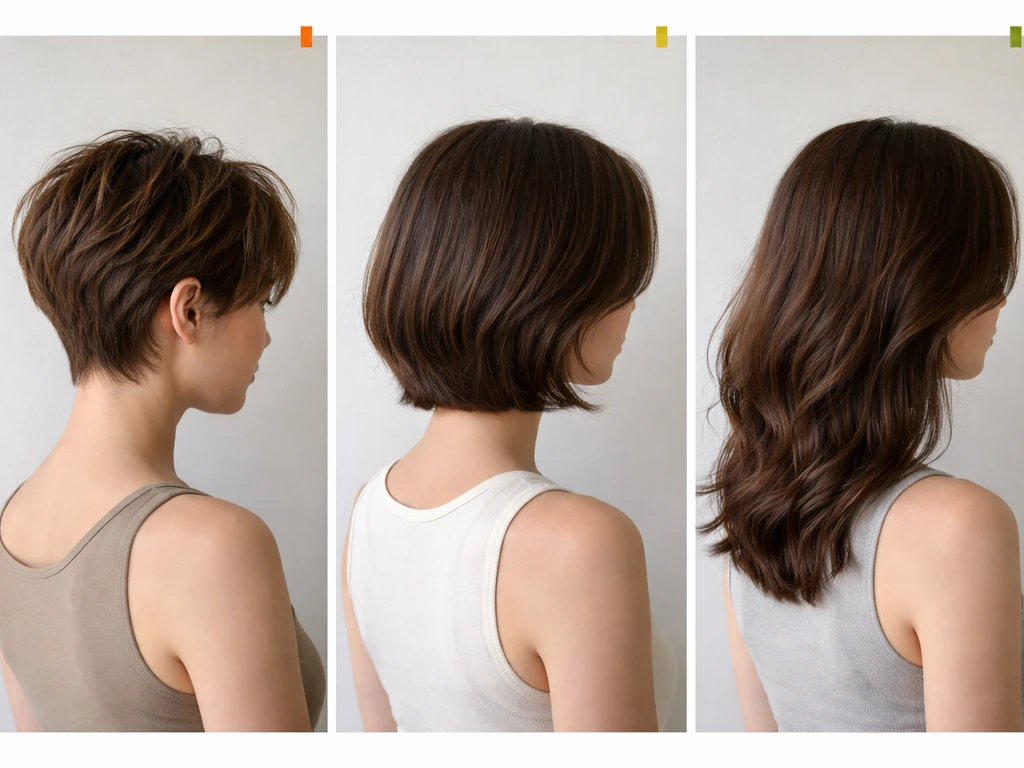
Figure out your starting cut and your growth goal
Before you pick a style, be honest about where you're starting from and where you want to end up. Those two data points determine everything: how long the awkward phases will last, how often you need a trim, and which styles are even available to you right now.
If you're starting from a pixie (roughly 1–3 inches on top), you're looking at 12–18 months to reach a collarbone length. Starting from a short bob (jaw-length, about 4–6 inches), you can hit shoulder length in around 6–9 months. Growing out a full blunt fringe takes 6–12 months; side or curtain bangs usually blend out in 4–6 months. Buzz cut or fade starting points add extra complexity because the sides and back need to catch up to the top while staying shaped.
Your goal length matters too. If you want a lob (long bob, sitting just above the shoulders), your timeline is shorter and your style options arrive sooner. If you're headed for mid-back length, you're committing to a longer process and need a plan for the full medium-hair middle section, not just the early awkward weeks. Write down both your start and goal, it makes every decision after this easier.
What growth stages actually feel like (and when they're hardest)
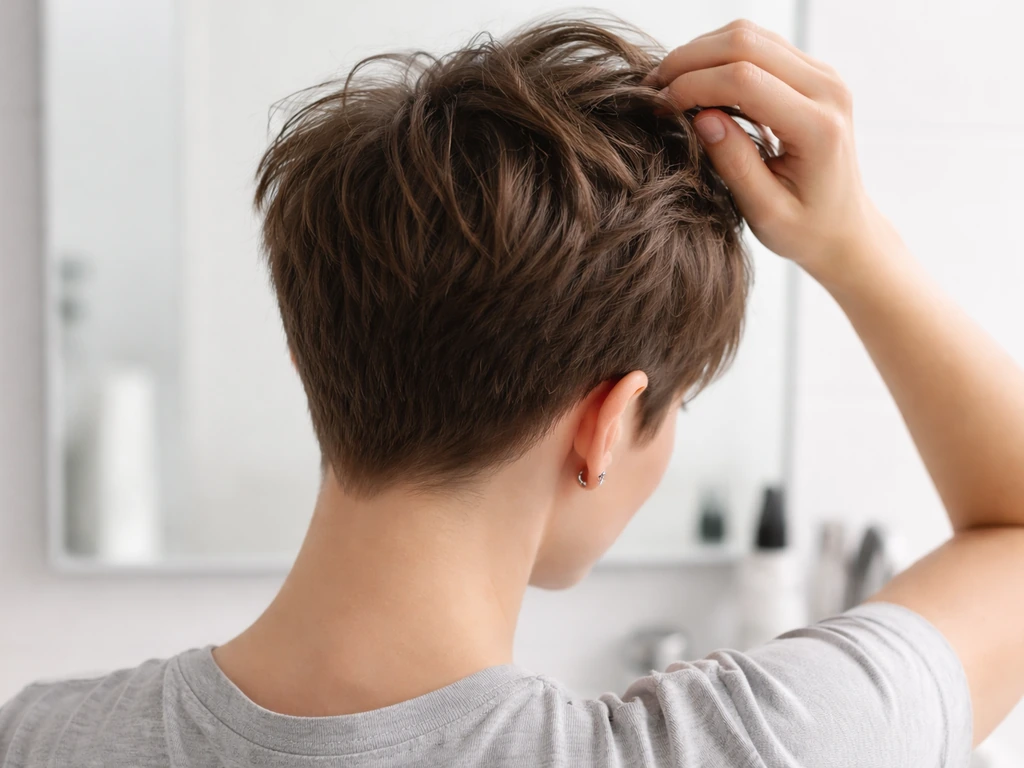
The hardest months aren't always the first ones. Most people hit a wall around months 3–5 of a pixie grow-out, when the top is long enough to flop but too short to tuck behind the ear or pull back. Sides go poufy. The nape gets shaggy. It stops looking like a pixie and doesn't yet look like anything else. That's the phase most people bail on, and the phase where the right styling approach makes the biggest difference.
For bangs specifically, the awkward phase typically kicks in around 4–6 weeks after the last cut, when the fringe stops lying flat and starts poking in directions you didn't ask for. For a blunt fringe, that struggle continues until the hair is long enough to pin to the side or sweep into a part, which can take several more months. Side bangs hit their awkward peak around months 2–3, then usually blend into face-framing layers by month 4–6.
Buzz cut and undercut regrowth has its own timeline. You'll see about one inch of new growth every eight weeks. The sides tend to puff outward before the top reaches its target length, which is the most common complaint at this stage. Understanding that this is predictable, not a sign you're doing something wrong, helps you plan around it instead of panicking.
| Starting Cut | First Awkward Phase | Hardest Stage | Approximate Time to Shoulder Length |
|---|---|---|---|
| Pixie (1–3 in) | Weeks 4–8 | Months 3–5 | 12–18 months |
| Short bob (4–6 in) | Months 1–2 | Months 3–4 (chin-to-jaw gap) | 6–9 months |
| Full blunt fringe | Weeks 4–6 | Months 2–5 | 6–12 months to fully blend |
| Side/curtain bangs | Weeks 4–6 | Months 2–3 | 4–6 months to blend |
| Buzz/fade | Weeks 6–8 | Months 2–4 (sides puffing) | 18–24+ months |
Best grow-out hairstyles by length and starting cut
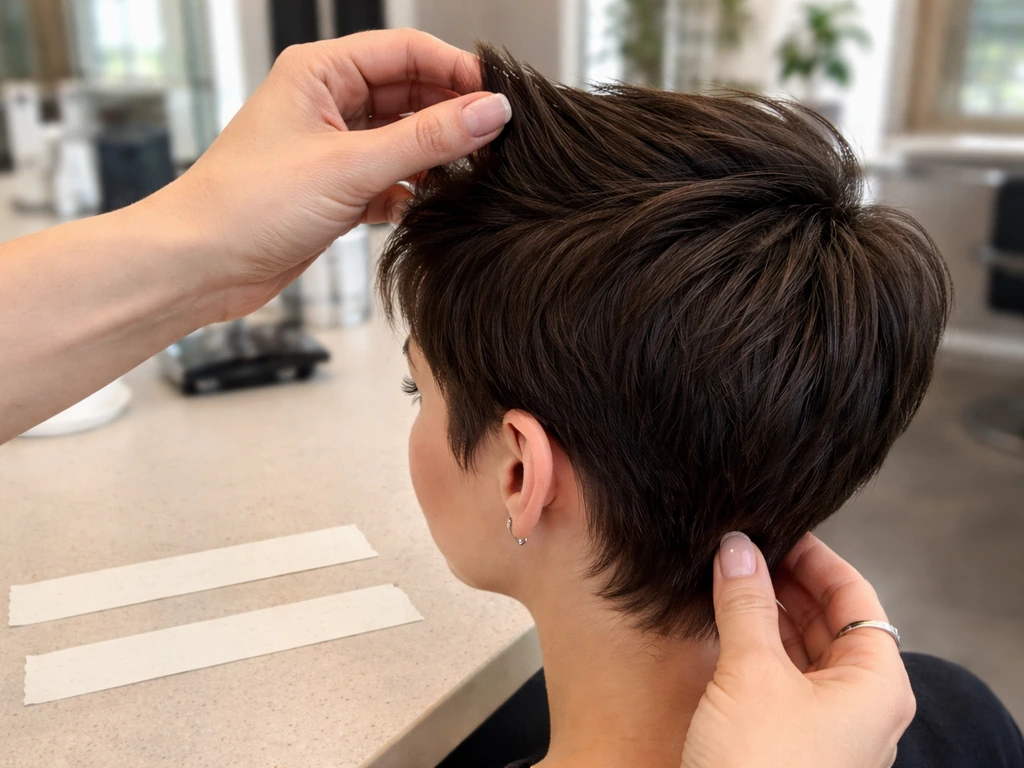
Growing out a pixie
In the first 1–2 months, keep the cut shaped at the sides and back every 4–6 weeks, this is not the time to skip the salon. Ask your stylist to trim the perimeter but leave the top alone. Style with a side part and a light mousse or cream to push the top to one side; this creates the illusion of intentional length before you have it. A deep side part is genuinely the most useful pixie grow-out hack and it costs nothing.
By months 3–5, you're in the true awkward zone. The top will be 2–3 inches long and won't cooperate. Try a textured, piece-y look using a small amount of paste or pomade worked through dry hair. At this stage, a simple headband pushed back from the hairline creates a retro look that reads as styled rather than overgrown. Bobby pins and mini clips at the temples are also genuinely useful here, not just a trend.
Months 6–9 bring you into a short shag or textured lob territory, which is one of the easiest stages to work with. A loose middle part with some wave or curl (even from a small-barrel iron) looks deliberately undone. A half-up style becomes possible for the first time, and it's worth using. Many people find this is actually their favorite stage because it has the most styling flexibility of any phase.
Growing out a bob
The bob grow-out hits its awkward peak when the ends reach just below the jaw. The hair isn't long enough to tuck easily and often flips out at the ends in an uncontrolled way. Rather than fighting those flicked-out ends, lean into them: ask your stylist for a light texturizing of the ends to make the flick look intentional, almost like a retro flip. A claw clip low at the nape is the easiest daily fix and it works across textures.
As the bob moves toward collarbone length (roughly months 4–6 from a short bob start), you enter the "clavicut" zone. This length, sitting right at or just above the collarbone, actually looks great when it's shaped. Ask for a refresh every 6–8 weeks to keep the line clean, and you'll spend several months looking like your length is a choice rather than a phase. Soft layers here also help the weight distribute better so it doesn't clump awkwardly.
Growing out bangs
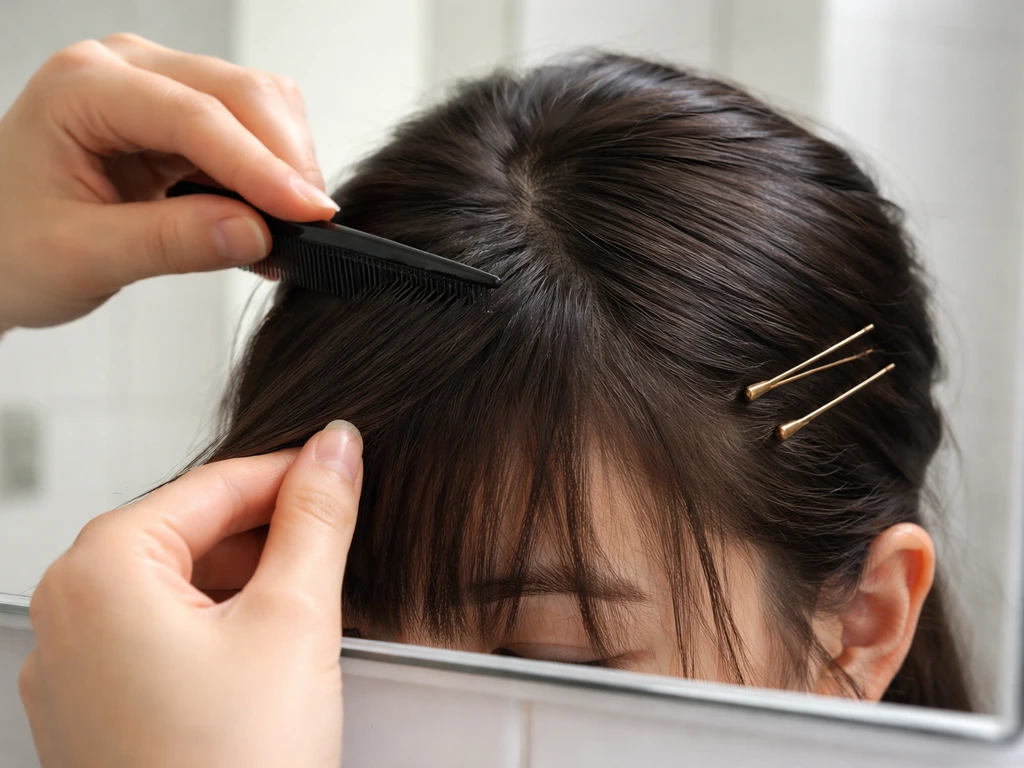
For a full blunt fringe, your main tools for months 1–4 are a fine-tooth comb, bobby pins, and patience. Part the fringe to one side and secure it with a flat pin tucked under a section of hair so the pin disappears. A headband that sits slightly further back on the head can also keep the fringe controlled while looking intentional. Ask your stylist to soften and texturize blunt bangs at your next visit so they don't look like a hard line growing out.
Face-framing or curtain bangs are a much faster transition. They can often be blended into the rest of the haircut in as little as 8–10 weeks with the right layering. If you're still in the early months of a blunt-bang grow-out and dreading the next 6–12 months, ask your stylist about reshaping the fringe into a softer, side-swept version as an intermediate step, it shortens the awkward phase significantly.
Growing out a buzz cut or undercut
The key with a buzz or fade grow-out is to keep the sides and back shaped, even while you're trying to get length. It feels counterintuitive, but asking your barber for a taper and blend every 4–6 weeks prevents the sides from puffing out and disconnecting visibly from the top. A hard line between a grown-out top and unmanaged sides looks more unintentional than any in-between length does. Blending the disconnect is the move.
For undercuts specifically, the under-layer grows at the same rate as the top, but because it starts shorter, the gap between the two sections becomes visible before it has a chance to blend in. A good barber can use a gradual taper to soften that gap over time. Styling products, a medium-hold clay or paste, can help keep the top lying flat and the disconnect less obvious on a day-to-day basis.
Styles for problem areas: layers, cowlicks, bulk, and uneven regrowth
Cowlicks can't be eliminated, they're a fixed growth pattern, not a styling failure. The most practical approach is to dampen the problem area, then use a blow dryer with a concentrator nozzle to direct the hair against its natural swirl while it dries. Finish with a small amount of oil-based pomade or wax to hold it flat without stiffening the rest of the hair. If you have a crown or nape cowlick that's particularly rebellious during grow-out, tell your stylist at every visit so they cut around it rather than against it.
Layers that were cut into short hair can create uneven bulk as the hair grows. The shorter layers create a ledge or ridge below the longer sections. The fix is usually a shape refresh from your stylist, who can blend the layers so they fall more evenly. In the meantime, using a round brush while blow-drying helps smooth the ledge and direct the layers in the same direction. Don't try to trim layers yourself, the grow-out math gets messier.
Uneven regrowth (one side growing faster, or a section that's noticeably shorter because of a previous asymmetrical cut) is frustrating but normal. Parting your hair to the side that has more length lets the longer section cover or frame the shorter one. If the difference is significant, a trim to even things out is worth the minor setback, growing in uneven sections usually means the shorter side is always catching up and never quite matching.
Bulk at the sides or back is especially common when growing out a short cut on thick hair. Ask your stylist for point cutting or thinning shears on the bulk areas, this removes weight without shortening the overall length, which is exactly what you need during grow-out. At home, a light smoothing serum applied to damp hair before diffusing or air-drying helps reduce puffiness without flattening desirable volume.
Styling methods that make it look intentional
A side part is the single most reliable tool in a short grow-out kit. If you want more ideas for how to style your in-between length at each stage, hairstyles when letting your hair grow out can give you a clear menu of options by length and starting cut. It instantly creates more visual length on the longer side of the face, and it gives hair direction, which matters a lot when lengths are between 2–4 inches and hair doesn't know what to do with itself. Switch from a center part to a deep side part and you'll notice the difference immediately.
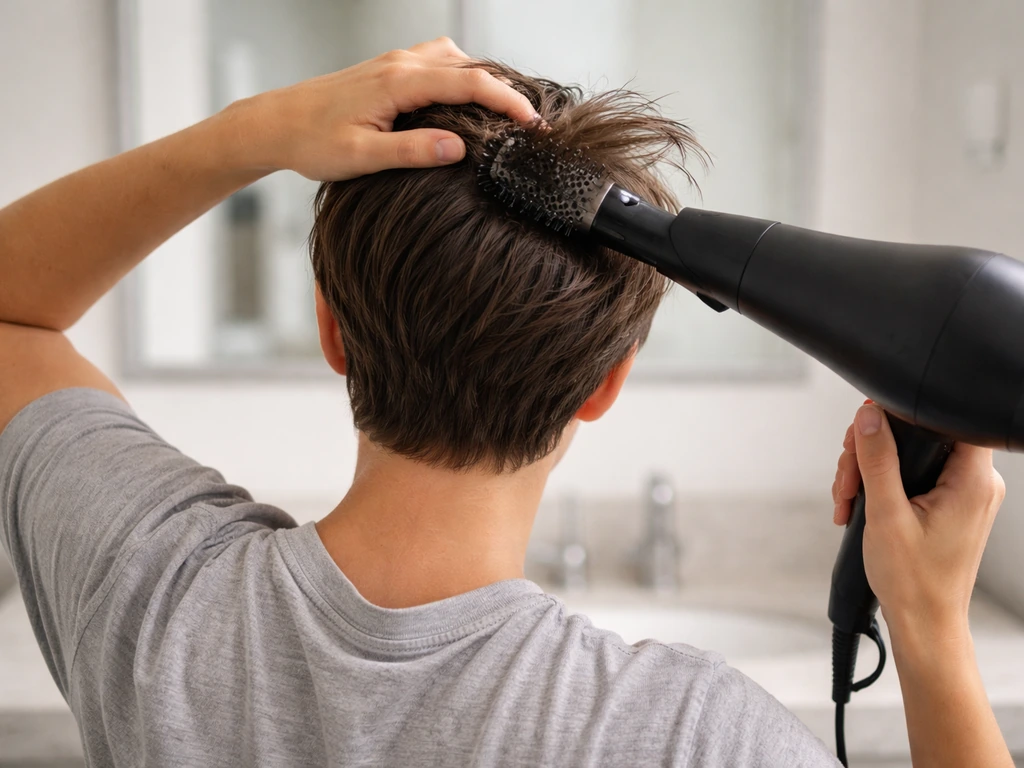
Volume at the roots helps shorter grow-out lengths look more intentional rather than flat and sad. Flip your head forward while rough-drying, then direct the roots up and back with a brush or your fingers. A volumizing mousse applied to damp roots before drying is the most consistent way to get this without product buildup. Once hair is long enough for a half-up style (usually 4+ inches on top), that pulls the top section back with some height and immediately elevates the look.
Clips, pins, and headbands are practical, not a backup plan. A barrette or small claw clip at the temple can turn an unruly side section into a deliberate accent. A thin elastic or scarf headband worn slightly back from the hairline is one of the most flattering options during every single grow-out stage, it works on pixies, short bobs, and everything in between. Mini claw clips used to pin back the front sections while the back grows are also genuinely useful, especially for short bangs.
Smoothing flyaways and frizz is mostly about timing. Apply a very small amount of serum or finishing cream to the top layer of dry hair after styling, not before, and not in large amounts. Running a small amount of serum over a soft boar-bristle brush and then lightly passing it over the surface works well for smoothing without greasing. For wavy or curly textures, scrunch a little extra gel into the ends once hair is 80% dry and let it finish air-drying or diffuse on low. For more hairstyle ideas that work specifically during short-hair grow-out, see hairstyles when trying to grow out short hair.
Maintenance during grow-out: trims, timelines, product basics, and care
The most common mistake in a grow-out is skipping all trims to protect length. The smarter approach is strategic trimming: keep the shape clean at the perimeter (sides, nape, around the ears) every 4–6 weeks, but ask your stylist to leave the top alone. This gives the cut shape and prevents the scraggly look that makes people want to start over. Dusting, removing just the very tips of the ends, every 3–4 months prevents breakage without meaningfully slowing growth.
Products to prioritize during grow-out are simpler than most people expect. A lightweight leave-in conditioner or detangling spray helps the hair stay manageable as it gains length and weight. A medium-hold styling product (cream, mousse, or light gel depending on your texture) keeps things looking intentional without stiffness. A heat protectant spray is non-negotiable if you're using any hot tools, it protects against breakage, which is the fastest way to lose length you've been patiently growing.
Wash frequency matters more during grow-out than people think. Washing daily can strip natural oils and make the scalp produce more oil to compensate, which makes fine to medium hair look flat and limp at the roots, already a problem at short lengths. Aim for 2–3 washes per week if your scalp allows it. Between washes, a dry shampoo at the roots refreshes the look without restyling from scratch.
Extra considerations: undercuts, natural texture regrowth, and colored hair
Undercuts and uneven sections
Undercut grow-out is its own category because the under-section and the top grow at the same rate but start from completely different lengths, sometimes a gap of 2–3 inches. This creates a visible disconnection that can look harsh before it has a chance to blend. The practical solution is to ask your barber for a gradual taper that gets less aggressive at each visit, letting the undercut blend in from the sides rather than waiting for an abrupt match. Plan for this process to take 6–12 months depending on how dramatic the original undercut was.
Natural texture regrowth (curls, coils, and waves)
If your hair has natural curl or wave that was relaxed, heat-trained, or simply cut so short that it didn't have a chance to form pattern, regrowth gets complicated fast. New growth comes in with your natural texture while the existing length may still reflect prior treatment or be too short to form coils yet. This creates a two-texture effect that can feel chaotic.
The most practical styling approach here is a wash-and-go with a defining gel, apply it in sections to damp hair, scrunch, then diffuse or air-dry completely before touching. For curly regrowth and styling, Curlsmith notes that you can scrunch out a gel cast once hair is completely dry to reduce frizz, and leaving the cast overnight can also help prevent frizz if you diffuse before bedtime.
Once fully dry, scrunch out the cast to get softer definition.
Shrinkage is a real factor for curly and coily textures: your hair may appear 1–2 inches shorter when dry than it measured when wet. Plan your growth timeline with this in mind, reaching shoulder length when stretched may still look like a short cut when worn in its natural state. Twist-outs, braid-outs, and finger coils are excellent protective options during this phase that also show off definition even at short lengths.
Colored hair and root management
Colored hair during grow-out has two main challenges: visible roots and increased fragility. On the root side, the color contrast between new growth and existing color is often most visible at the part and hairline. Switching to a deeper side part or alternating your part line daily can slow how quickly the contrast becomes obvious. A toning shampoo or gloss used every 2–3 washes can neutralize brassiness in the existing color so the contrast is less harsh, purple shampoo for blonde, blue for orange-toned brunettes.
Color-treated hair is more porous and more prone to breakage, which makes the grow-out period higher-stakes than for untreated hair. Use a sulfate-free shampoo, a moisturizing conditioner, a heat protectant before any hot tool (aim for one rated to at least 450°F), and a leave-in or serum to seal the cuticle. If you're getting highlights or color refreshes during the grow-out, ask your colorist to tone the ends to better match incoming root color, this creates a more gradual, blended transition that reads as balayage rather than neglected regrowth.
Your next 4–12 weeks: a simple plan
Here's how to think about the next three months in practical terms. In the next two weeks, settle on your starting style based on your current length and the guidance above. Book a shaping appointment if you haven't had one in the last 4–6 weeks. Pick one or two products to use consistently, a mousse or cream and a heat protectant is enough to start.
At the 4–6 week mark, reassess the shape and book a trim if the perimeter has gone shaggy. This is also the point where bangs typically enter their first awkward moment, so have your pins and part strategy ready. Try the side-part swap or a headband style if you haven't yet, this is the stage where small styling changes make the biggest visual impact.
By weeks 8–12, you should have about an inch of new length on top. This is when the grow-out starts to feel like real progress, and when you can start experimenting with half-up styles, soft waves, or the clavicut shape if your bob has grown enough. Check in with your stylist about whether any layers or bulk areas need blending, and adjust your wash frequency and product if your scalp or texture has changed. If you're managing color, this is usually the right window for a toning refresh. Stay consistent and resist the urge to cut it all off, this window, months 2–3, is when most people quit, and it's almost never worth it.
FAQ
What’s the best style choice when I’m stuck in the 2–4 inch “nothing fits” stage?
When your hair is around 2 to 4 inches on top, the “best” option is usually a direction-giving style, deep side part plus light mousse, or a clip at the temple to force the side sections to behave. If you feel like you have no control, prioritize controlling the sides and nape first (perimeter trims every 4 to 6 weeks), then add texture to keep the top from looking flat or patchy.
How do I keep my ends from looking shorter or worse even if I’m not cutting much?
If your hair is shortening at the ends from regular flicking, heat, or tangling, you can still grow, but you need to change how you handle it. Detangle gently with a wide-tooth comb on damp hair, use a lightweight leave-in, and use heat protectant if you blow-dry. Also ask your stylist for “dusting” only at the very tips (not a full re-cut) to keep length loss minimal.
How can I use parts to hide uneven regrowth between sides?
Deep side parts work well because they create a clear direction, and they also camouflage uneven growth by letting the longer side frame the shorter side. A practical check is to part where your brow naturally “pulls” the hair, then secure the temple area with a small pin for the first hour of wear, so the style sets before the hair flops back.
What should I do differently if my scalp gets oily fast during a grow-out?
Yes. If your hair is oily or fine, avoid loading heavy products on the roots during the early stages. Use mousse on damp roots, keep styling cream or paste mostly to the mid-lengths and ends, and consider washing every 2 to 3 days instead of daily. For between washes, dry shampoo at the roots can prevent the “flat and limp” look without restyling.
Which grow-out goal tends to be easiest to maintain between appointments?
If you want less maintenance, aim for a goal that matches your lifestyle. For low-effort days, a textured lob, loose middle part, and claw-clip friendly lengths are usually easiest, while blunt fringe and very short pixie stages require more daily pinning. If your schedule is tight, talk to your stylist about shaping that supports clip and part placement.
How do I deal with a cowlick that keeps ruining my side part?
Cowlick control is about timing and direction. Try styling when hair is slightly damp, dampen the cowlick area only, then blow-dry with a concentrator nozzle while pulling the hair against its swirl. Finish with a tiny amount of oil-based pomade or wax, just enough to prevent spring-back, then stop touching it so it sets.
I have thick hair, why does my grow-out look bulky and lumpy, and what’s the fix?
For thick hair, the biggest mistake is adding weight with heavy serums or skipping shape refreshes. Ask for point cutting or thinning only where bulk collects (often sides and back), and at home use a small amount of smoothing serum on damp hair before drying, not a full mask-like layer. This keeps volume but prevents the “pillow” effect.
My bangs keep sticking out, how long should I try pins and headbands before asking for a reshape?
If bangs keep poking in random directions, shorten the “reset time” by pinning and selecting a consistent direction. Part the fringe to one side and use a flat pin under a section so it disappears, or use a headband slightly back from the hairline to hold it while it dries. If it’s still impossible after you control it for a few weeks, ask for reshaping into face-framing layers instead of continuing to muscle through a blunt grow-out.
Can I use heat during a short hair grow-out without ruining progress?
If you use hot tools, protect the hair and keep styling gentle. Use a heat protectant every time you heat, keep the tool at a reasonable temperature for your hair type, and focus on defining the ends rather than repeatedly heating the roots. Overheating and over-manipulating at 2 to 3 inches can create breakage that makes the grow-out feel slower.
When does my hair start looking naturally styled instead of just “being grown out”?
In the 6 to 9 month window, if you’re approaching a shag or textured lob, you can often shift from “covering the awkward” to “making it look styled.” Looser middle parts, half-up styles, and soft wave or curl are the sweet spot because the hair has enough length to hold shape, yet not so much that it falls flat immediately.
What’s the best way to keep colored short hair from looking patchy during grow-out?
If you’ve colored your hair, schedule care around fragility. Use sulfate-free shampoo, keep conditioning consistent, and consider toning at a predictable interval like every 2 to 3 washes if your color starts to drift. Also ask your stylist to tone the ends to better match incoming root color, so the grow-out transition reads blended rather than two different shades.
Should I keep my part in one place longer after coloring to reduce visible root contrast?
If you get highlights or frequent gloss refreshes, tell your stylist you are growing out so they can plan placement to reduce harsh lines as regrowth appears. A practical approach is to request an end tone that matches the next root shade, then keep parting consistent for a few weeks to avoid drawing extra attention to the contrast at the hairline.